
Granting specific permissions to users based on their role for accessing a same system is a crucial as it allows you to manage multiple users effectively and also makes your system secure. This practice is normally seen in Linux operating systems like Ubuntu, as they hold significant importance when it comes to server management and app or web development.
The user which has permission to perform any task in Ubuntu and other Linux systems is a sudo group member. To add a sudo user in Ubuntu there are several ways like using usermod command or manually editing the sudoers file.
5 Ways To Add Sudo User in Ubuntu
The sudo user can perform system-level tasks like installing packages, configuring services, or managing users which a non sudo user cannot do. Further, if you want to run automated tasks which require sudo privileges you can simply add that user in sudo group. There are five ways to add sudo user in Ubuntu and this guide will explain them in detail:
1: Manually Assigning Permissions
The first method for adding a sudo user on Ubuntu is by manually assigning the permissions for that respective user. However, it is necessary that the user already exists, otherwise you first have to create that user and then assign the permissions. The permissions can be found in sudoers file, so first open it using Ubuntu text editor:
sudo nano /etc/sudoersNext, use the below syntax to add sudo user in Ubuntu:
[user-name] ALL=(ALL:ALL) ALL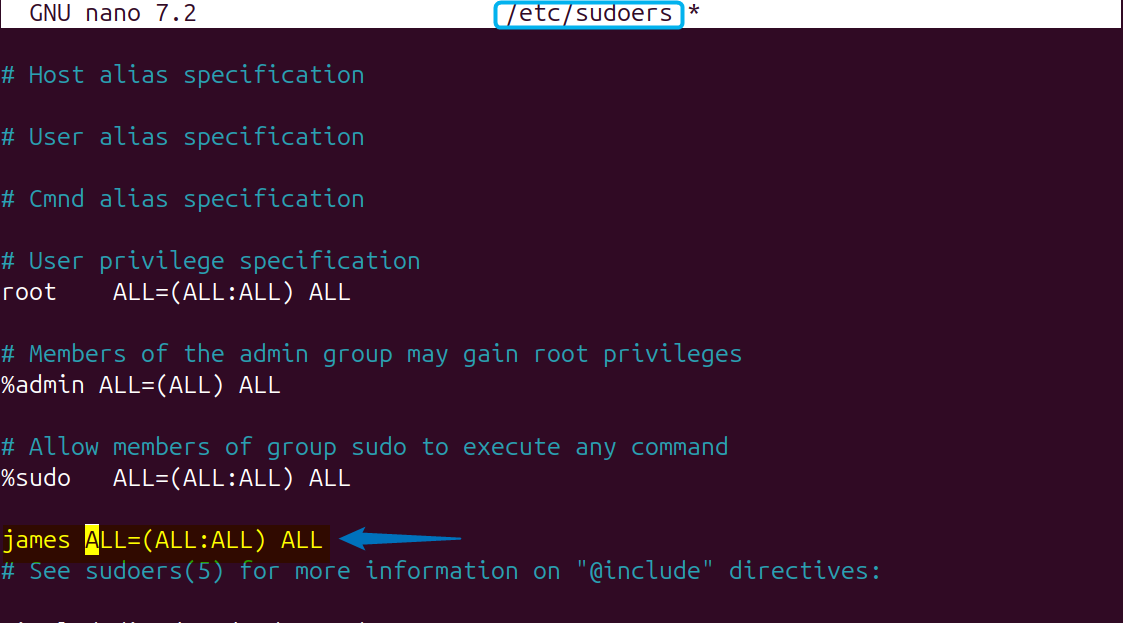
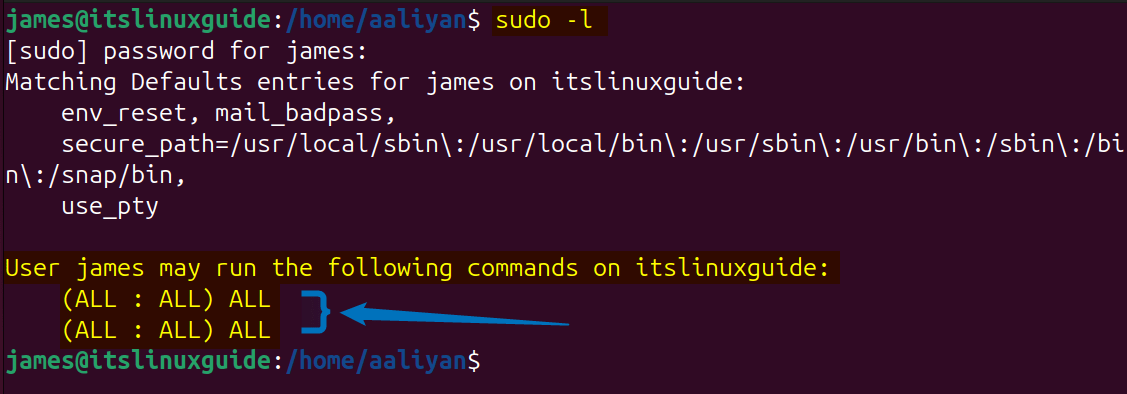
Now once you are done, close the sudoers file after saving the changes, and then you can verify that respective user permissions using the below command after logging into that user in terminal:
sudo -l
2: Through usermod Command
The next method to add a sudo user is by using the usermod command that is primarily used to edit the details of users and their account. If you have already created a user then use the below command syntax that will add the respective user to sudo group:
usermod -aG sudo [user-name]
Next to verify the user group allocation use the below command syntax:
groups [user-name]
3: Through adduser Command
If you want to add a new user and assign them sudo privileges, then you can do this by using adduser command. Further, if you are trying to create a new user and adding it to sudo at the same time, then you will get the error of user does not exist as in the image below:

To add a simple user in Ubuntu via adduser command you need to enter its password which should be 8 characters long strong password. Further, you can add more details like full name and contact information after executing the below command:
adduser [user-name]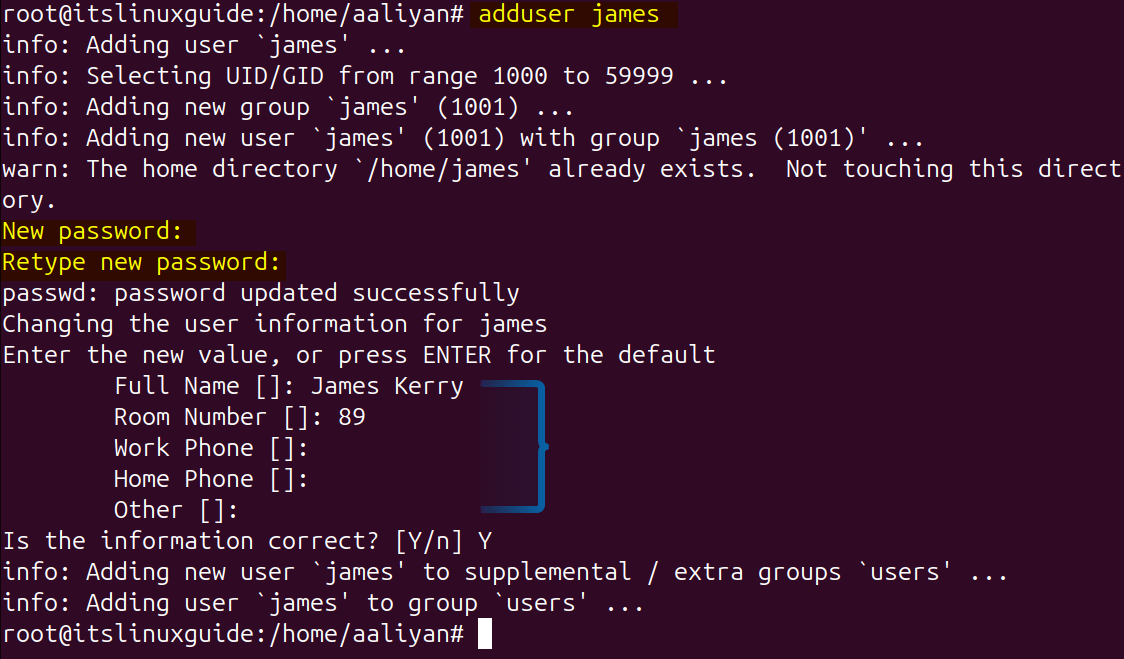
Once the user is added, use the following adduser syntax to add sudo user:
adduser [user-name] sudo
To verify the addition of sudo user you can list all the users added in sudo group by running the following command:
getent group sudo
Note: One thing to remember here is that to add the user to sudo group you have to log in as a root user and this is the same in case of creating a new user as well, otherwise you will get the error of only root may add a user or group to the system as in the image below:

4: Through Ubuntu User Settings
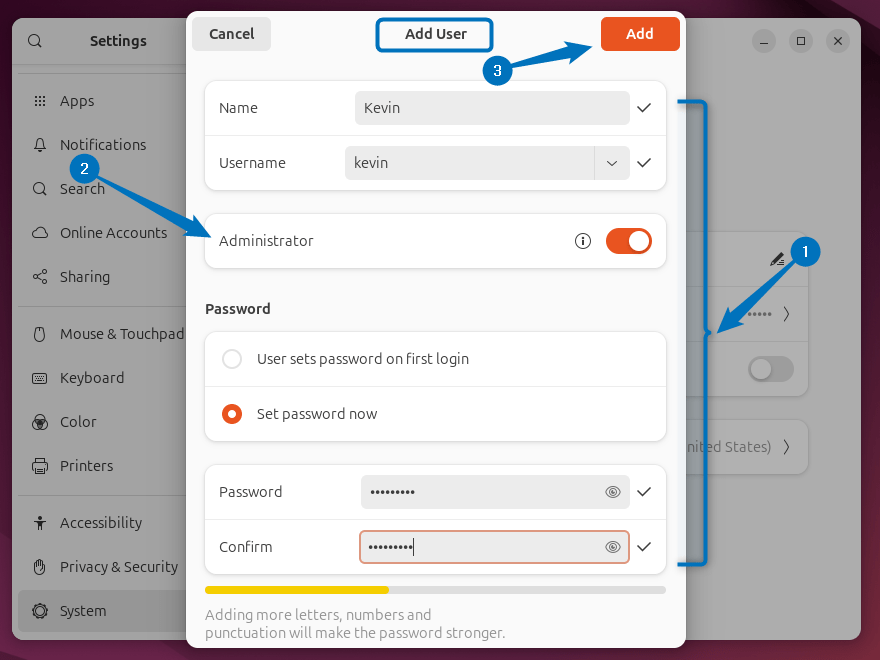
Next is the GUI method for adding a sudo user in Ubuntu, this method is far more convenient in case you need to create a user having sudo privileges. For that, you need to go to the user tab in settings, next you have to unlock the settings:
Now click on the add user option at the bottom and then fill in the user details, also turn on the option for Administrator. Once you are done, click on the Add option to add sudo user in Ubuntu
Once you are done creating a sudo user, verify its creation by listing all the members of sudo group by running the below command:
getent group sudo
5: Through gpasswd Command
The fifth and the last method to add sudo user is using the gpasswd command, this also requires the pre-creation of user. So first you need to create a user it could be done either by using the adduser or useradd command. Next, use the gpasswd command as in the syntax below to add the user to sudo group in Ubuntu:
sudo gpasswd -a [user-name] sudo

Now when you check the id details of the user which you added to sudo group by using the following command, you will see sudo in its details:
id [user-name]

Conclusion
This guide discussed 5 ways to add sudo user in Ubuntu and these include using usermod command, adduser command, Ubuntu user settings, gpasswd command and Ubuntu sudoers file. If you need to create a new user and want to add it to sudo group then either user the Ubuntu settings method or use the adduser command method. The best way otherwise to add a sudo user in Ubuntu is by using its sudoers file.