
Virtualization primarily allows users to run or test multiple operating systems on a single device by creating virtual hardware. Now there might be some cases in which you need to create and run a virtual machine on an operating system that is also running virtually and this is often known as nested virtualization.
The nested virtualization is a feature in VirtualBox, so to enable that feature you can simply use the PowerShell application in case your primary operating system is Windows. This post will elaborate the process of enabling nested VT on VirtualBox for Linux operating systems by demonstrating it for Ubuntu.
Enabling Nested Virtualization in VirtualBox
The prime benefit of nested virtualization is that it improves the resource and provides isolated testing grounds for software development and experimentation. On VirtualBox for Ubuntu and other operating systems, you will find this feature under the processor settings of the respective virtual machine:
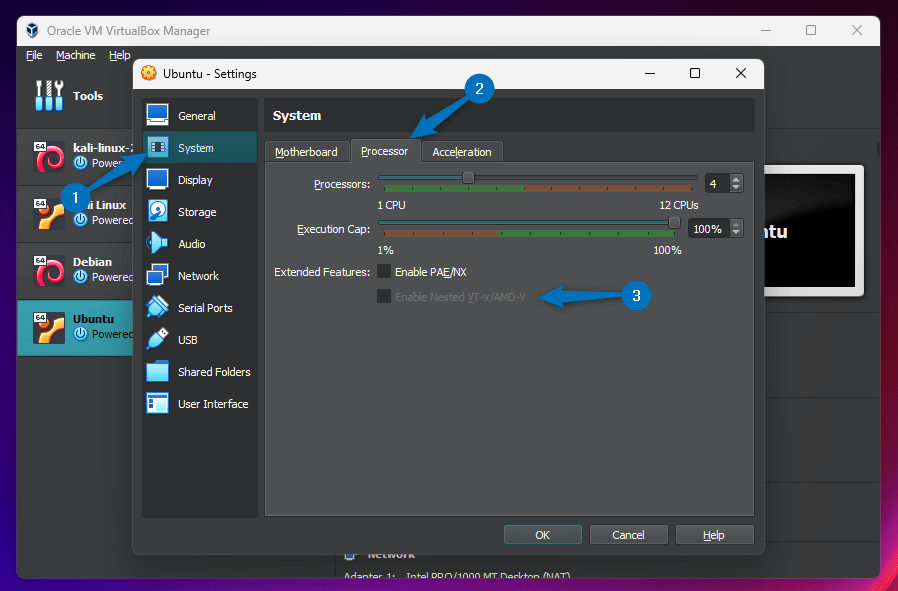
So now you can see in the above image that this feature is disabled by default for Ubuntu, so we need to enable it using the PowerShell. This is a three-step process which is quite easy to follow:
Step 1: Find and Navigate to VirtualBox directory
The installation directory for VirtualBox and the virtual machine is based on the user preference, so in my case I have kept all the virtual machines on the C directory. So simply navigate to the VirtualBox directory where all the virtual machines are saved and the copy the path:
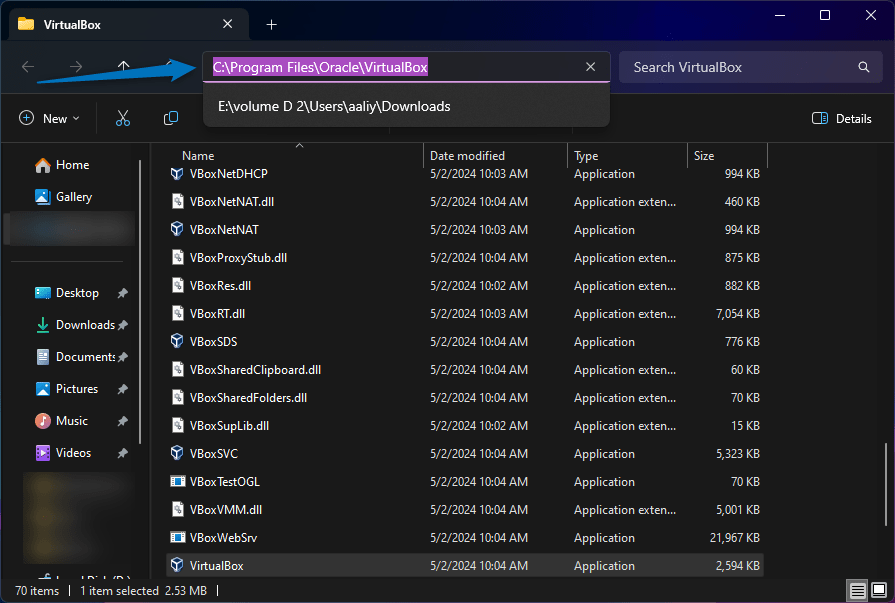
Here, keep in mind that the path required is of VirtualBox installed directory is not the directory path where the virtual machines are installed. Next, launch the PowerShell under the administrative rights and go to the copied directory using the following syntax:
cd "[virtualbox-directory-path]"
Step 2: List all the Virtual Machines in VirtualBox
The next, thing you need to do is to list all the virtual machines present in VirtualBox, this is necessary as you need to have a correct name for the respective machine.
.\VBoxManage list vms
Here, you can see in the image above that I have Debian, Ubuntu and Kali Linux installed on VirtualBox. So now note down or copy the name of the operating system for which you want to enable nested virtualization.
Step 3: Enable Nested Virtualization for Ubuntu
Now use the VBoxManage tool to modify the settings of any virtual machine created on VirtualBox, so use the below command syntax to turn on nested virtualization.
.\VBoxManage modifyvm "[Name-of-virtual-machine]" --nested-hw-virt onHere, in the below image, I have enabled this nested virtualization for my Ubuntu operating system, Also carefully copy the command as you may get any error for unnecessary spaces:

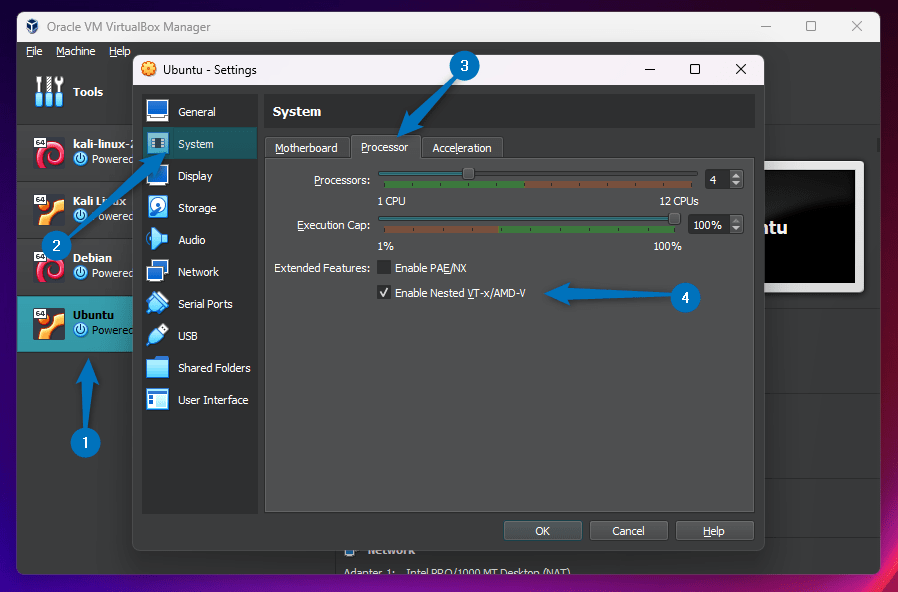
Next, Launch the VirtualBox and check if the nested virtualization is turned on or not under the processor settings. Here in the below image, you can see that my nested virtualization is enabled for Ubuntu:
Note: These steps can be used for enabling nested virtualization for any operating system, including all the Linux distributions, here for demonstration I have picked up Ubuntu.
Conclusion
This guide discussed the process of enabling nested virtualization for Ubuntu and any other virtual machines installed on VirtualBox. In other words, the enabling of virtualization on virtually created machines. This was a three-step process which included: navigating to VirtualBox installed directory on Windows, listing all the created virtual machines and using the VBoxManage utility to enable nested virtualization for Ubuntu.