
There are multiple ways to access any system remotely, one of which is using the TeamViewer application. Using TeamViewer, you can get full control access to the remote system based on the allowed permissions. This is primarily useful while diagnosing and fixing technical problems on user devices, this saves time and effort instead of visiting the user system in person.
If you are using Ubuntu as your daily operating system, and you either need assistance while working by giving remote access to your system, or you need to access other systems remotely, then use the TeamViewer application. This guide will explain how to install TeamViewer on Ubuntu and demonstrate how to access Ubuntu from the Windows operating system using TeamViewer.
3-Ways to Install TeamViewer on Ubuntu
TeamViewer comes in three versions: quick support, full-client, and TeamViewer-host. However, it is better to install the full client version. Further, for personal use, TeamViewer is free whereas there are for commercial use you have to buy it. To install TeamViewer there are three ways and here I am using the newly released Ubuntu 24.04:
1: Through TeamViewer Deb file
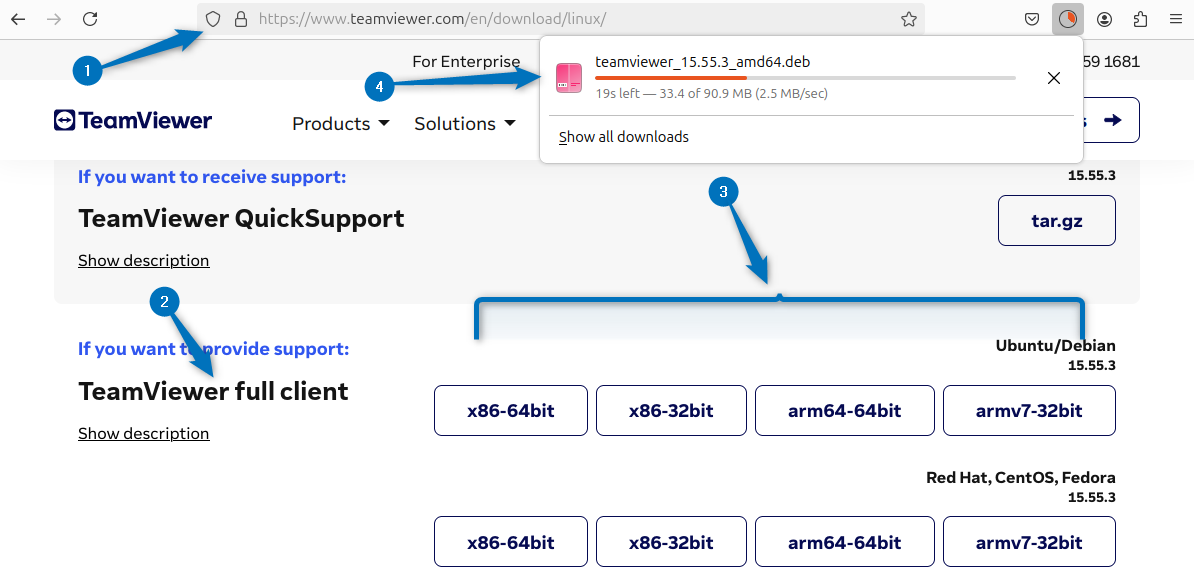
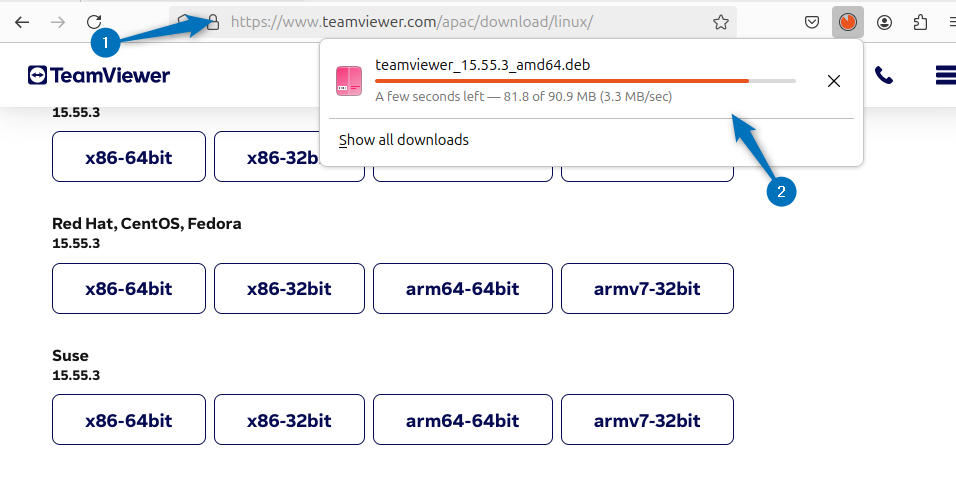
The first method to install TeamViewer is using its Deb file, which you can download from its official site after selecting the suitable version for it. Here I have selected the TeamViewer full client version and then after that opted for the deb file based on my Ubuntu architecture:
Alternatively, if your system is 64 bit then use can use the below command to download the TeamViewer full client deb file using the terminal on Ubuntu:
wget https://download.teamviewer.com/download/linux/teamviewer_amd64.deb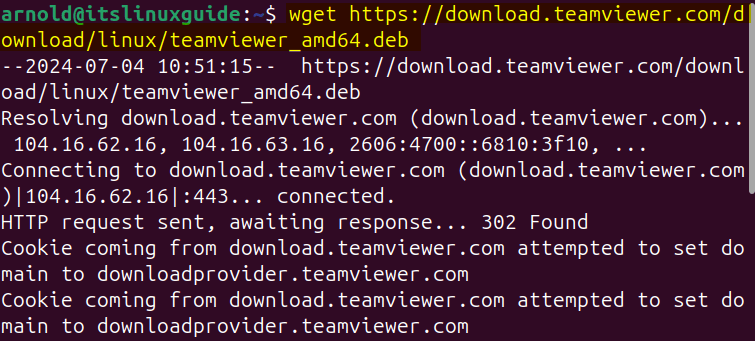
Once the file is downloaded, install TeamViewer on Ubuntu using the apt package manager:
sudo apt install ./teamviewer_amd64.deb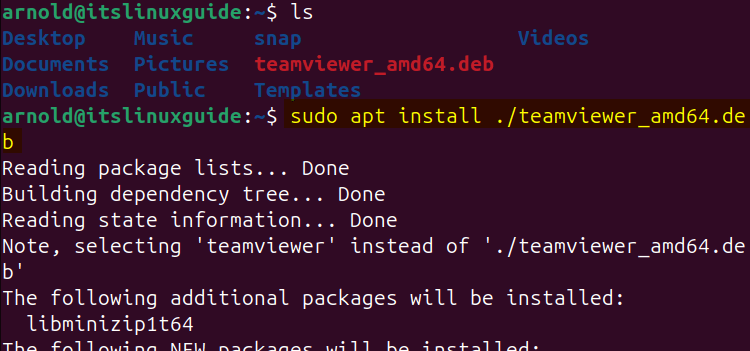
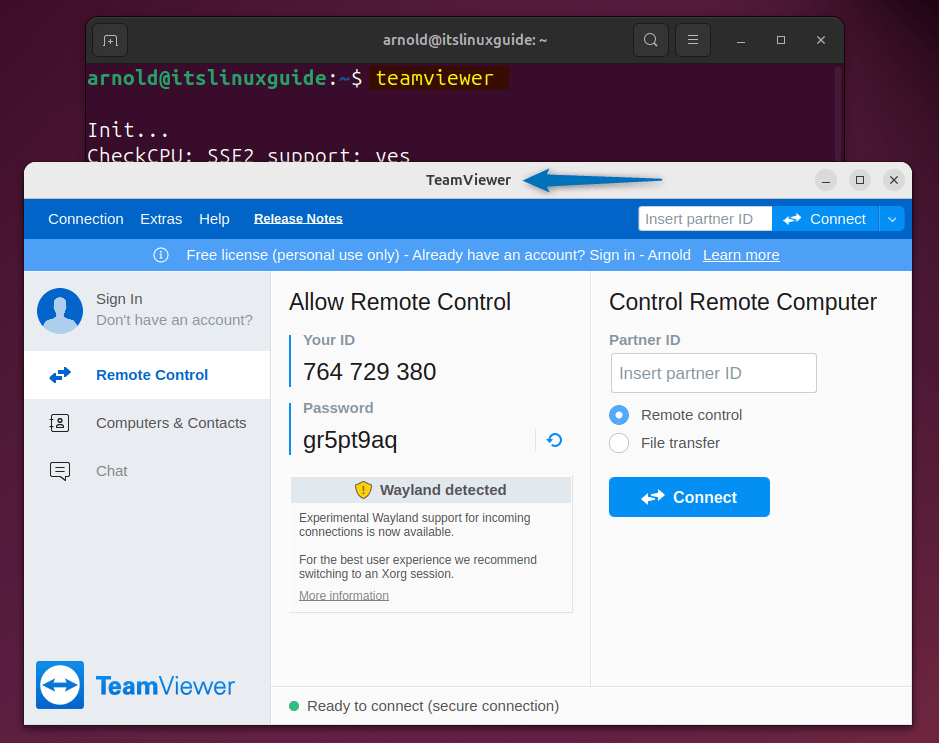
Now launch TeamViewer either through the apps menu or terminal, during the first launch you have to agree to EULA and DPA terms and conditions:
teamviewer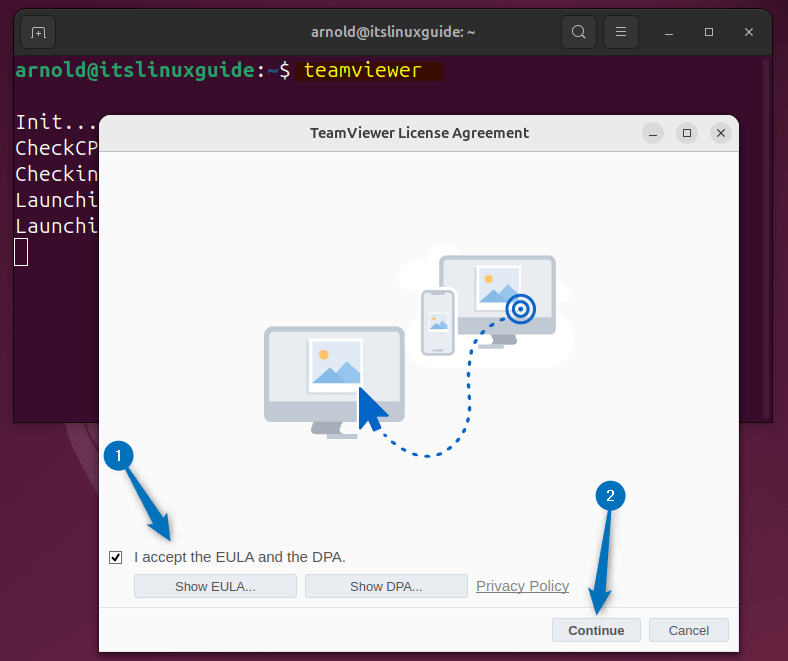
After agreeing to the terms and conditions, your TeamViewer will launch:
2: Through TeamViewer Repository
On Ubuntu and other Linux distributions, the apt package manager does not have the repository for the TeamViewer. So by adding the TeamViewer repository, you can install it via apt. To add the repo, first add the validation key in the keyrings directory of Ubuntu by executing:
curl -fSsL https://linux.teamviewer.com/pubkey/currentkey.asc | sudo gpg --dearmor | sudo tee /usr/share/keyrings/teamview.gpg > /dev/null
Next, add the TeamViewer repository in Ubuntu after signing it with the GPG key added previously:
echo "deb [arch=amd64 signed-by=/usr/share/keyrings/teamview.gpg] http://linux.teamviewer.com/deb stable main" | sudo tee /etc/apt/sources.list.d/teamviewer.list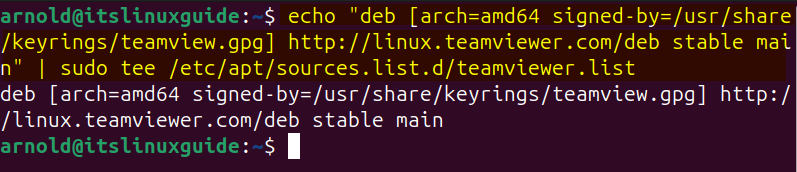
Now, refresh the apt packages list to successfully add the TeamViewer repository:
sudo apt update
Next, use the apt package manager to install TeamViewer on Ubuntu via its repository by executing:
sudo apt install teamviewer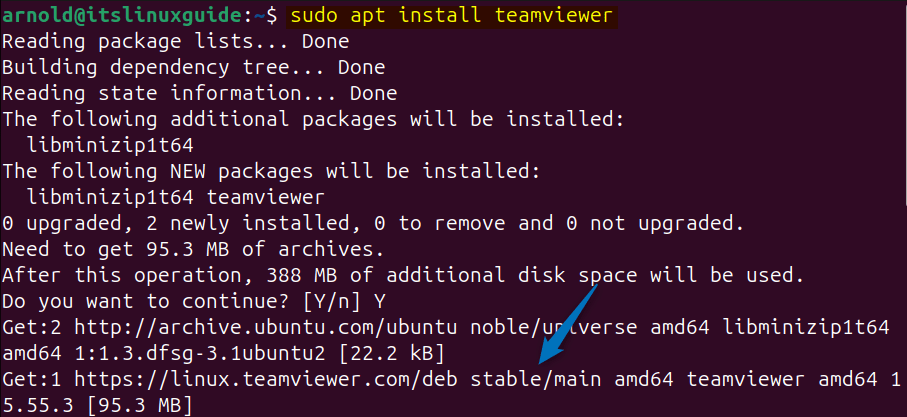
Next, use the teamviewer command to launch it:
teamviewer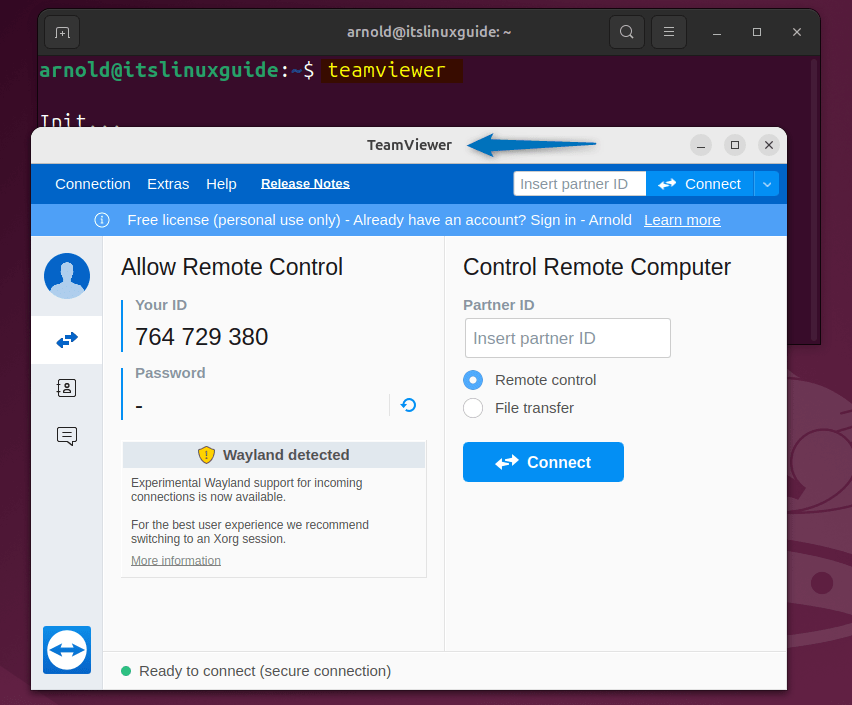
3: Through GDebi Package Installer (GUI)
In the first method, I used the deb file for TeamViewer installation on Ubuntu using the terminal. However, there is a GUI method to install TeamViewer on Ubuntu using its deb file that is using the GDebi GUI. First, download the deb file from TeamViewer:
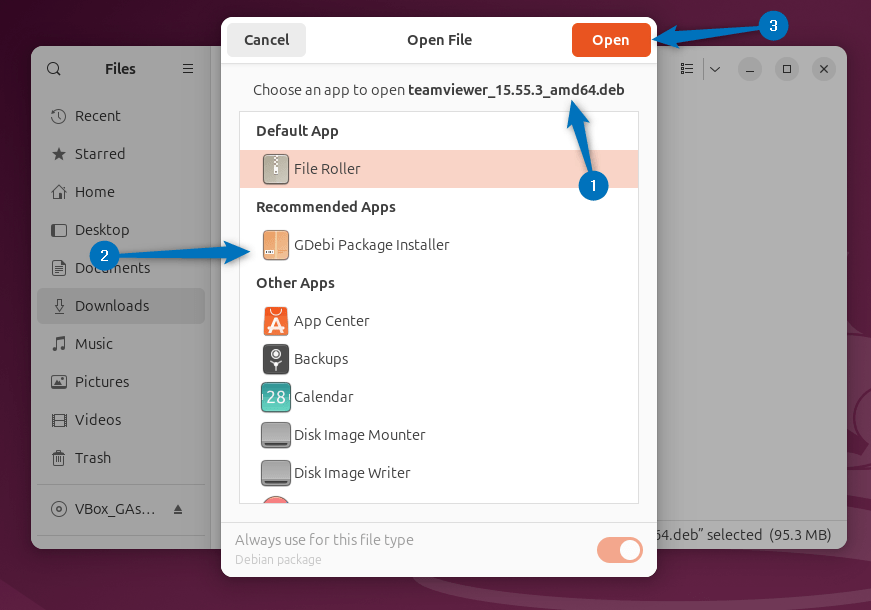
Next, open up the TeamViewer deb file in GDebi package installer on Ubuntu:
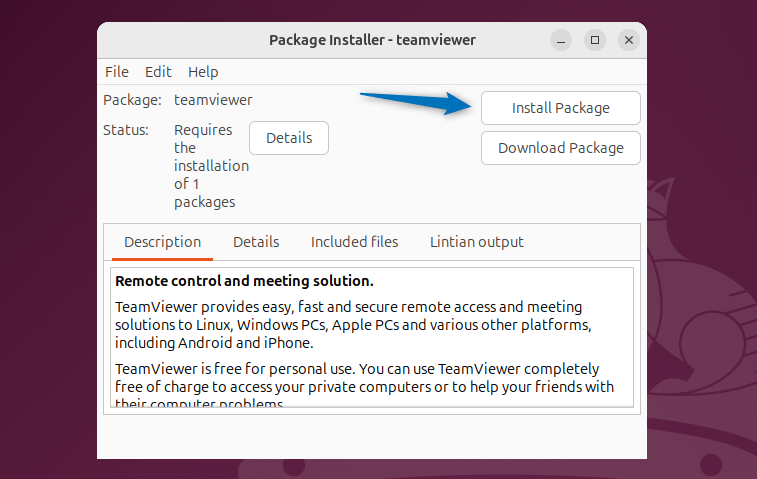
Once the file loaded, click on the Install Package option to proceed with the installation:
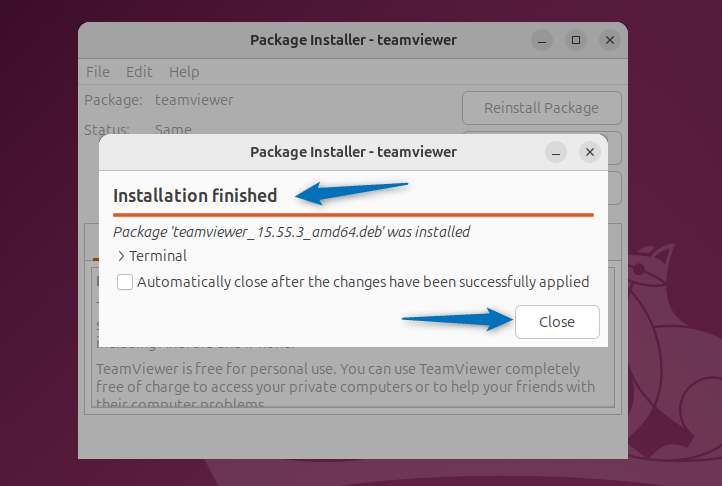
Once the TeamViewer installation is finished, close the installation status bar:
Now launch TeamViewer on Ubuntu either through the terminal or application menu:
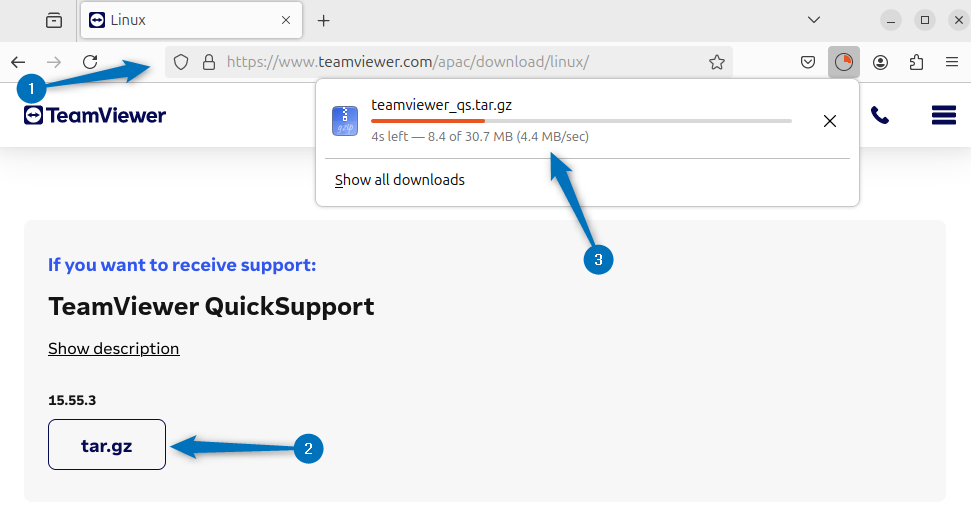
Note: TeamViewer comes with a quick support version, which is a sort of plug-and-play version. Just download and extract the TeamViewer tar file and run the TeamViewer file:
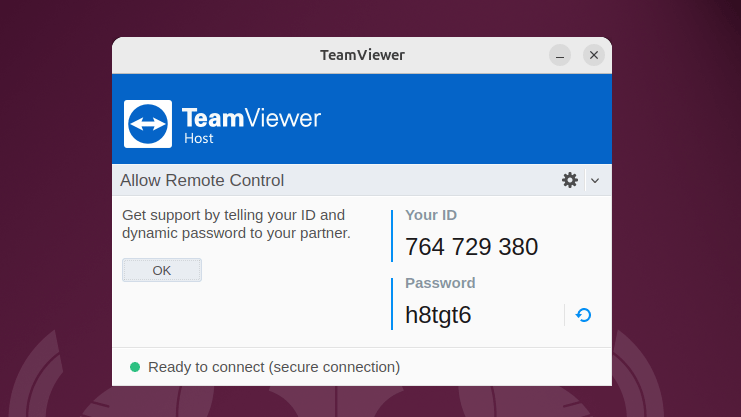
How to Install TeamViewer Host on Ubuntu 24.04
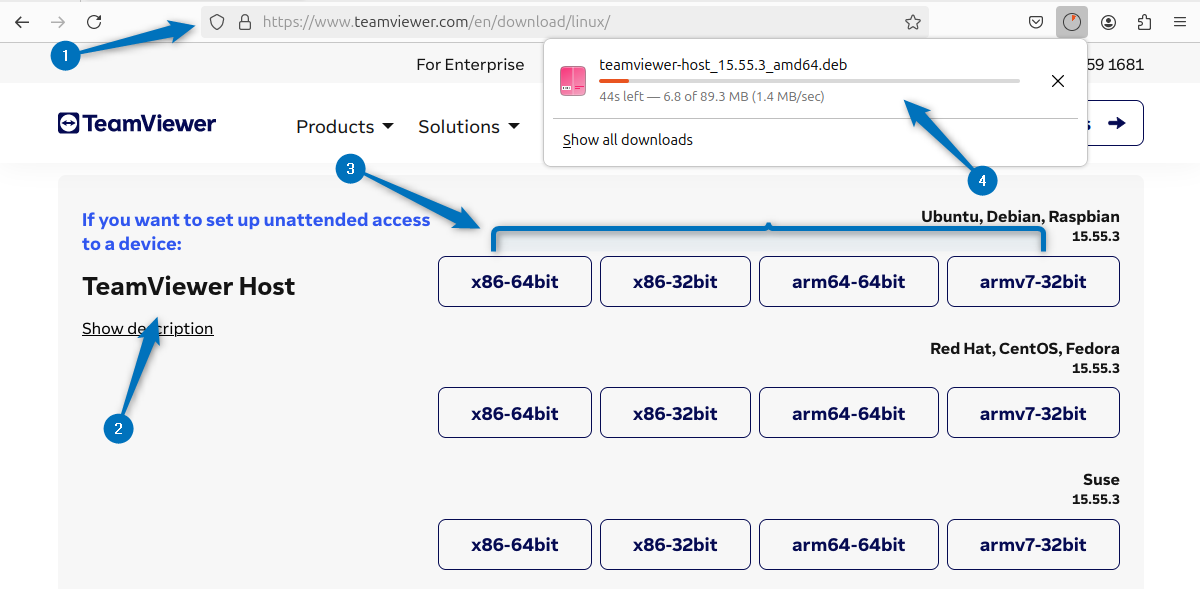
If you want to use TeamViewer for unattended access then you can use the TeamViewer host version. The unattended access means a remote access session where the user on the target device is not present and hasn’t explicitly granted permission for the connection at that specific moment. The target device is usually pre-configured to allow remote access without requiring manual user approval each time. To install it, download the TeamViewer host deb file on Ubuntu:
Alternatively, you can download the TeamViewer host deb file using its download link as in the command below:
wget https://download.teamviewer.com/download/linux/teamviewer-host_amd64.deb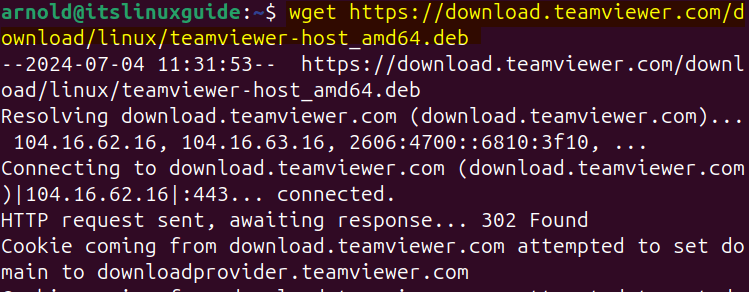
Now use the apt package manager to install TeamViewer host on Ubuntu using its deb file:
sudo apt install ./teamviewer-host_amd64.deb
Next before launching the TeamViewer host reboot Ubuntu to apply the changes and then launch it via the terminal or apps menu:
Accessing Ubuntu Remotely From Windows using TeamViewer
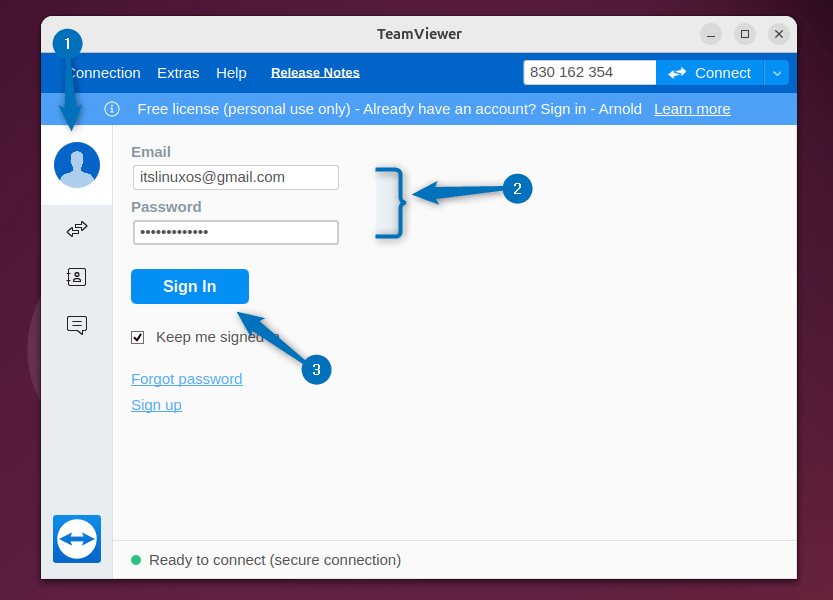
To either access any system remotely or to give your system access to any other user using the TeamViewer, it is mandatory to sign in with a TeamViewer account on Ubuntu. Here to demonstrate the use of TeamViewer on Ubuntu, I have accessed it from my Windows system. First, click on the user icon and login to the TeamViewer account, to create a TeamViewer account, visit its management console registration page:
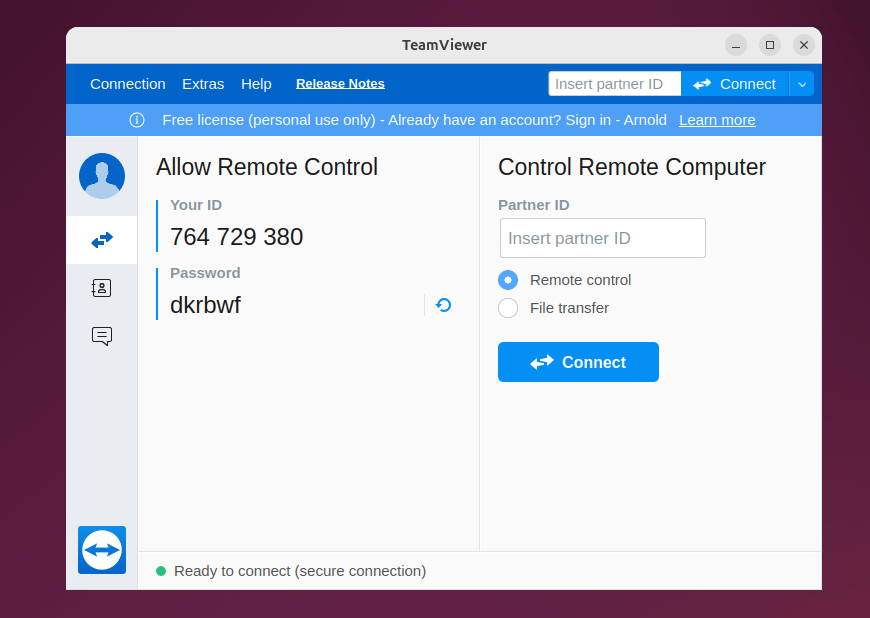
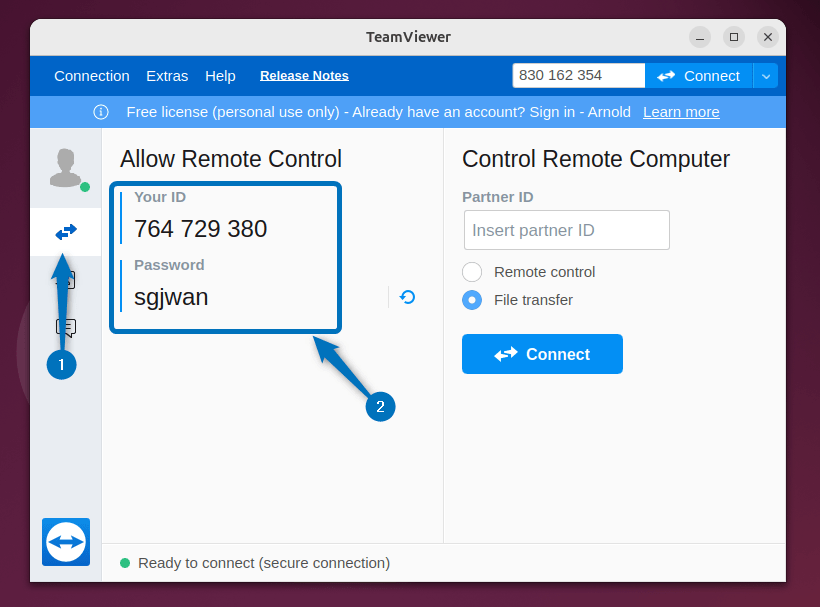
Now, copy your Ubuntu TeamViewer ID and password:
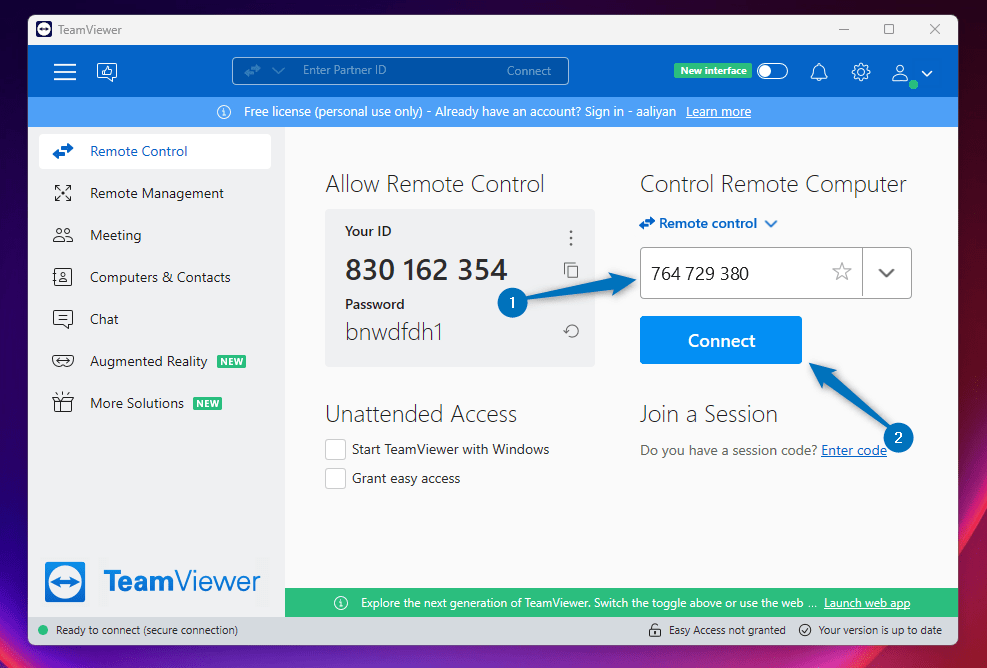
Next, launch TeamViewer on your Windows operating system and enter your TeamViewer ID of Ubuntu, after click on Connect icon to establish the connection:
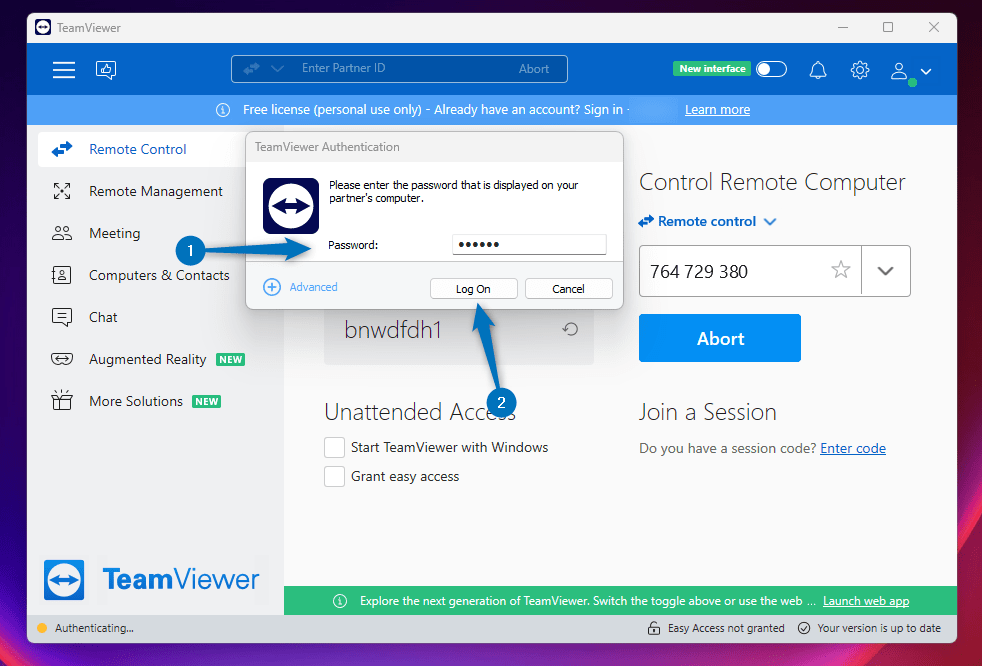
Once the connection is established, TeamViewer will ask for the password shown on the Ubuntu for authentication. Enter the password and then click on Log On:
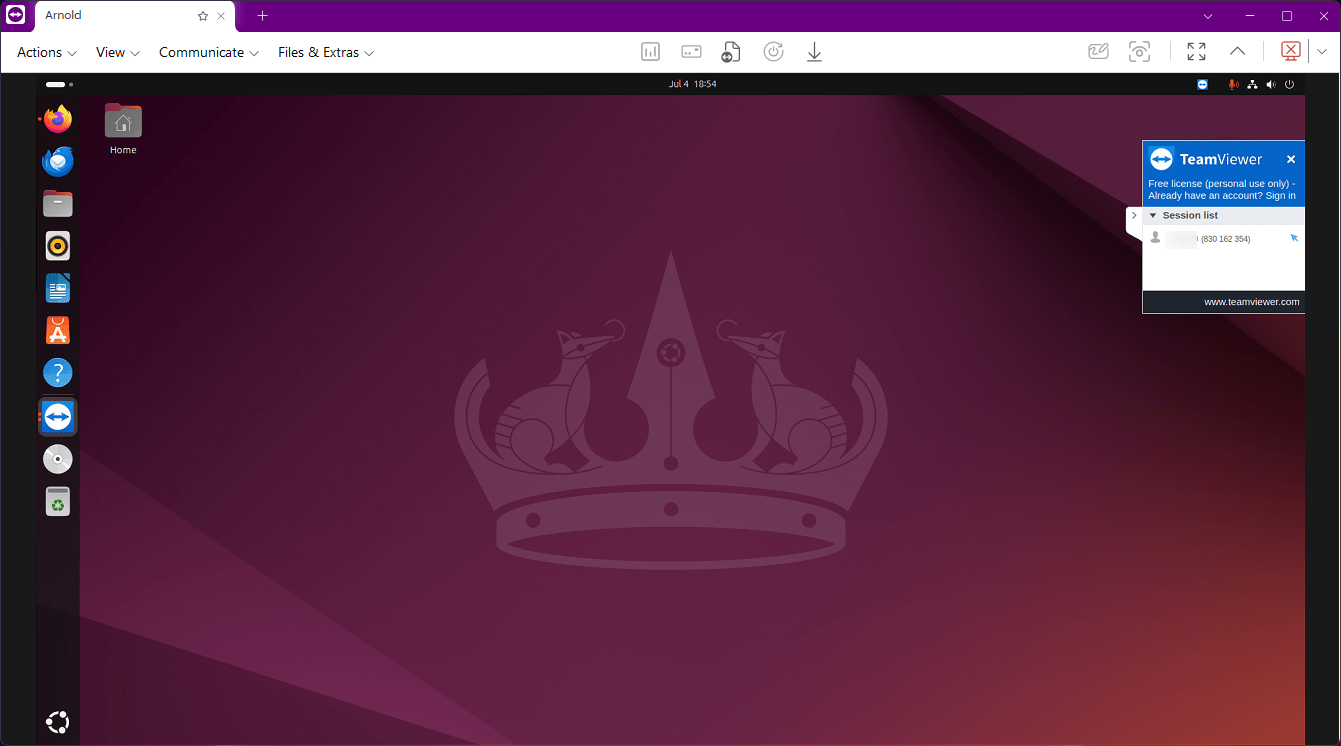
Now you will see that the Ubuntu system is accessed on Windows. Next, based on the control permission you can carry out the desired tasks:
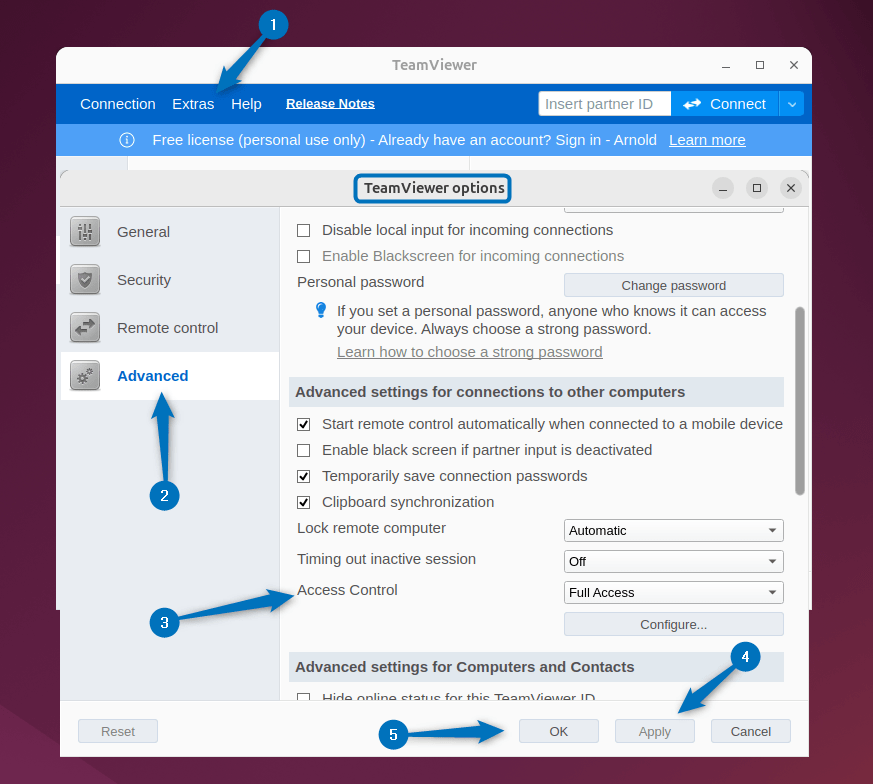
Note: To access any system using TeamViewer, you need to add both devices as trusted devices in the TeamViewer account for the management console. Further, you can set the desired control settings for your Ubuntu, for that go to the options tab in the Extra option at the top. Next, go to the advanced option and from there set the desired option for access control:
How to Get TeamViewer Password to Show on Ubuntu
Sometimes when you launch TeamViewer on Ubuntu or on any other Linux distribution, you might experience that the password is not displayed along with the TeamViewer ID. In that case, you need to set the password from the settings:
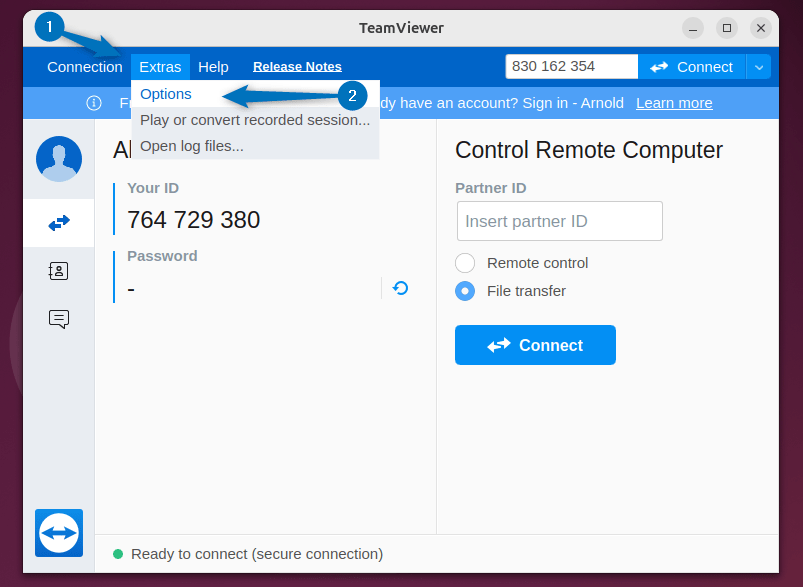
So for that, go to the Options tab by clicking on the Extra option:
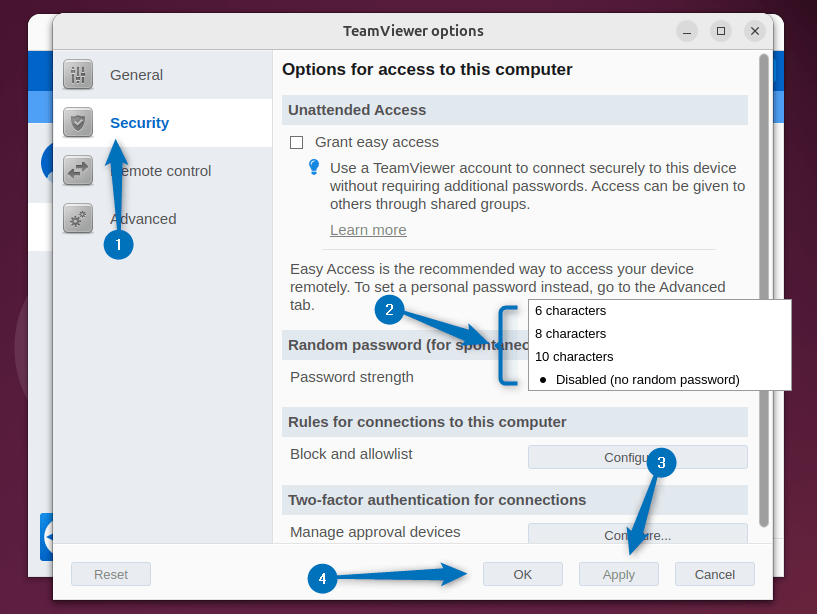
Next, click on the Security option on the left, and from there select the password length under the Random password option. After that, click on Apply and then click on OK to save the changes:
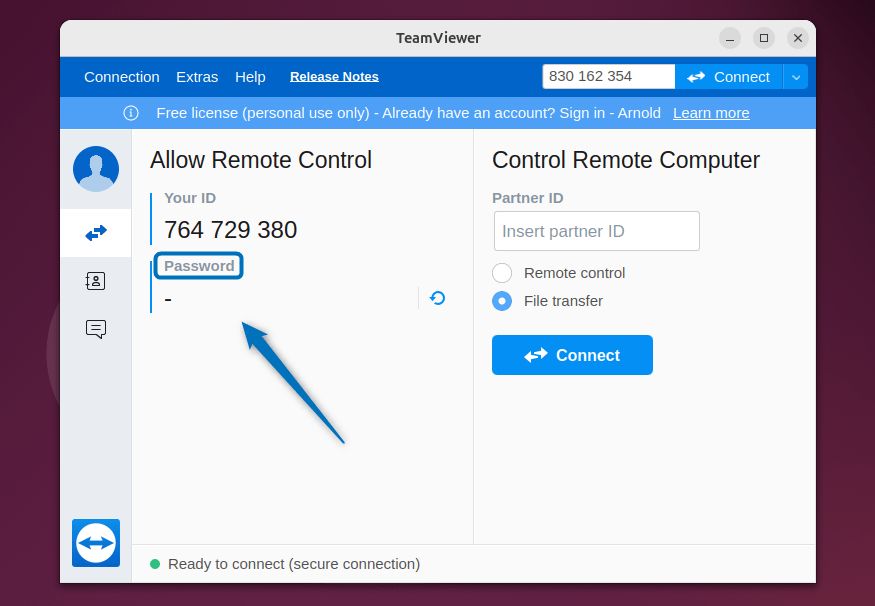
Now you will see the password will be displayed along with the TeamViewer ID:

Major Differences between TeamViewer’s Different Versions
To clarify or to give a broader picture of all three types of TeamViewer software, I have given some basic differences in the table below:
| Differences | TeamViewer Quick Support | TeamViewer Full Client | TeamViewer Host |
| Primary Function | Only for Attended access | For both attended and unattended access | For Unattended Access |
| Features | Basic functionalities for remote control and viewing | Several features, like chat, collaboration tools, and file transfer | Comes with core functionalities for remote control and file transfer |
| Installation Procedure | Plug and play (No installation required) | To be installed on both controlling & target devices | To be installed on target device only (Supported Device) |
| Applications | Occasional remote support scenarios | For both attended & unattended access, collaboration | Unattended device management (servers, kiosks, headless systems) |
| User Requirement | Requires user on the target device to grant permissions | Can be used with or without a user present | Designed for scenarios without a user present |
Conclusion
To install TeamViewer on Ubuntu there are three ways which include using TeamViewer deb file, TeamViewer repository, and GDebi package installer. Further, to either gain access to any system remotely or to allow your system for remote access you need to have a TeamViewer account and both devices should be added as trusted devices.