
Jellyfin is a self-hosted media server that offers users to centralize, organize, and stream their digital media collections across multiple devices. For Ubuntu/Linux users, Jellyfin is better because it installs natively, integrates with system services, uses hardware more efficiently, and fits into the open-source ecosystem.
4 Ways to Install Jellyfin on Ubuntu
Jellyfin operates on a client–server model, where the server is responsible for indexing and managing media files while client applications provide playback and user interaction. There are four ways to install it on Ubuntu, which this guide will explain in detail.
1: Through Jellyfin Bash Script
The first method for installing Jellyfin on Ubuntu is to use its official bash script, which not only adds the validation key and repository but also installs it. In other words, it is just a one-command operation, so execute the command below:
wget -q -O- https://repo.jellyfin.org/install-debuntu.sh | sudo bash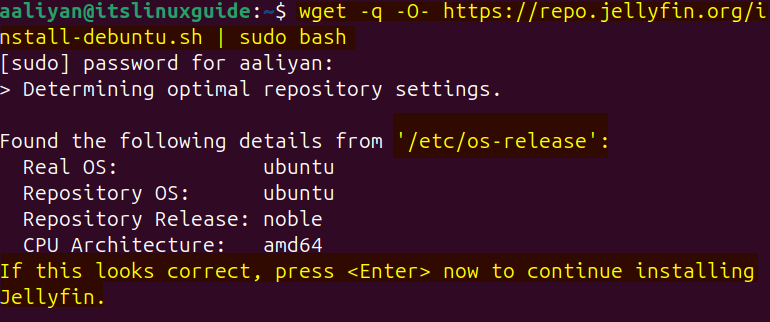
Once the installation is completed, verify the repository addition by running the package update command as given below:
sudo apt update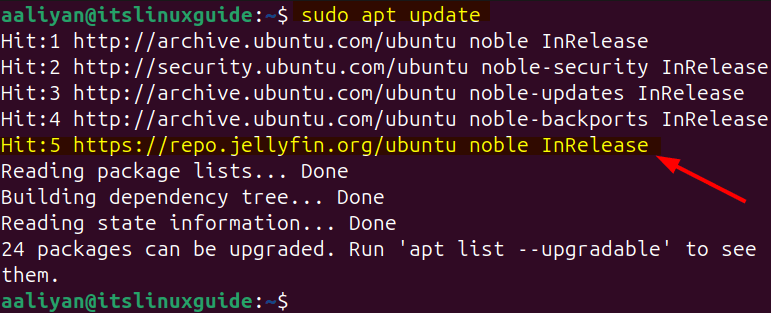
Next, to see if the Jellyfin media server is installed correctly and its service is active, use the command below:
sudo systemctl status jellyfin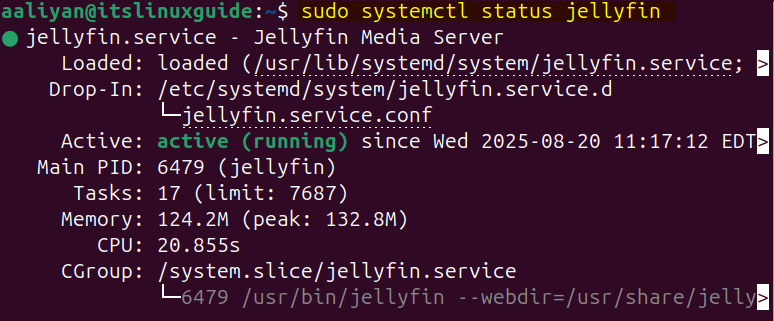
2: Through Jellyfin deb file
Another way to install Jellyfin on Debian-based Linux distributions is by using the application deb file, which can be downloaded from the Jellyfin repository homepage:

Or use the file download link as in the command below:
wget https://blr1.mirror.jellyfin.org/files/server/ubuntu/stable/v10.10.7/amd64/jellyfin-server_10.10.7+ubu2404_amd64.deb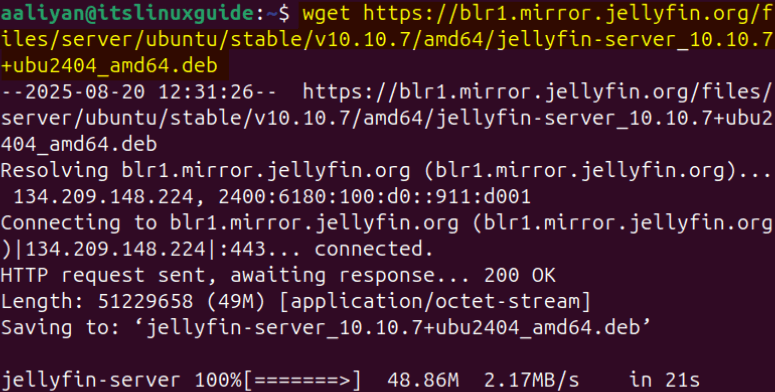
Next, use the apt package manager to install Jellyfin via its deb file:
sudo apt install ./jellyfin-server_10.10.7+ubu2404_amd64.deb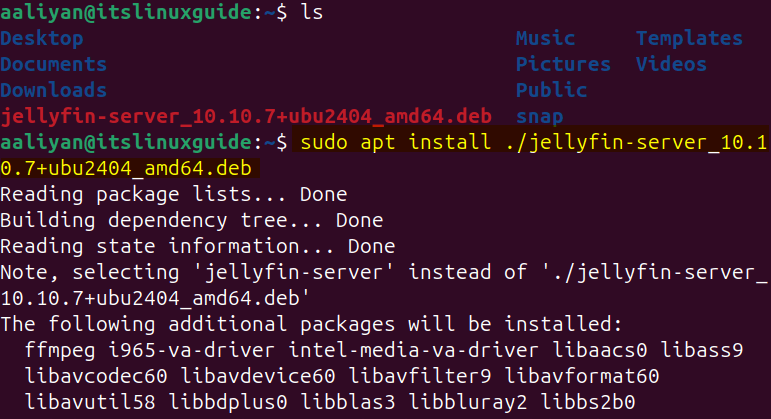
To verify the Jellyfin installation, check its version by executing the following command:
jellyfin --version
3: Through Snap Store
Just like apt package manager, Snap is also a third-party package installer with both CLI and GUI interface, to install Jellyfin, execute:
sudo snap install itrue-jellyfin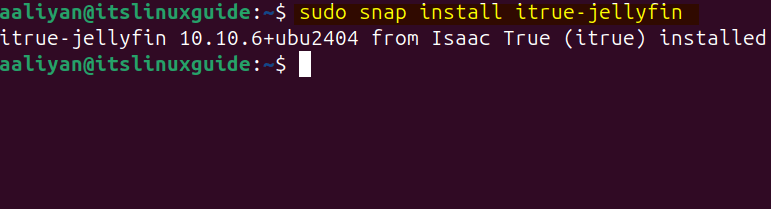
Verify Jellyfin installation by listing snap installed apps:
sudo snap list
4: Through Jellyfin Repository
Jellyfin media server cannot be installed directly via the apt package installer, as it does not have its repository by default. So, by adding the repository manually, it can be installed, and for that, first add its validation key by executing:
curl -fsSL https://repo.jellyfin.org/ubuntu/jellyfin_team.gpg.key | sudo gpg --dearmor -o /etc/apt/trusted.gpg.d/jellyfin.gpg
Now, add the Jellyfin repository by using the following command:
echo "deb [arch=$( dpkg --print-architecture )] https://repo.jellyfin.org/$( awk -F'=' '/^ID=/{ print $NF }' /etc/os-release ) $( awk -F'=' '/^VERSION_CODENAME=/{ print $NF }' /etc/os-release ) main" | sudo tee /etc/apt/sources.list.d/jellyfin.list
Next, update the packages list to integrate the added repository for Jellyfin by executing:
sudo apt update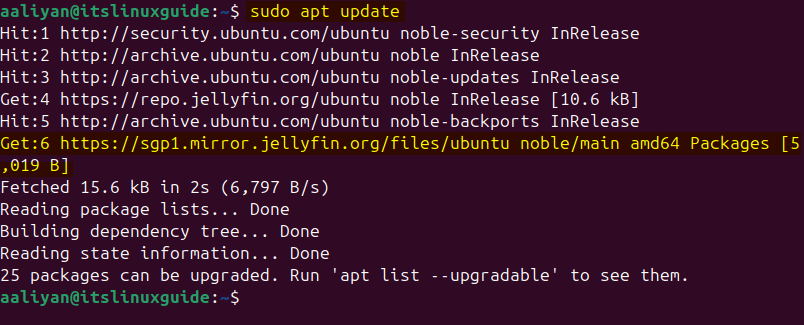
Now install Jellyfin on Ubuntu via the apt package manager by executing the following command:
sudo apt install jellyfin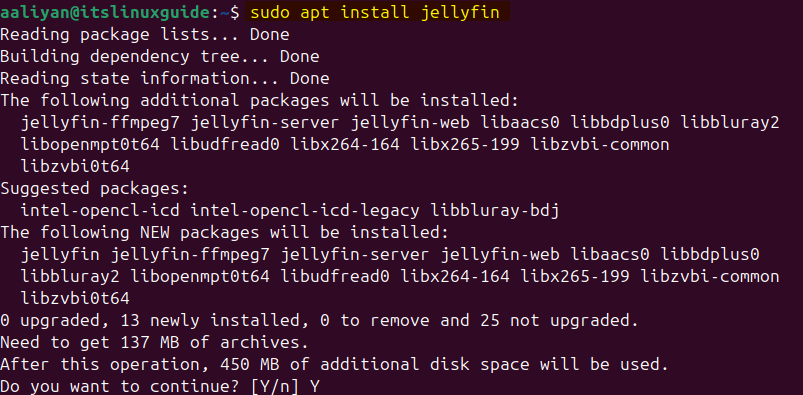
Lastly, verify the Jellyfin media server installation by executing the version command:
jellyfin --version
Setting Up Jellyfin on Ubuntu
Jellyfin comes with a user interface that can be accessed via a web browser, so on the first visit, some configuration steps are necessary to carry out.
Step 1: Selecting Jellyfin Server Language
To access the Jellyfin media server on Ubuntu, use the following IP address along with the port 8096 as given below. After that, select the desired language and move to the next step:
http://127.0.0.1:8096/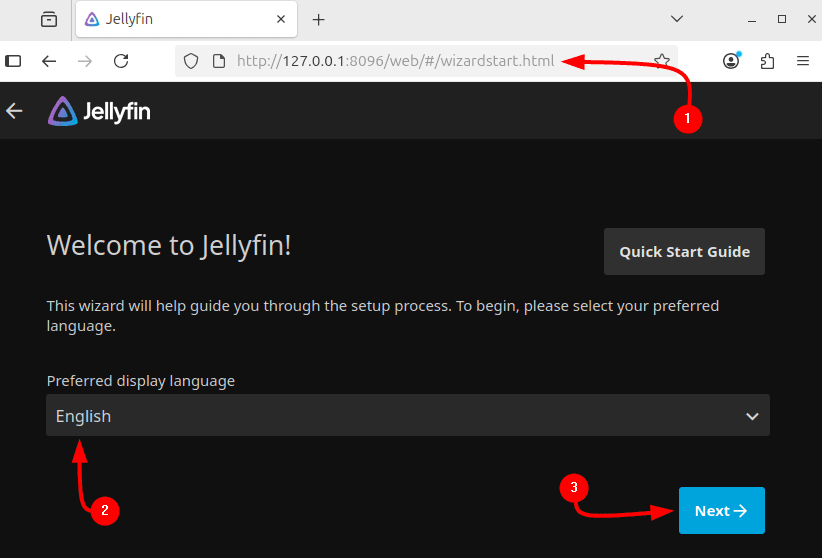
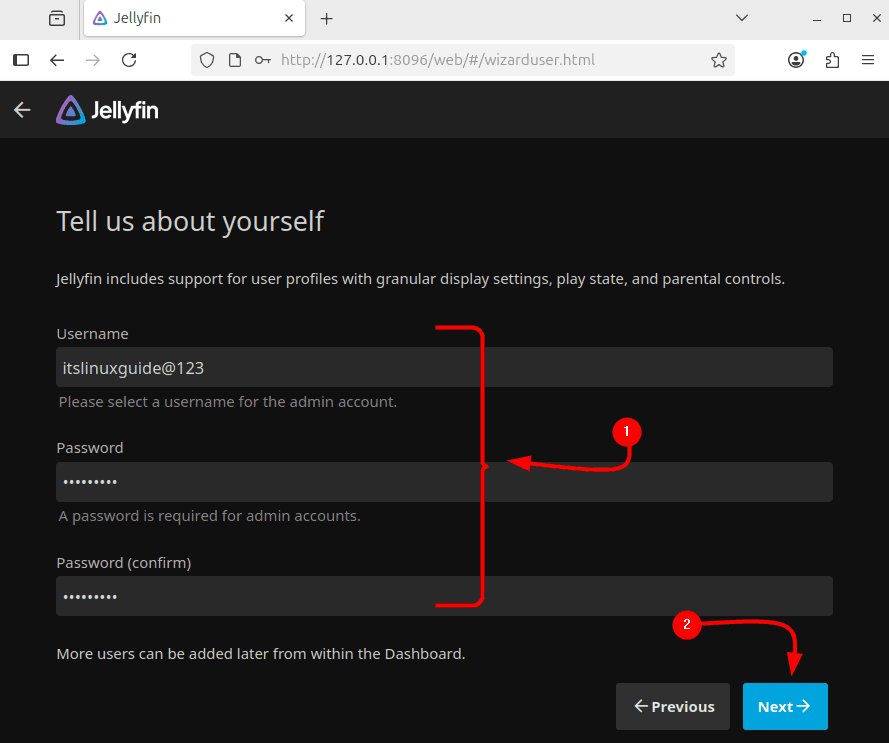
Step 2: Creating Jellyfin Account
In the next step, create the login credentials and move to the next step:
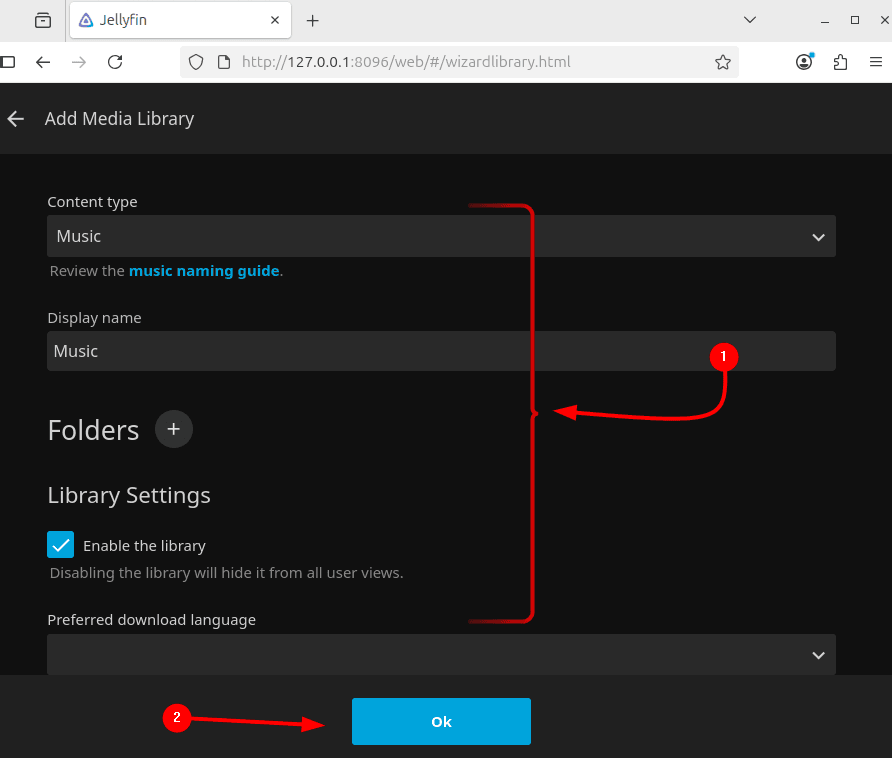
Step 3: Adding Media Libraries
In the third step, first select the Add Media Library and then click on Next to proceed:

Here, based on preference, first select the content type that is to be linked with Jellyfin. Here I have selected Music and then afterwards added the preferred location on the system. There are some other settings regarding the selected content type that can be accessed by scrolling down, click on Ok when completed:
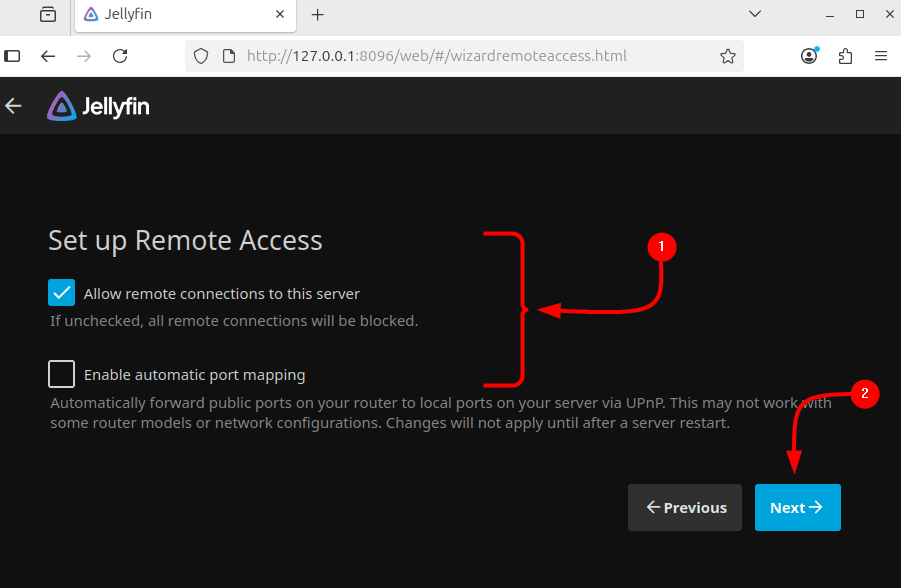
Step 4: Network Access
In the network access, only select the remote connection option and then click on next, there will be a confirmation page for completion of the configuration:
Conclusion
Jellyfin is a sort of self-hosted Netflix + Spotify + Plex, but without ads, tracking, or subscription fees. There are four ways to install Jellyfin on Ubuntu, discussed in this guide, which include using the Jellyfin bash script, the deb file, the Snap store, and via its repository. There are some configuration steps as well, which were also discussed in this guide.