The biggest benefit of virtual machines is the ability to use different operating systems on one machine. Several virtualization software are available, but the most prominent is the VMware workstation. VMware can be a favorable option when it comes to creating virtual machines for Linux distributions like Debian 12.
How To Install Debian 12 on VMware Workstation
WMware comes with many features, including advanced security options, high-availability tools, and robust management capabilities. However, Wmware is not free to use so one has to buy it, and secondly, VMware’s feature-rich environment can have a steeper learning curve compared to simpler solutions. The installation of the Debian 12 virtual machine on Wmware is quite lengthy but it is easy to follow all the necessary steps.
Step 1: Download Debian 12 on your Computer
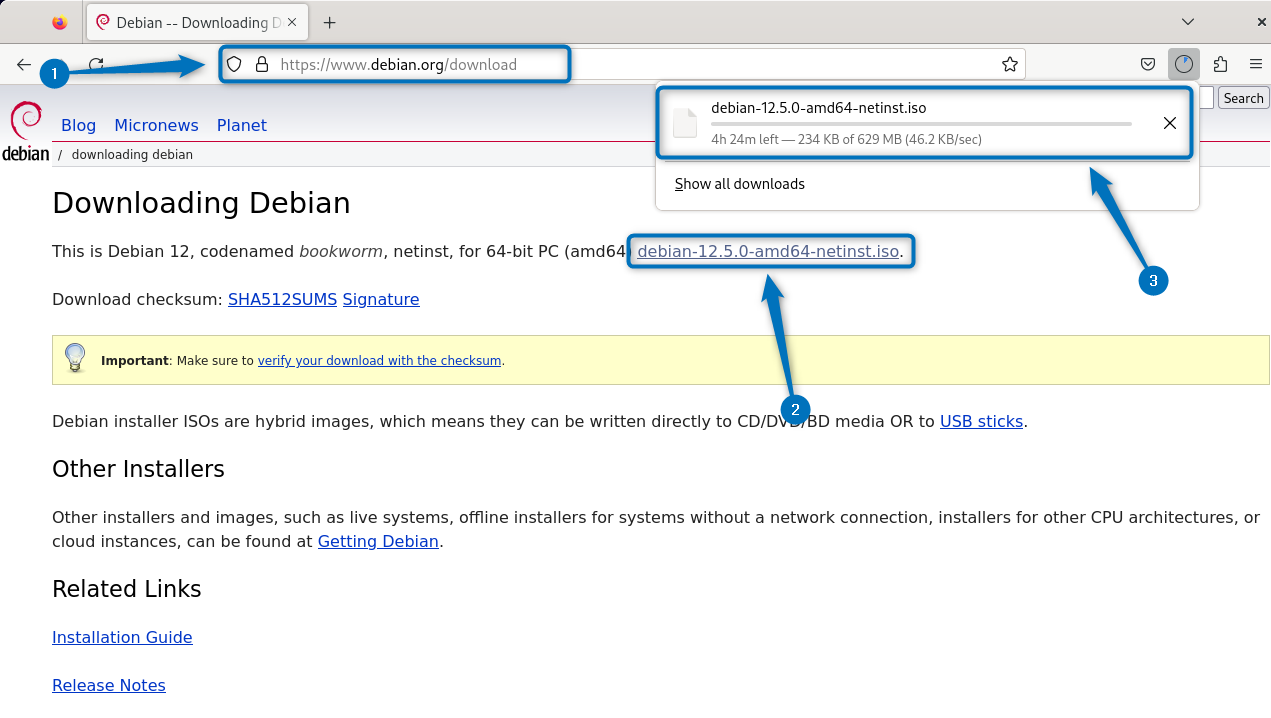
The first step for creating a Debian 12 virtual machine is to download its setup file. For that go to the Debian 2 download page:
Step 2: Create a Virtual Machine on WMware
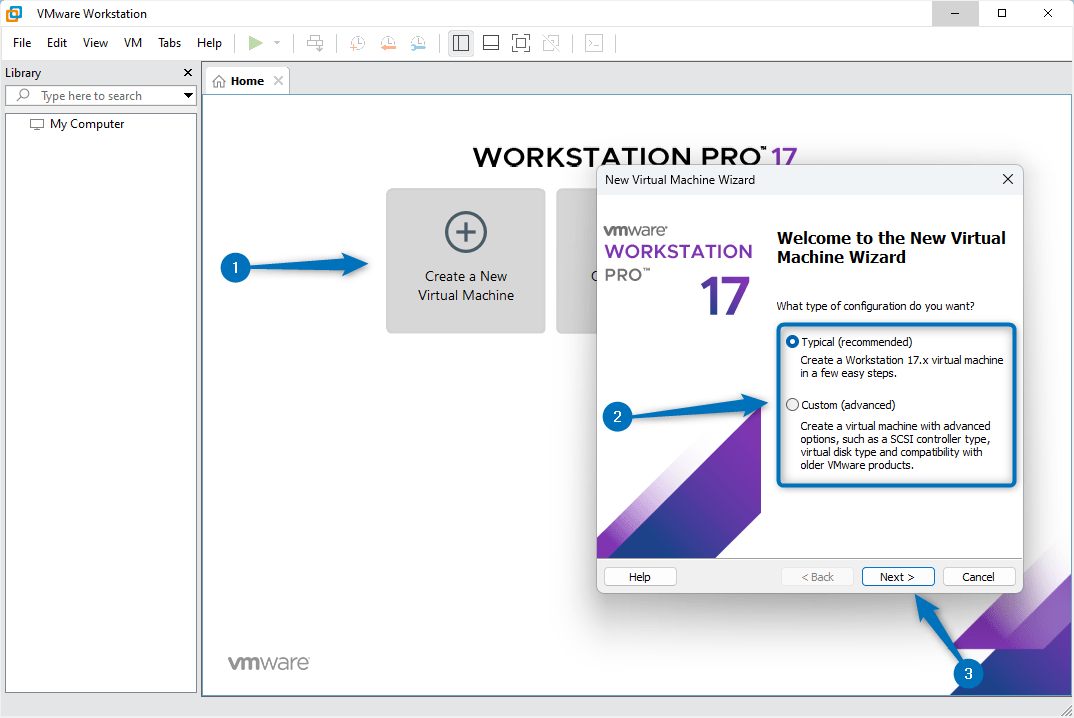
Next, create a virtual Machine on WMware, for that launch it and click on Create a New Virtual Machine. Next, the New Virtual Machine Wizard tab will open. Here first select the configuration type for your virtual machine. Here I have selected the Typical which is recommended, you can select the Custom (advanced) option if you are an expert.
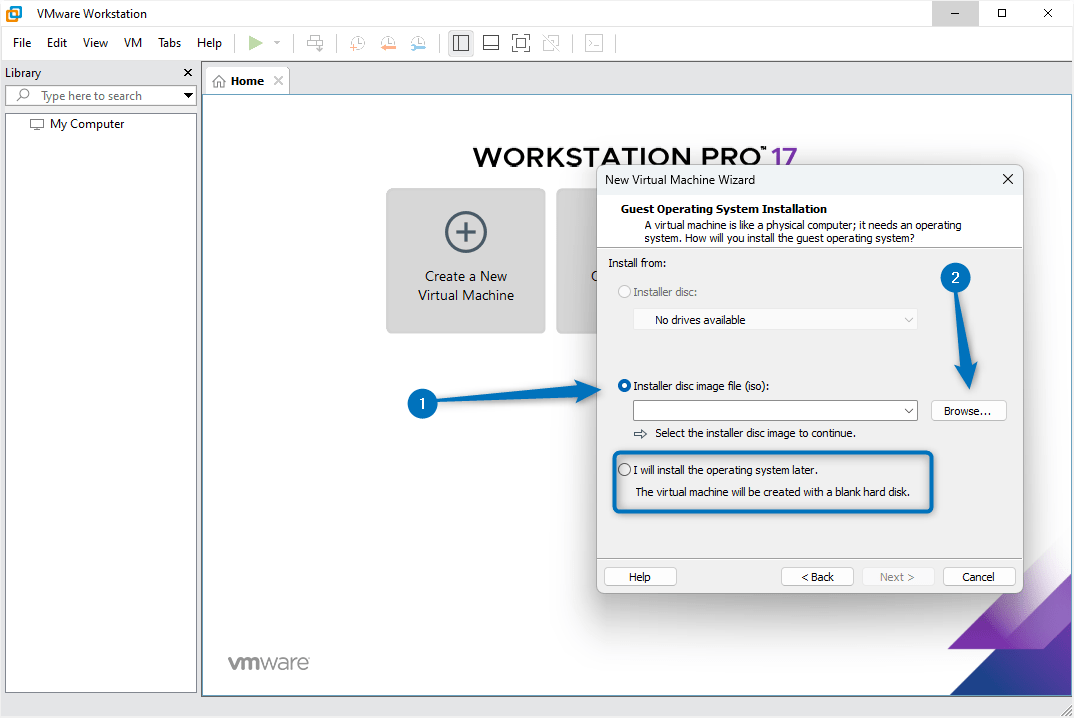
Now on the next step, you can either add a bootable USB drive for Debian 12 or you can add the path for the downloaded ISO file for Debian 12. Further, you can also skip this step and add it later:
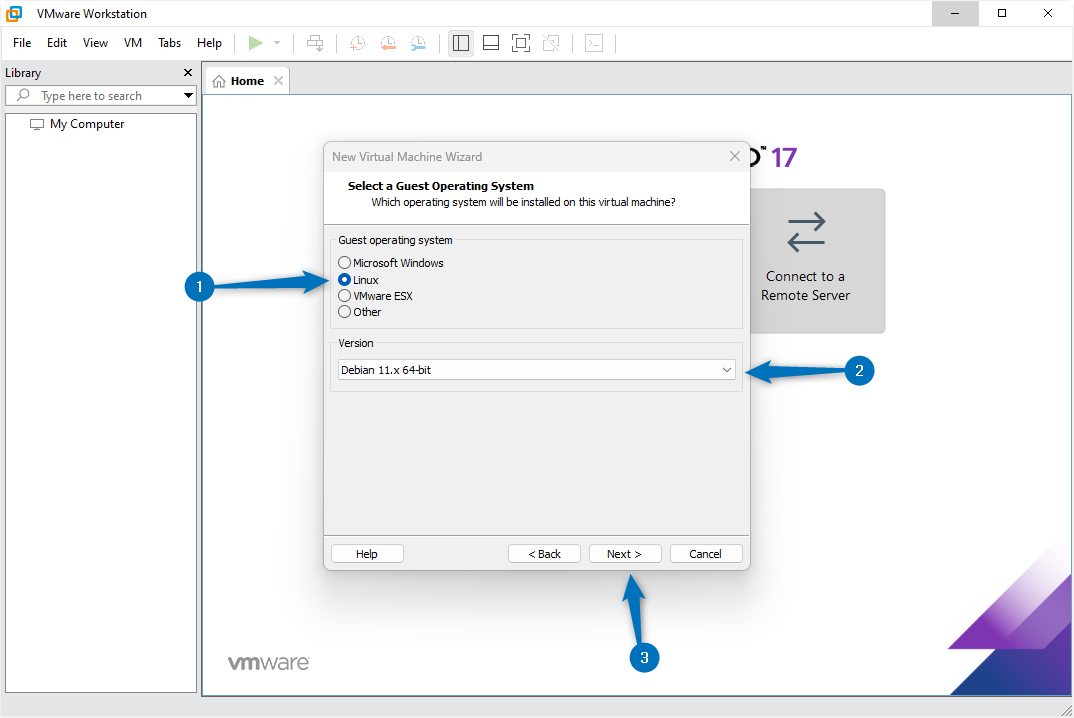
In case you have skipped the step of adding the path for the Debian 12 ISO. Now select the operating system and then name from the drop-down menu select its version. Here in VMware, the latest version of Debian is 11.X so don’t worry just select it and proceed:
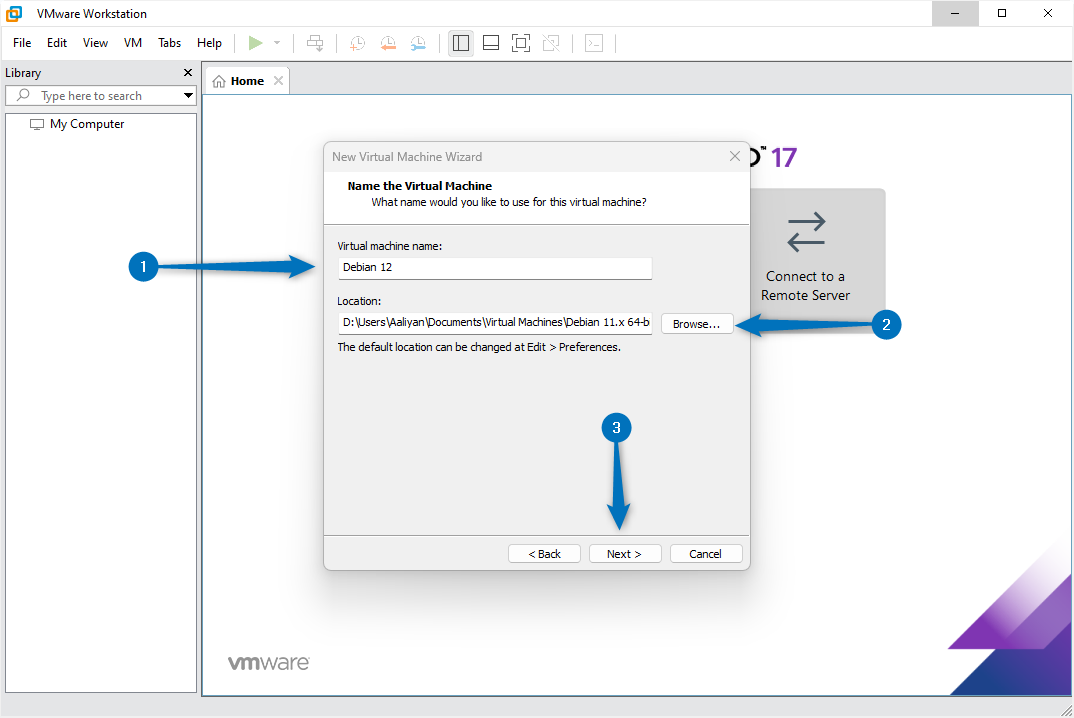
Now name your virtual machine and then set its installation path:
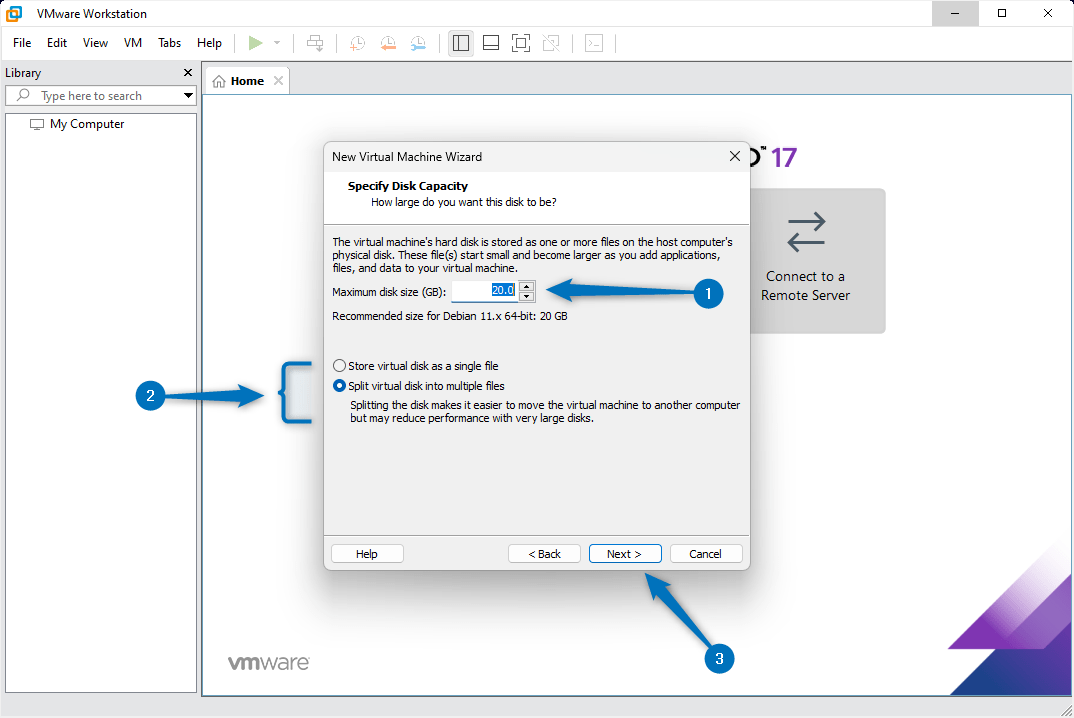
To create a virtual machine you have to allocate some resources so the next tab is about allocating the space for Debian 12. Ideally, if you want to use it for normal day-to-day tasks then 20GB is fine. In case if you want to use it for some advanced purposes then allocate more than 30GB of storage space. Further, select the disk partition option, here I will recommend keeping the virtual disk as a single file:
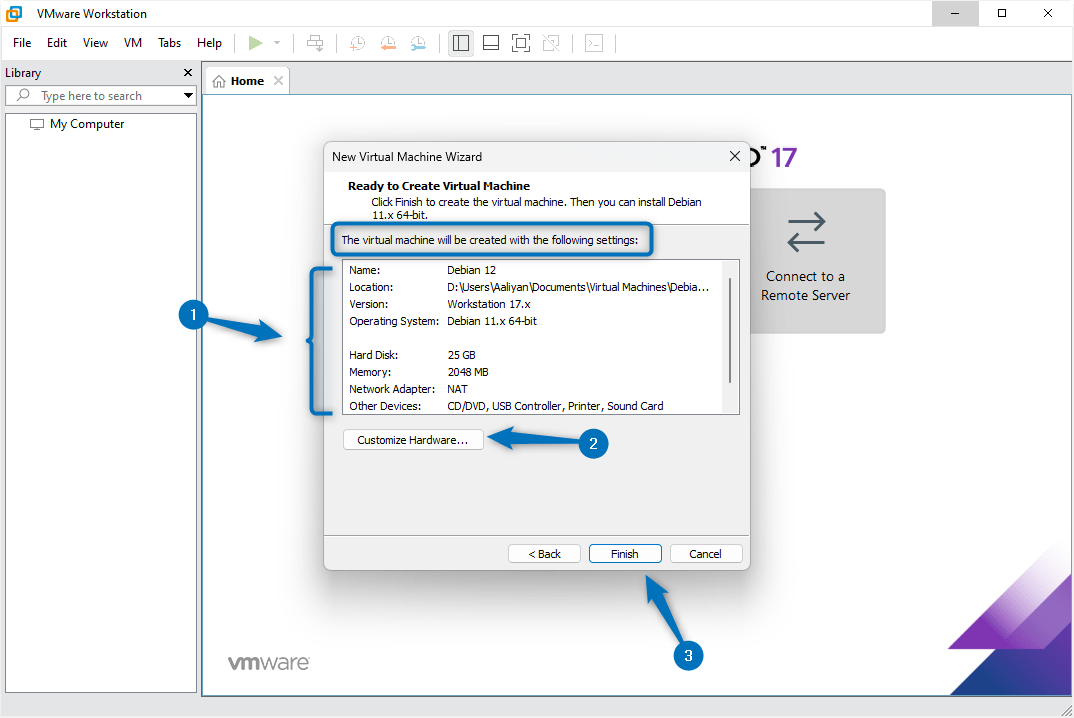
The next tab will show you the summary of settings for your Debian 12 virtual machine. Here you can also customize the hardware options as well:
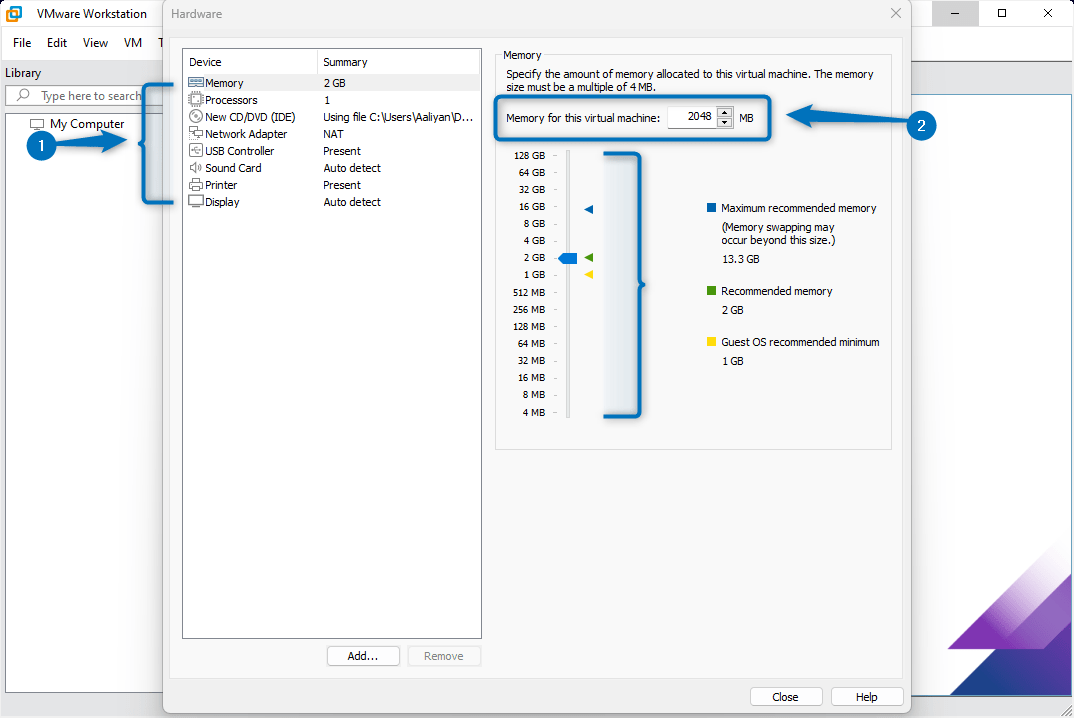
So now in the hardware customization option, you will come across several different settings that can really affect your experience of using VMware. Here the first option is about setting the RAM (memory) for the virtual machine. You can either enter a number manually or you can use the slider as well:
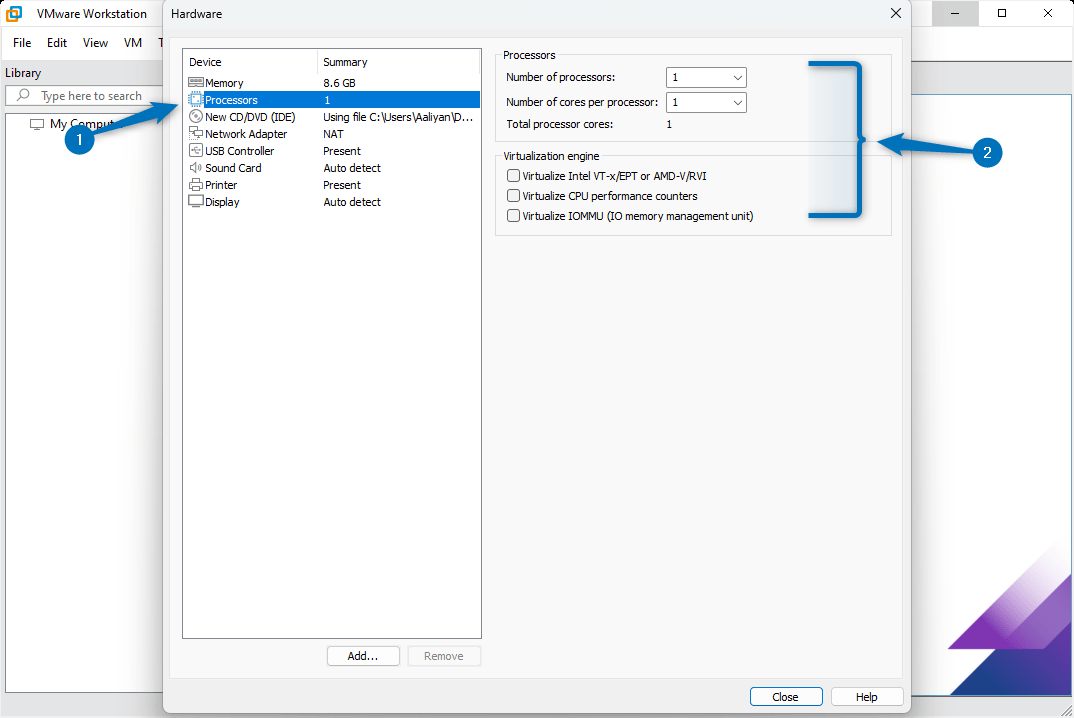
The next option is to allocate Processors for this VMware virtual machine. Here you can allot the number of cores and processors depending on the system’s use and specification.
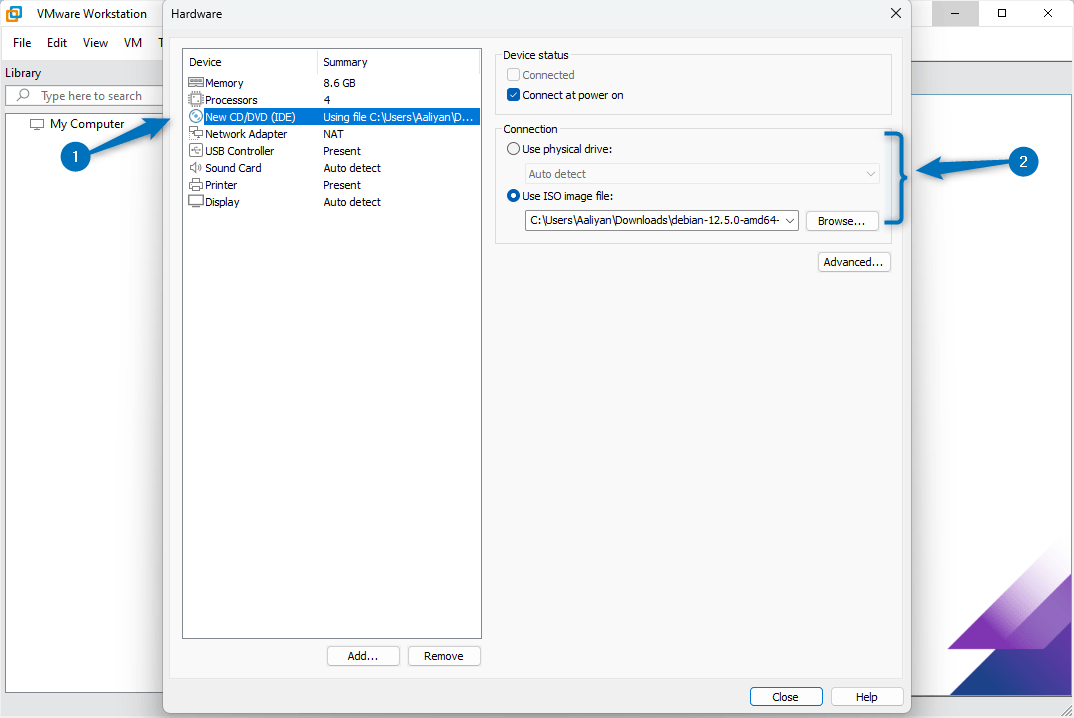
The next settings here allow you to add the path for the Debian 12 ISO file which you can link by clicking on the browse option:
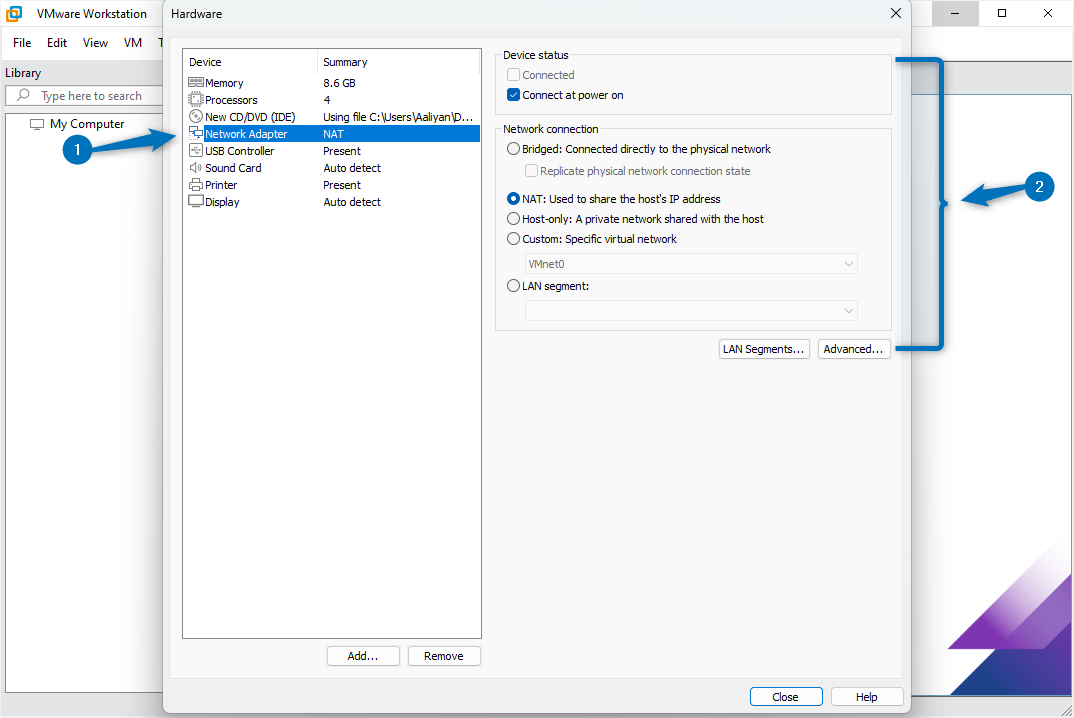
The next up is the network settings here it is recommended to select the NAT option because if you select Bridge to network your primary system might get issues:
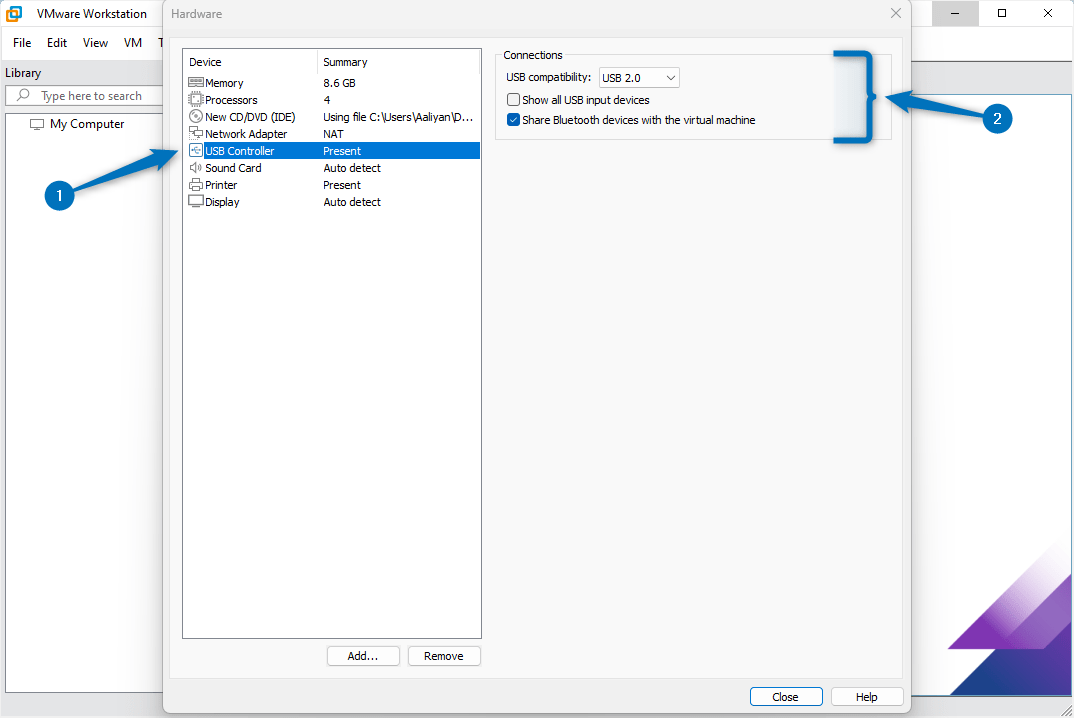
The next hardware setting is of universal bus service, set your compatibility here and proceed:
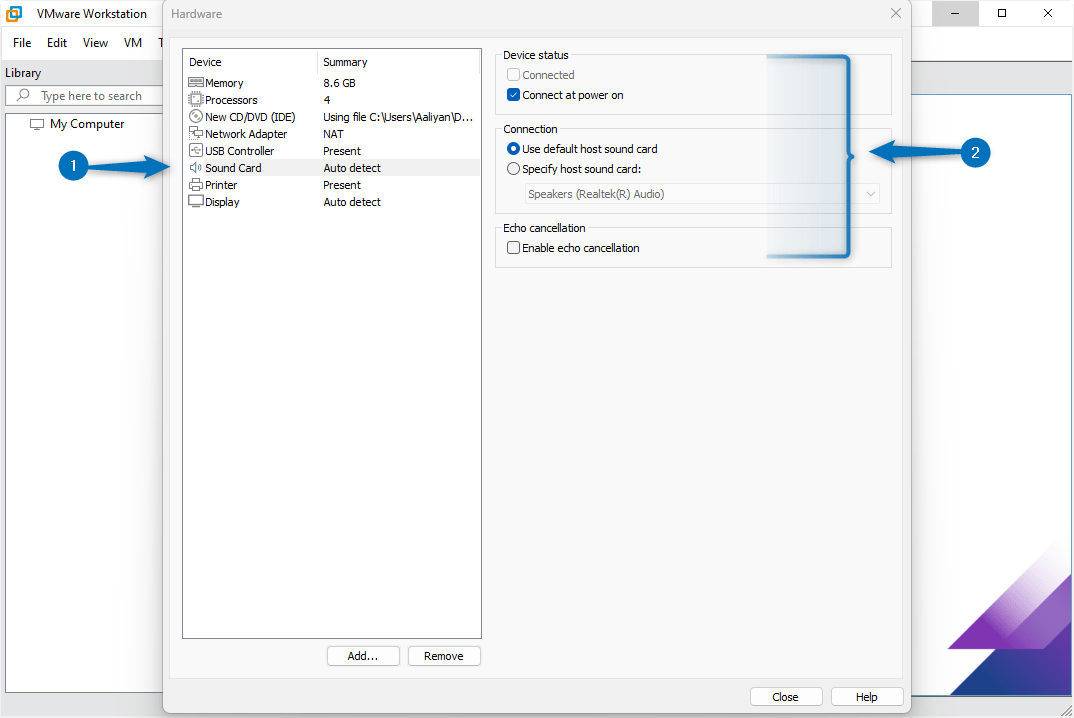
Having a proper sound connection is essential for a virtual machine as it not only allows you to listen to any system alerts but you can also have a streamlined experience with different entertainment applications:
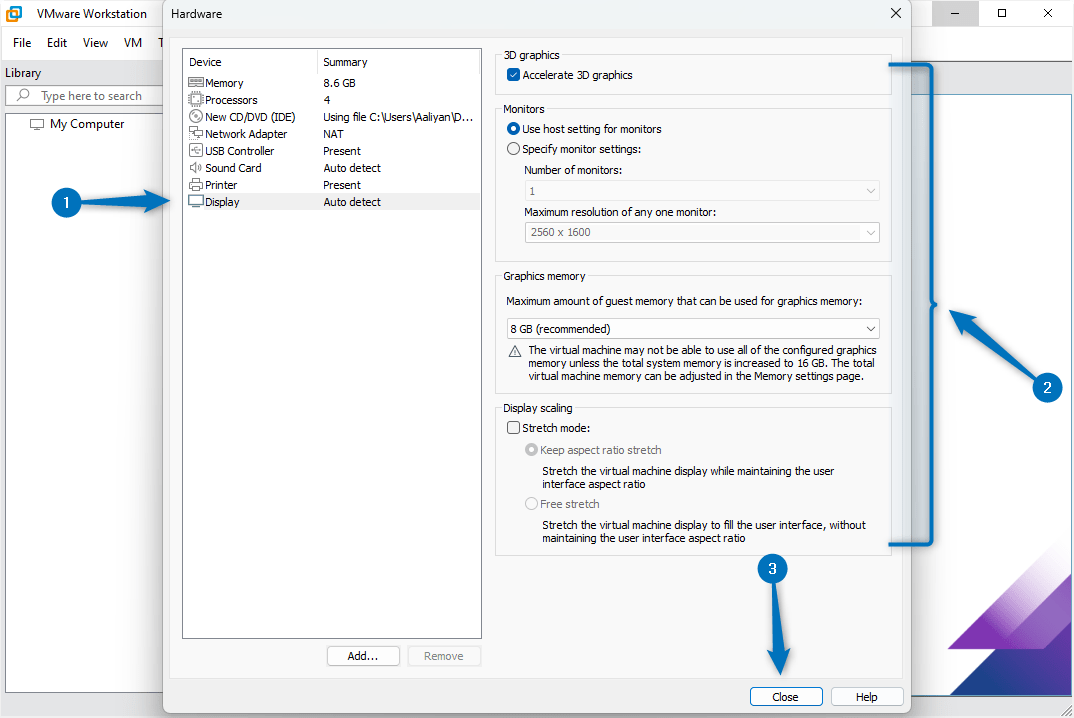
The last important setting for hardware is the display settings. Here you can fix the screen resolution, add RAM for GPU, and enable 3D accelerated graphics:
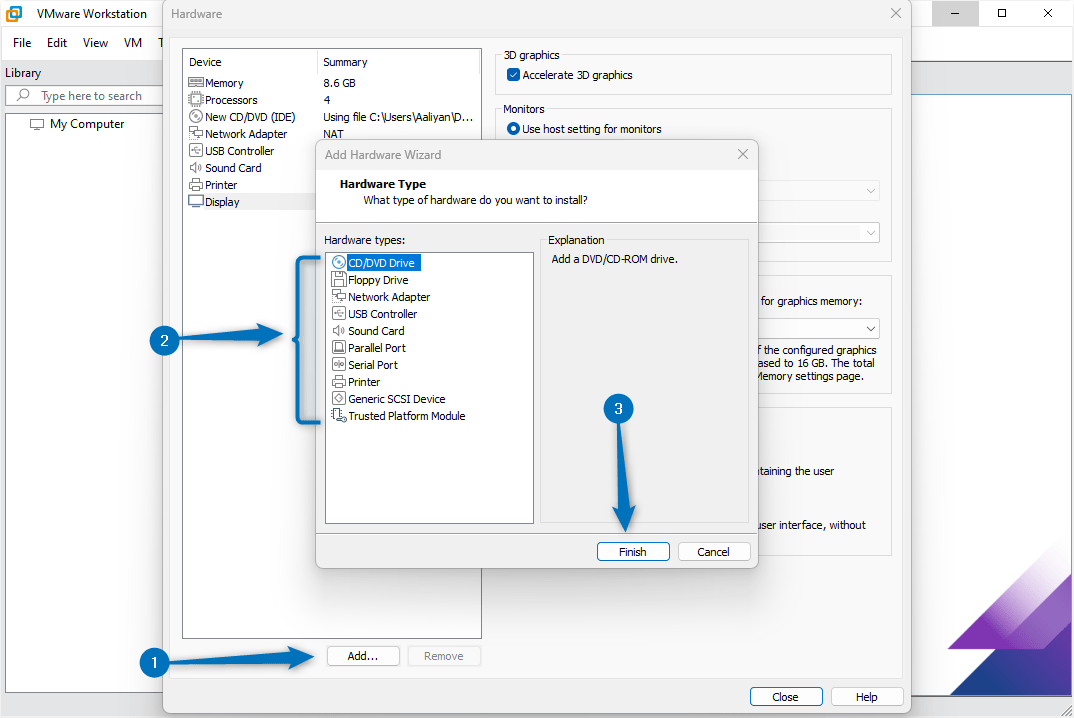
You can also add some additional hardware features as well, just click on the add option and you will come across a list of features that you can add to your virtual machine:
Step 3: Install Debian 12 on VMware virtual machine
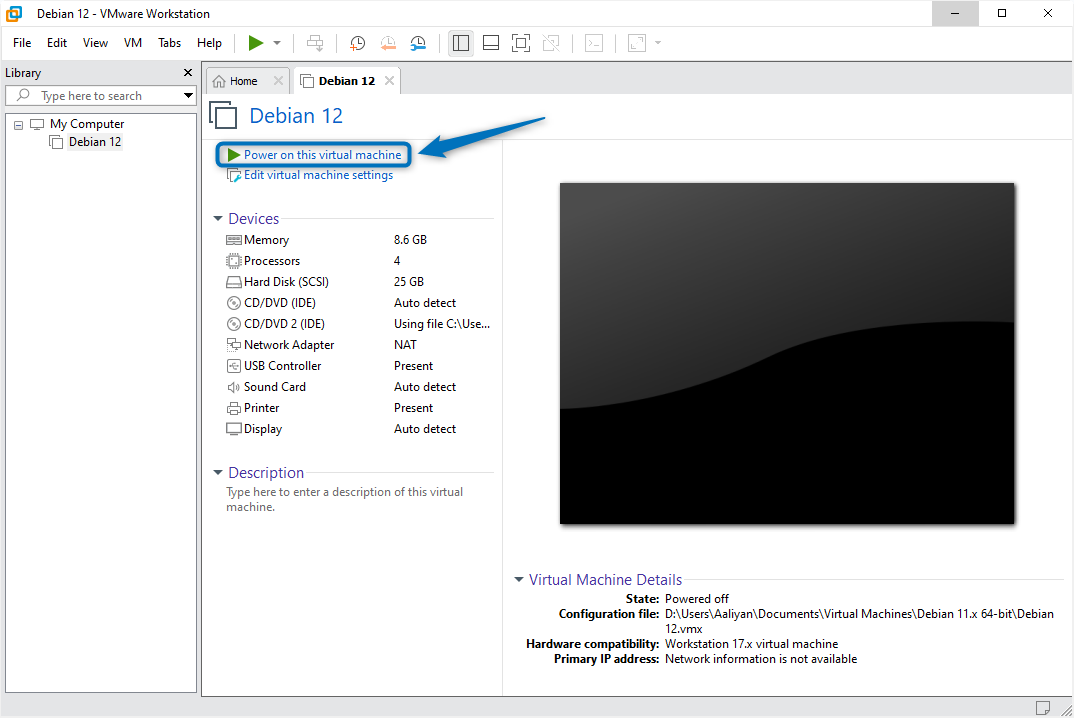
Once the virtual machine is created launch it by clicking on Power on this virtual machine:
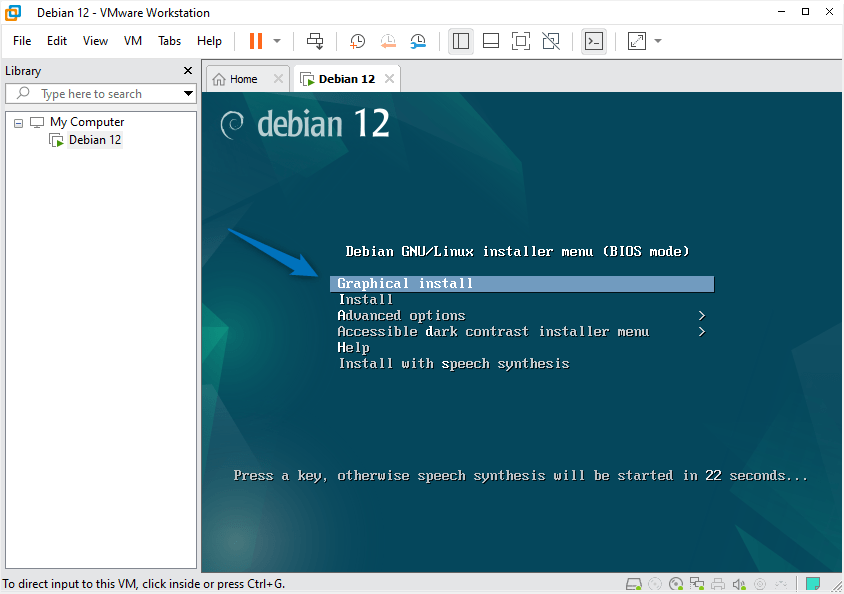
Now click on the Graphical Install option from the installation menu of Debian 12:
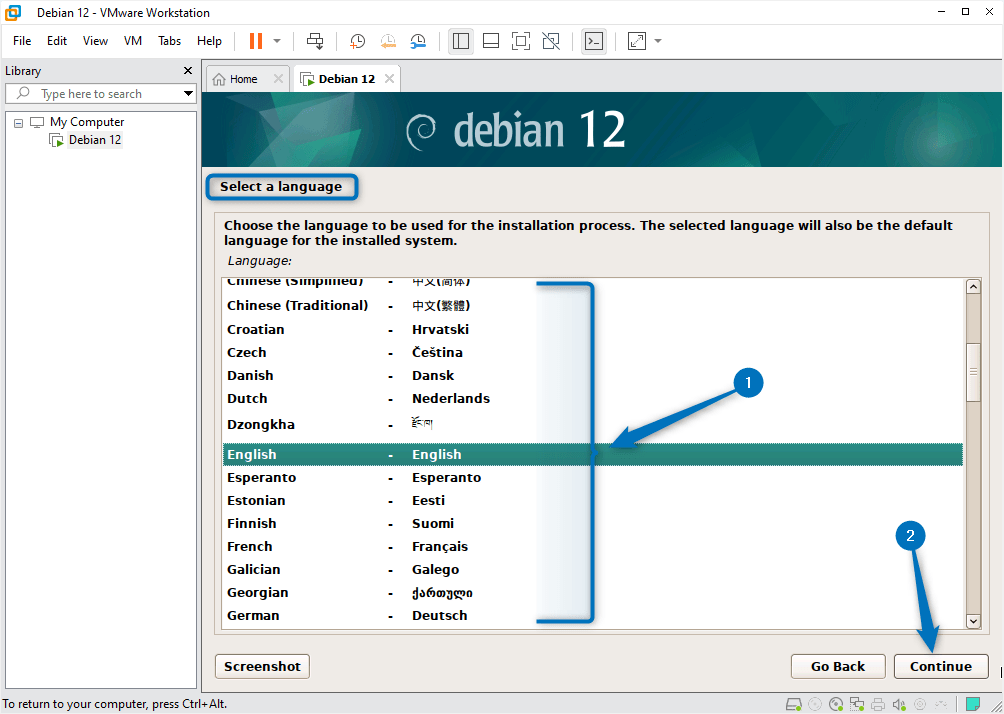
The first setting you will have to do is to Select a language for the installation wizard, once selected click on Continue:
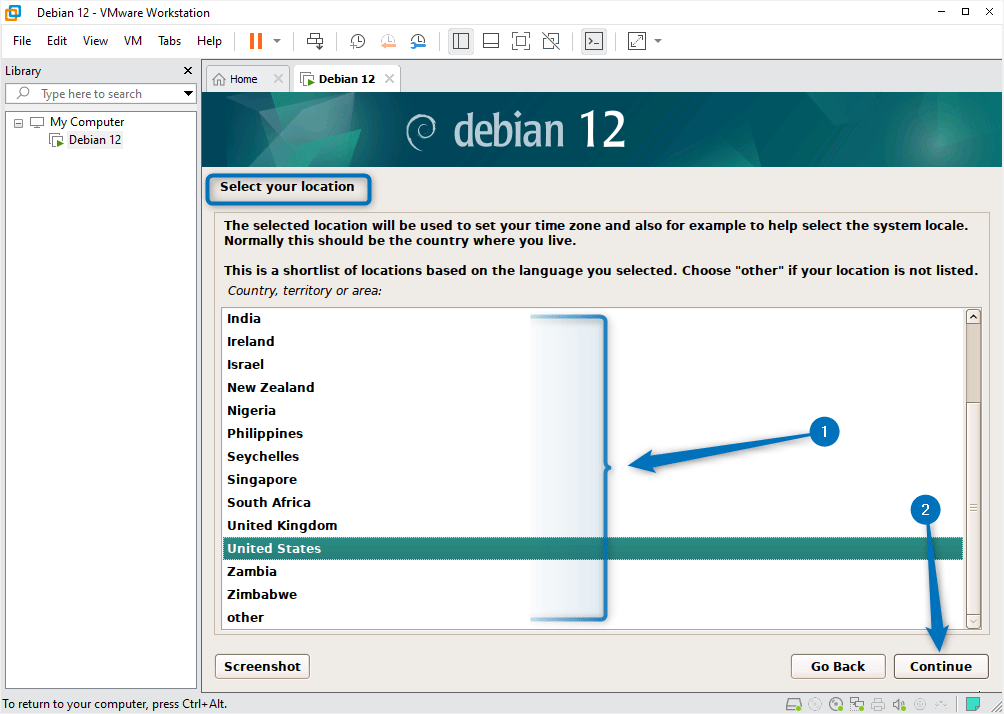
Next, select your location and the country you are residing in:
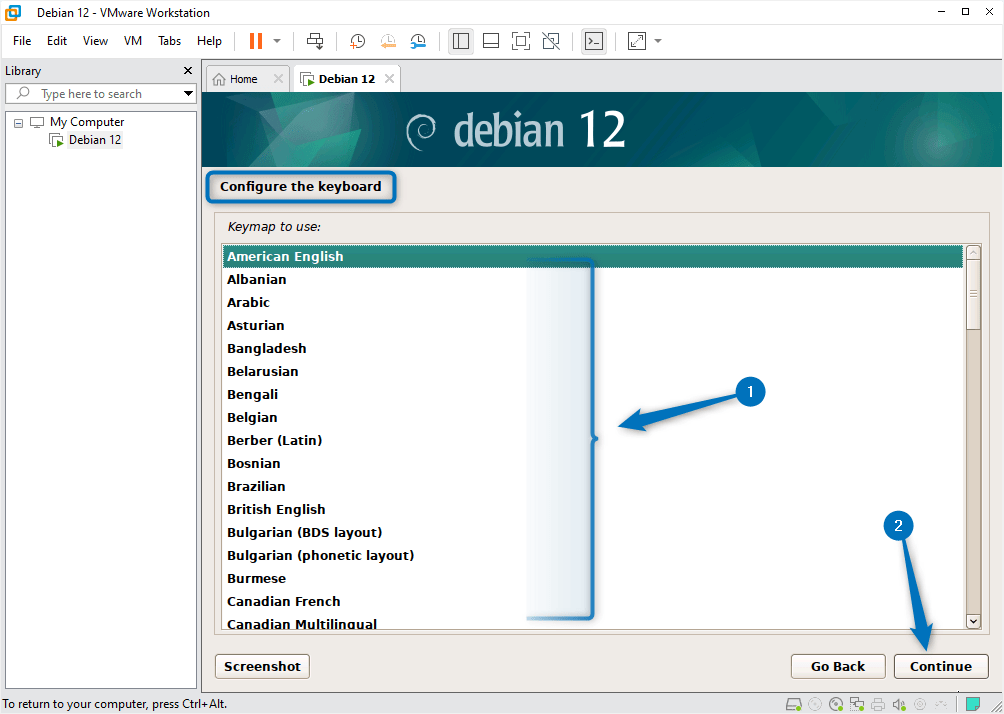
Based on the language and the location the keyboard layout varies so next, select the desired keyboard layout for your Debian 12 virtual machine on VMware:
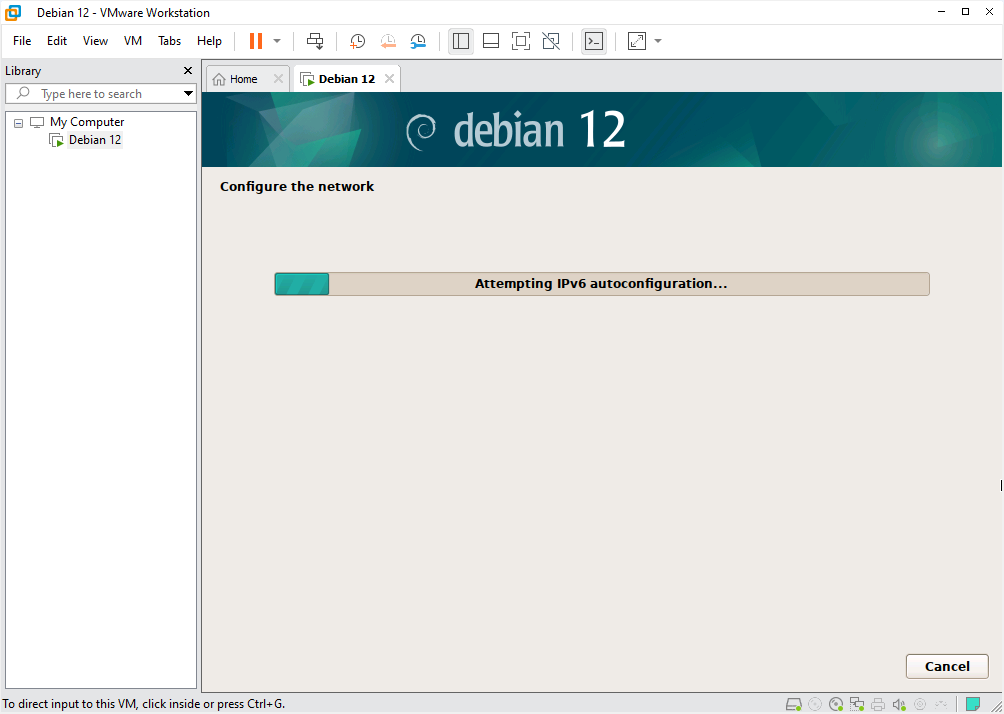
Now some installations and configuration will begin:
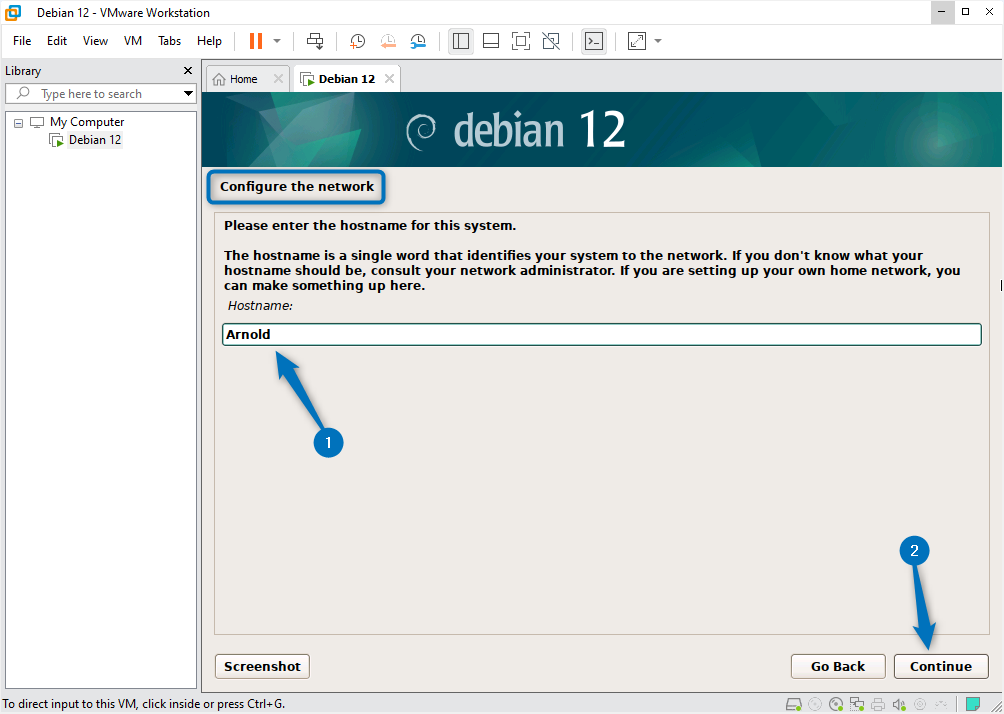
On Debian 12 and all other Linux distributions there are three types of hostnames. Here enter your dynamic hostname which is primarily used for network:
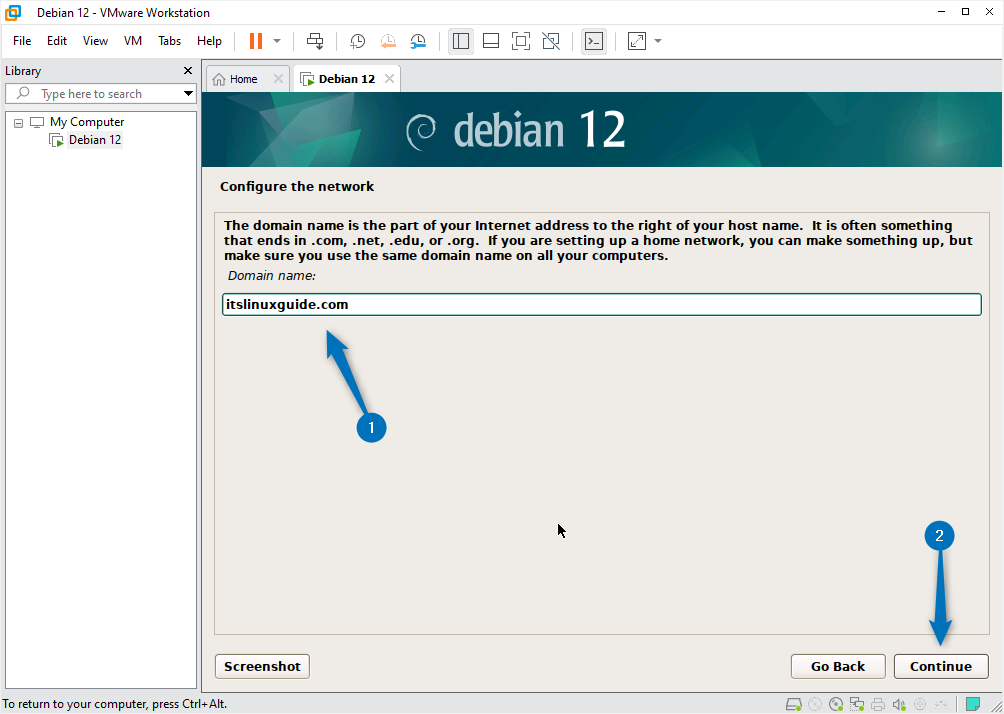
The next option is optional, if you have some domain go ahead and enter it otherwise you can simply skip it by clicking on Continue:
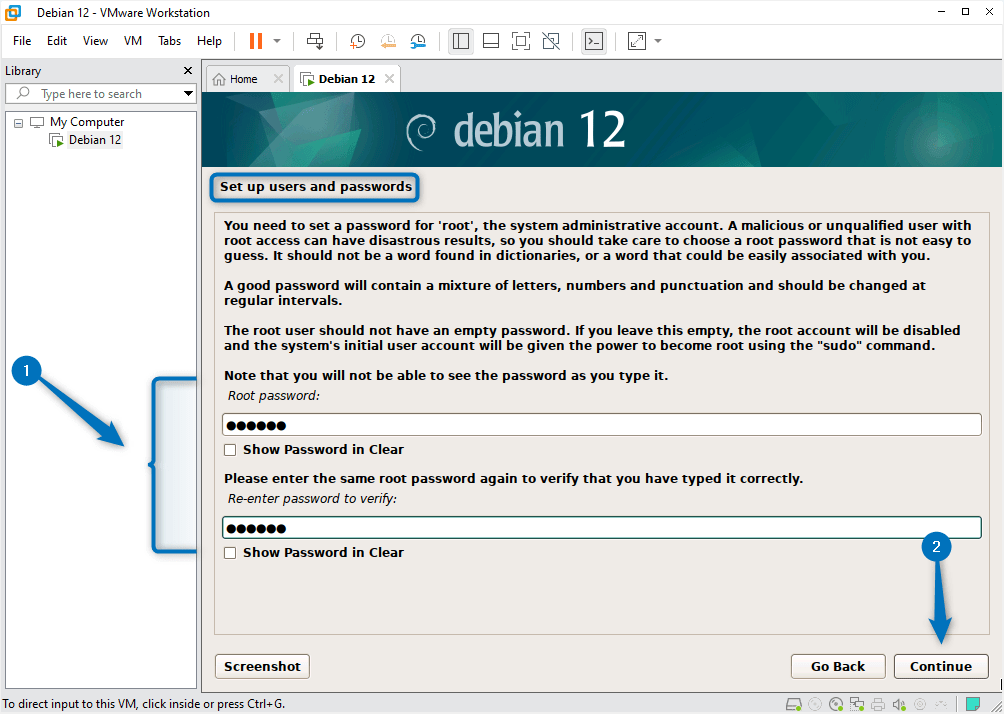
Now set the password for your Debian 12 root account:
Next up is setting up the non-admin user account for Debian 12, so here enter the full name of the user for whom you want to create a non-administrative account and proceed:
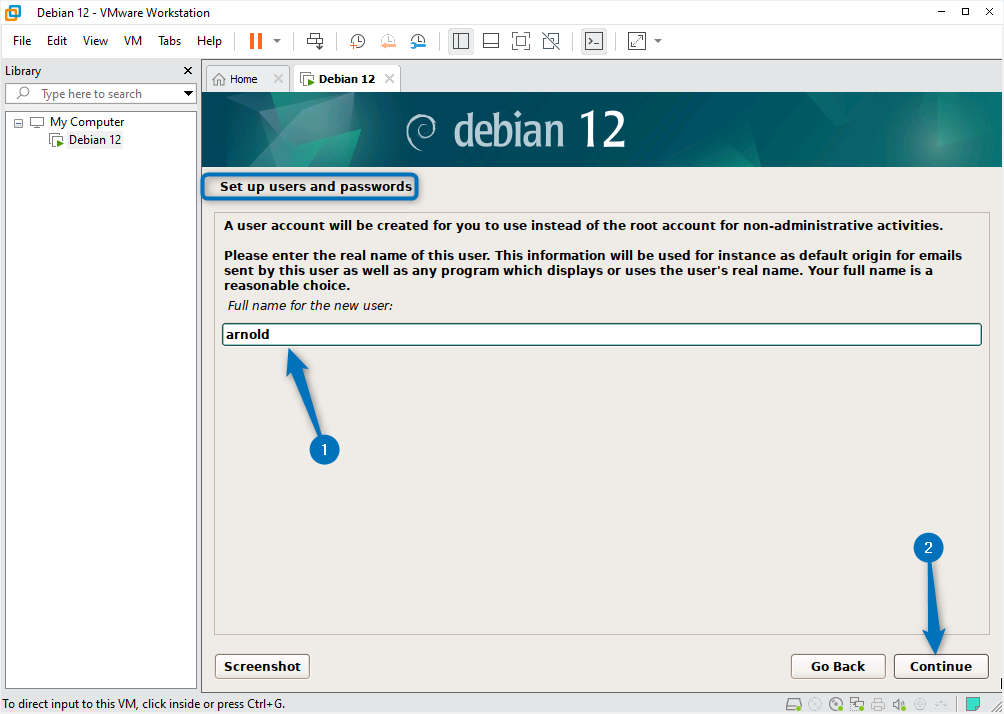
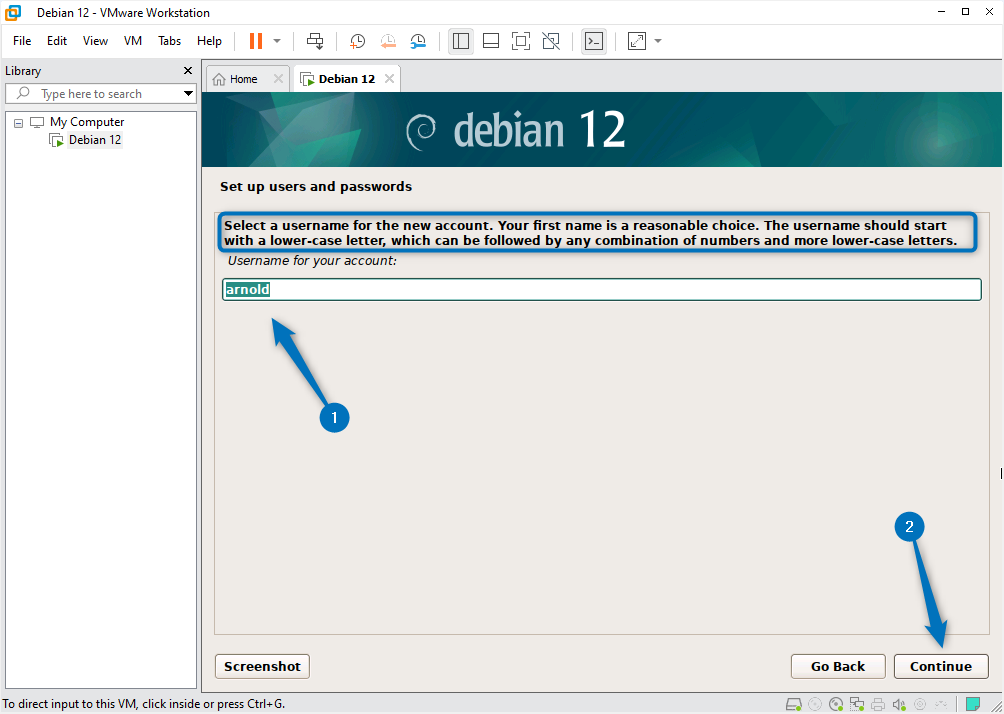
Now set the username for the account which comes under the static hostname type. Keep in mind that the user name should not start with an uppercase letter:
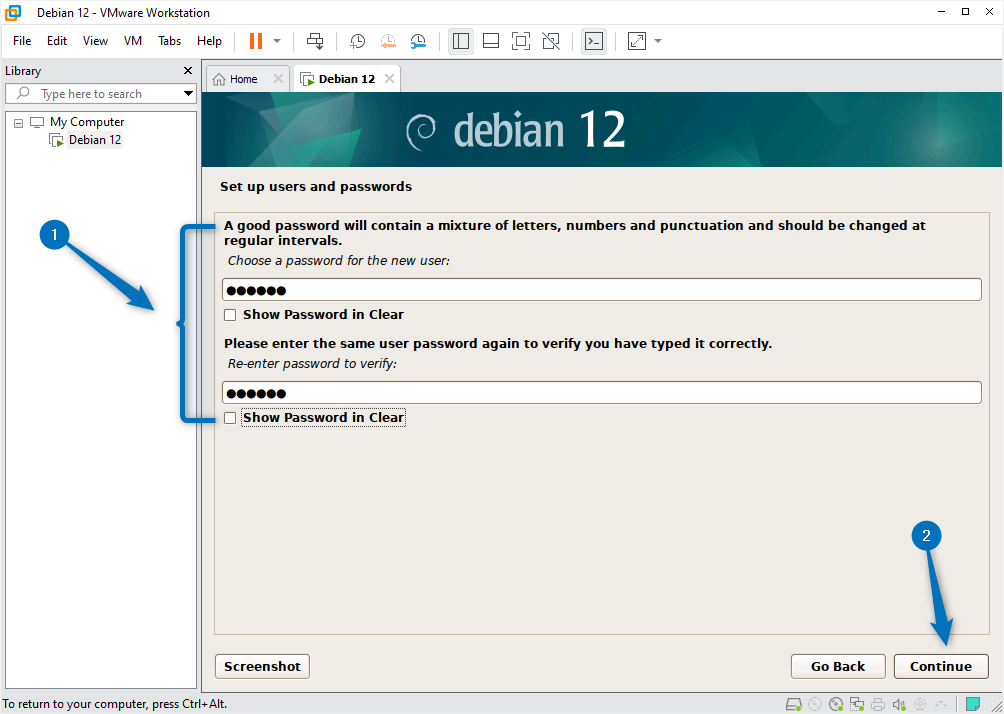
Just like the root user account set the password for the non-admin account:
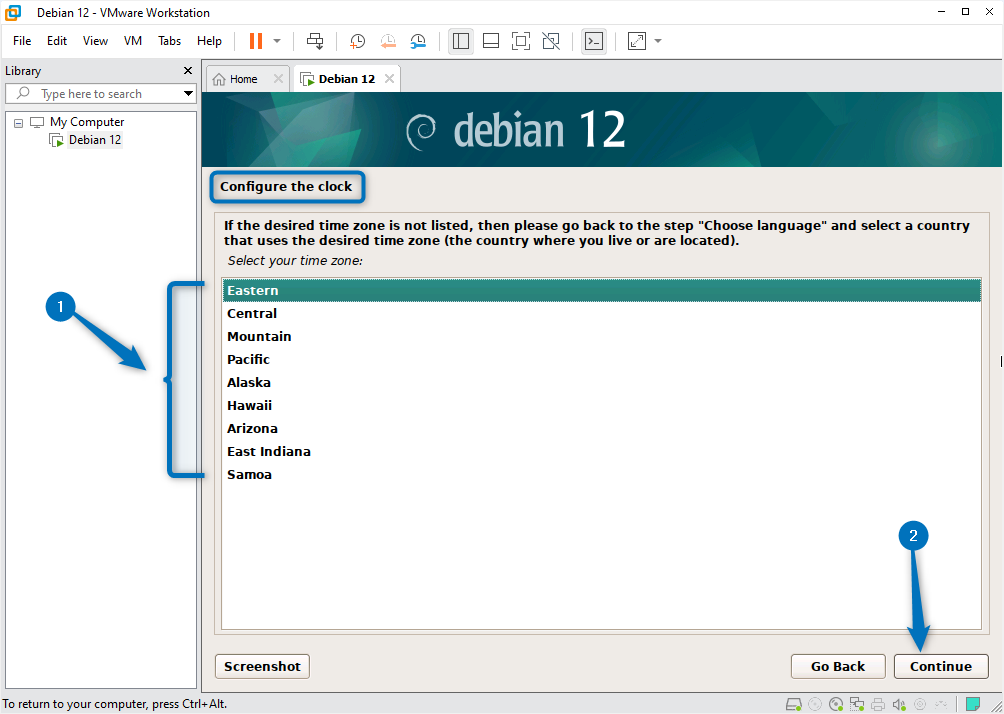
After creating the user for Debian now set the clock and for that set the region for it, remember that these regions will show based on the location that we set earlier:
Now the disk partition setup will start, the first option is to select the partitioning method. Here the first partition method is recommended:
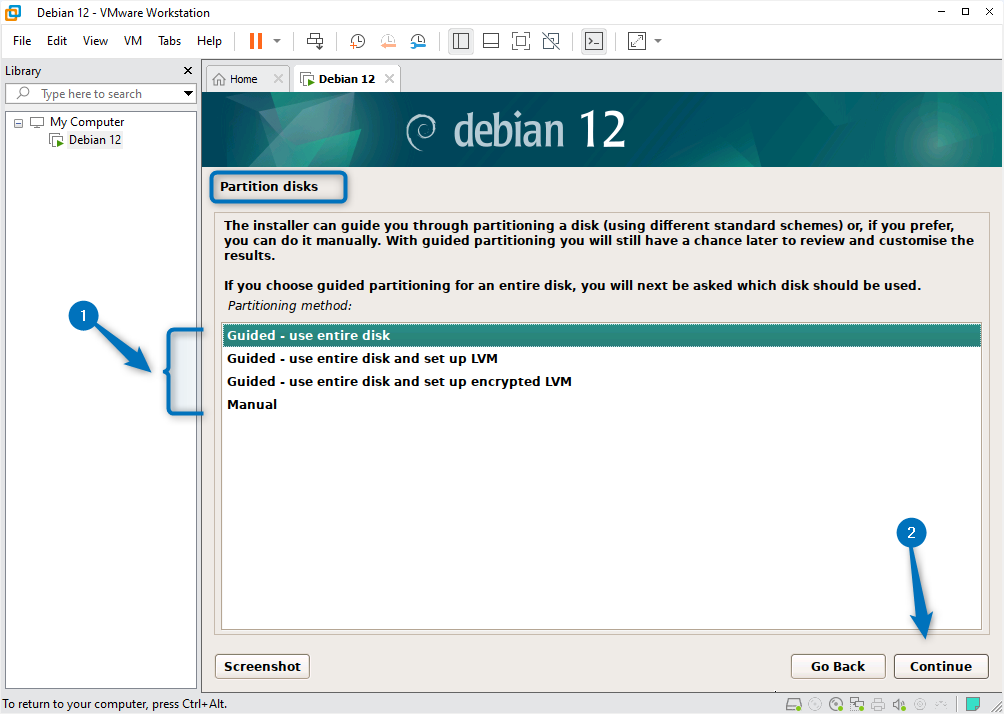
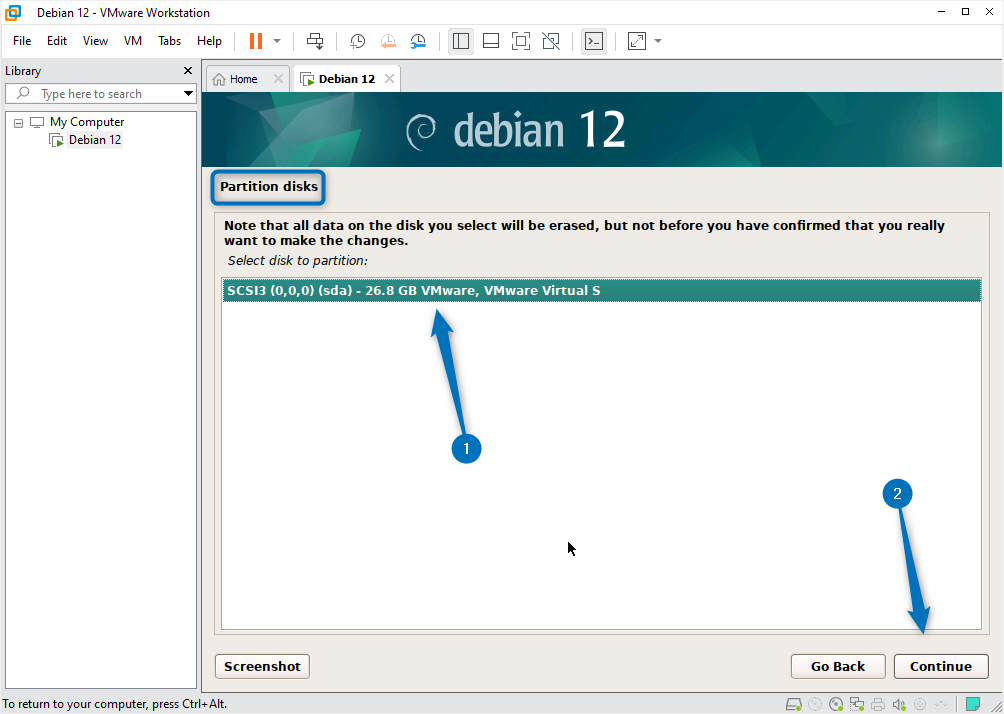
Since only a single storage disk is created so here it is already selected when it comes to selecting the suitable disk for partition:
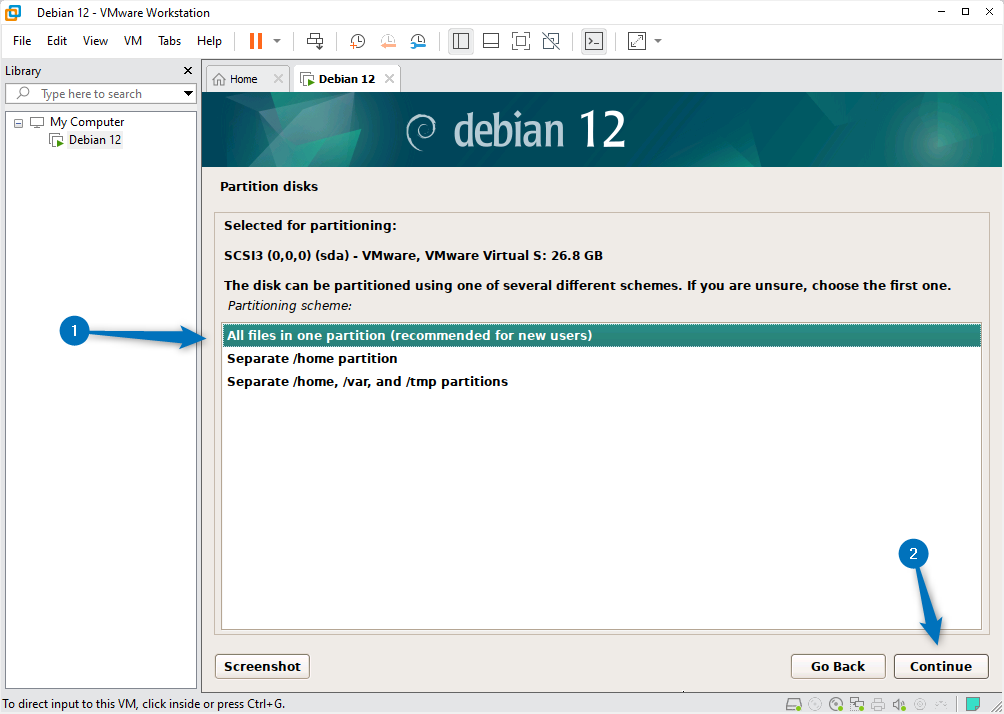
If you are a beginner then it is recommended to keep all the files on one disk as they will be easy to manage:
Next review all the disk partition settings and once you are done with it select Finish partitioning and write changes to disk option, afterward click on Continue:
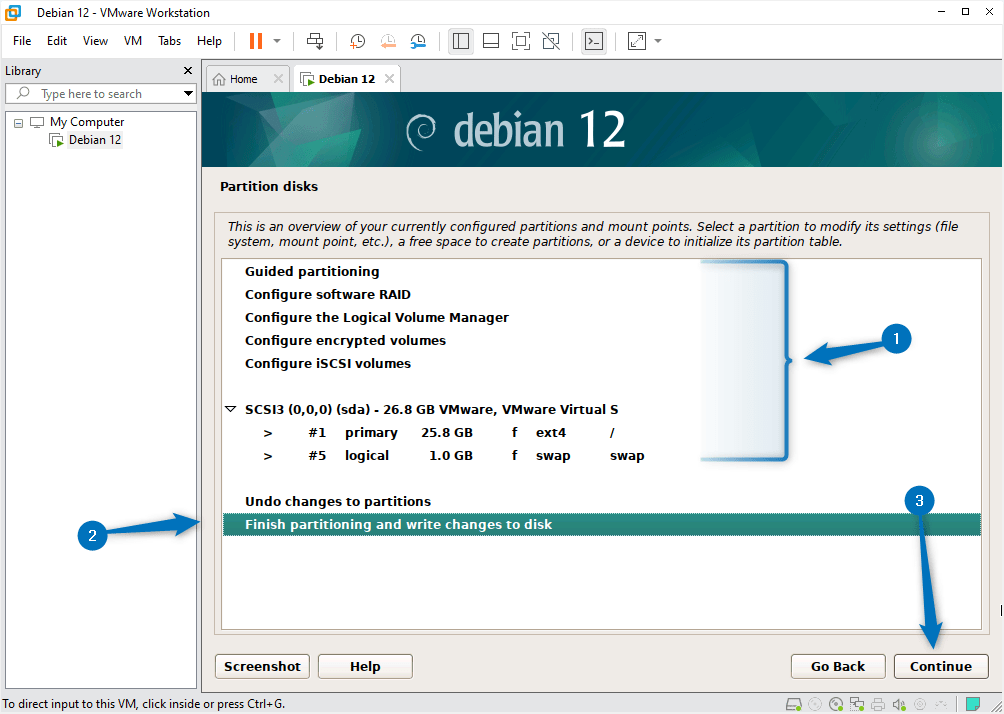
Now allow the erasing of the partition disk:
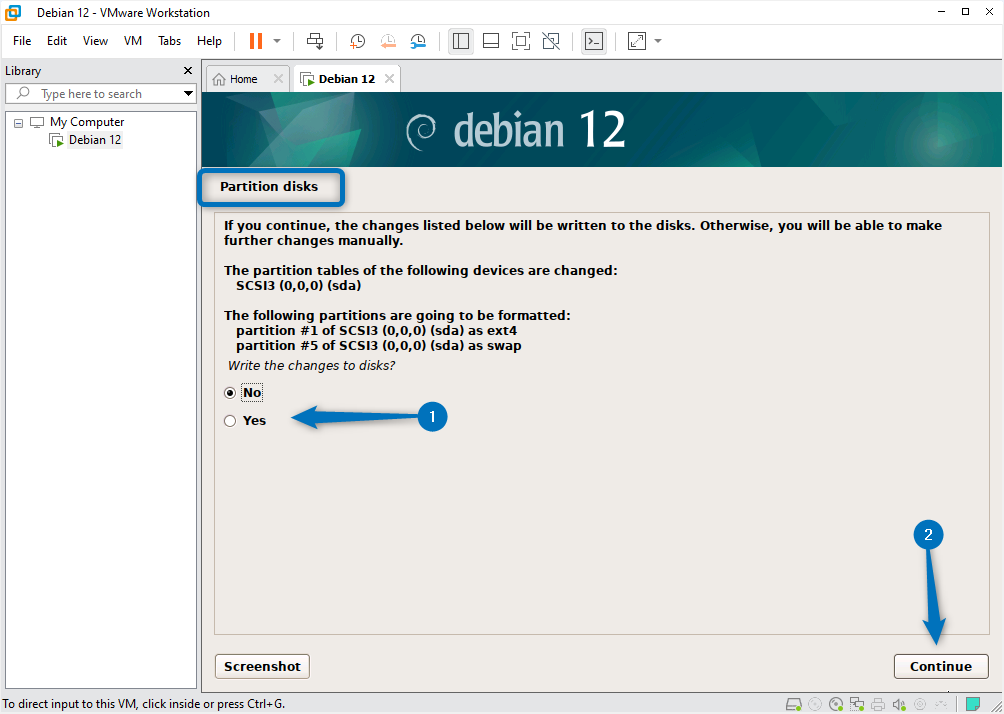
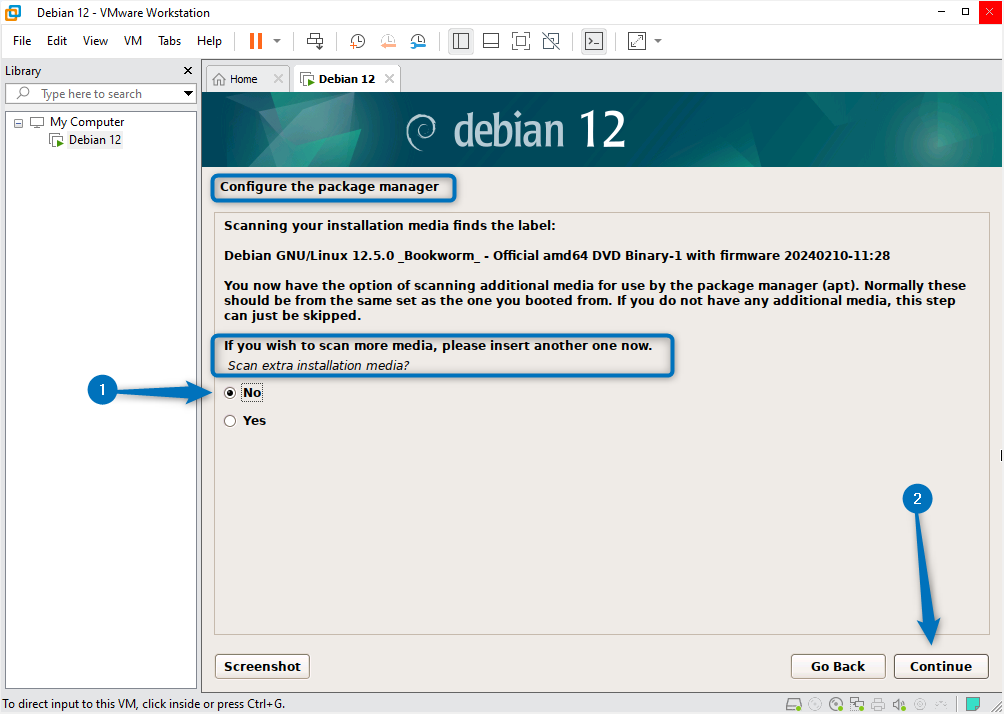
Next, if you have any additional media you can add it here otherwise you can skip it by selecting No:
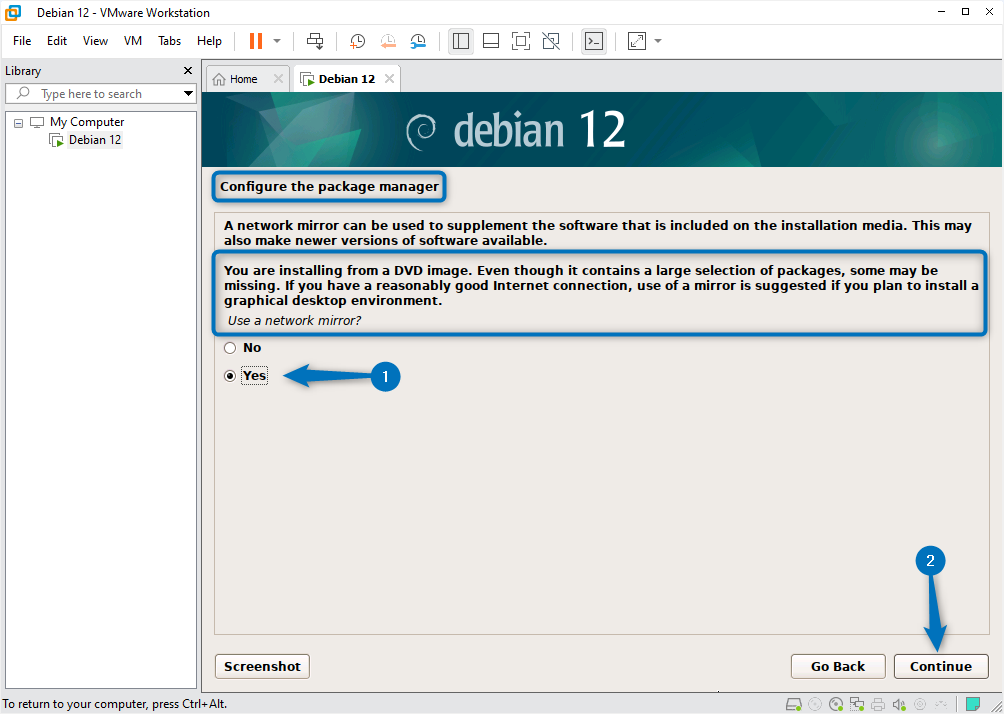
The package managers on Debian 12 specifically the default one use the mirror list for installing any application. So it is necessary to use a network mirror:
Now for the mirror list you need to select the server location as well so choose the location relevant to your system location, yet it is not compulsory to have the same location server:
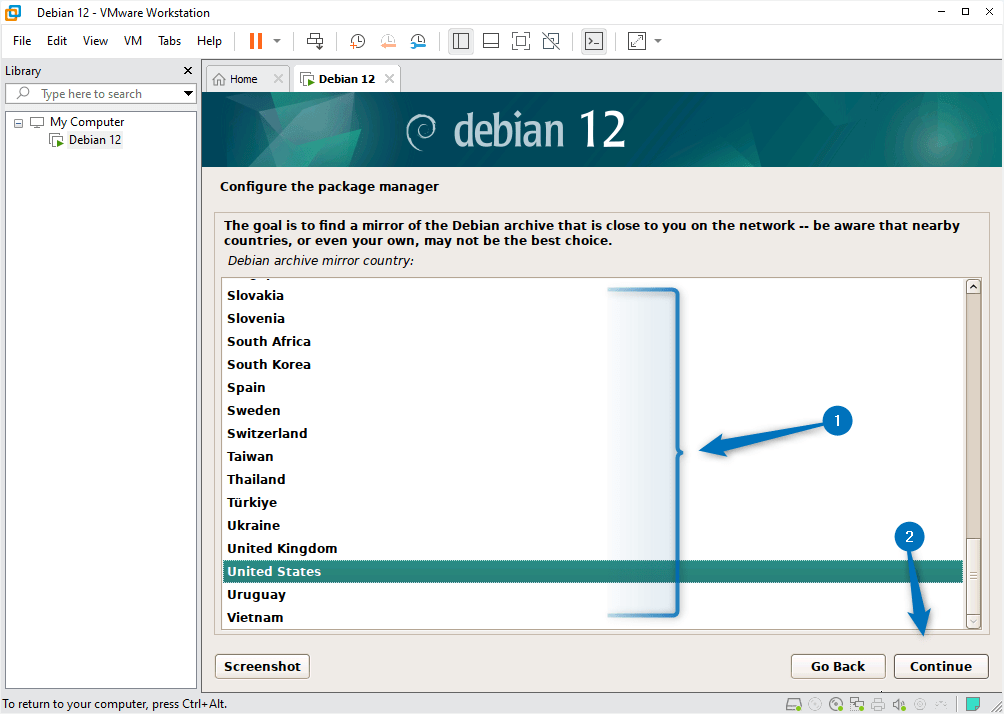
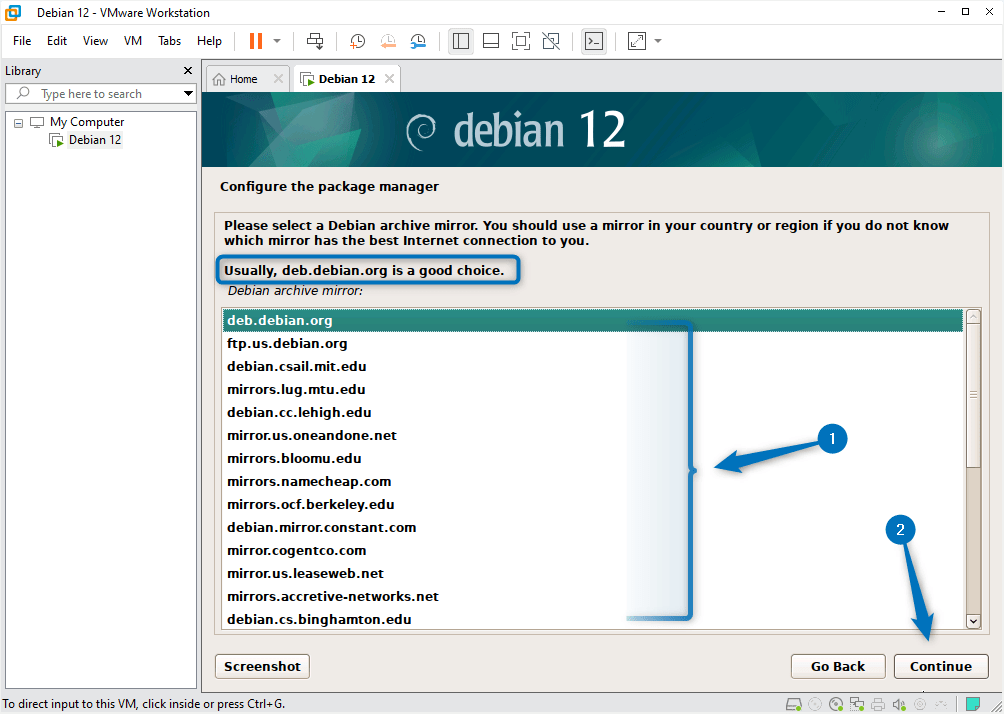
Next, select the suitable Debian archive mirror, here it is recommended to go for the first option:
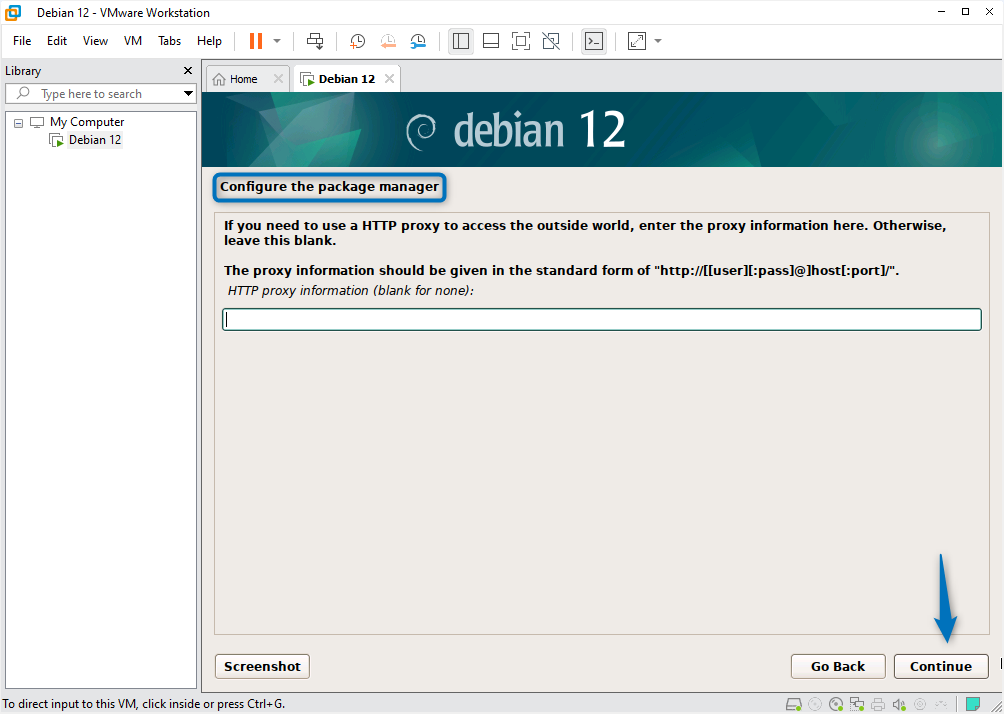
You can also add the proxy information as well to access the outside world but you can leave it blank:
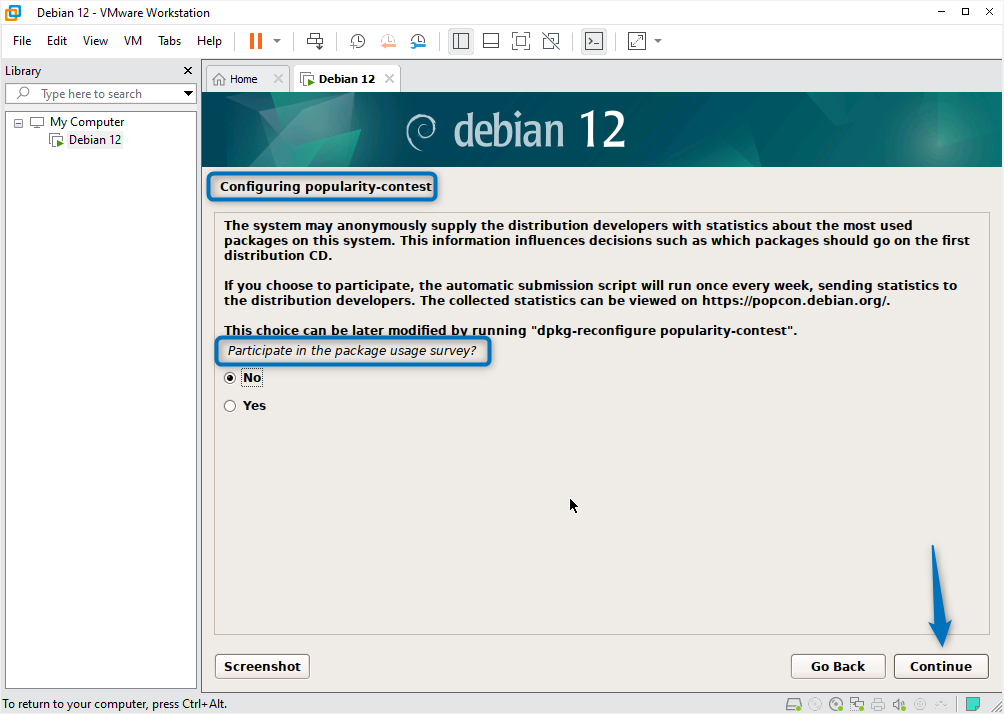
The next option is also optional as it is about participating in a survey, you can select the to participate by selecting the yes option, otherwise select no and proceed by clicking on Continue:
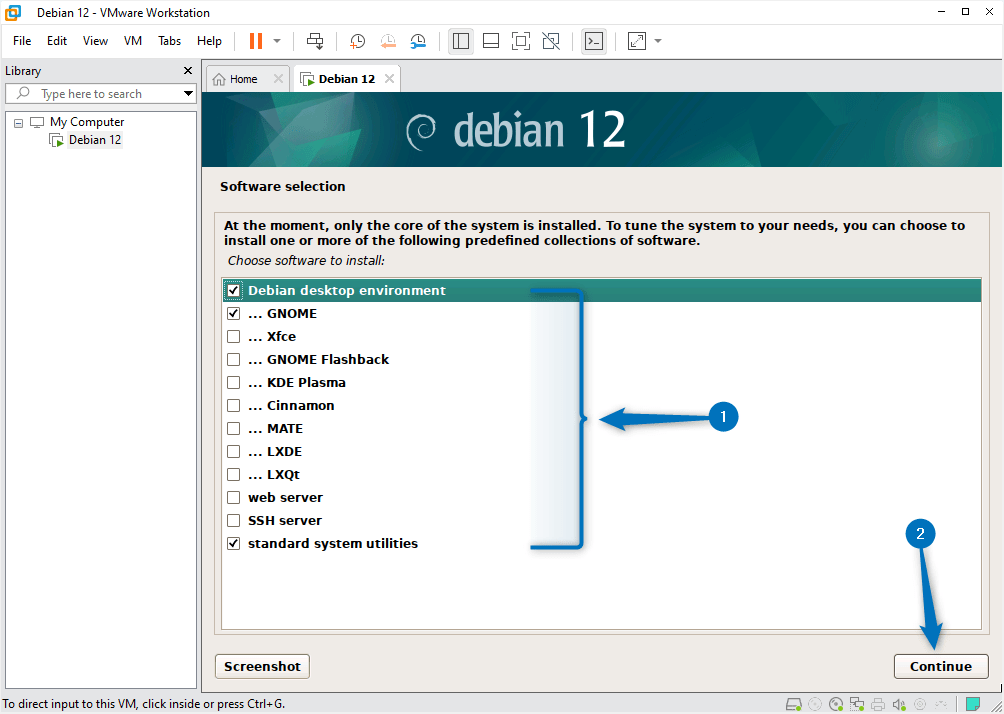
Selecting a desktop environment while installing Debian 12 or any other Linux distribution is crucial as your whole user experience is based on it. Here I have selected the GNOME desktop environment. Also, select the system utilities option:
The bootloader or GRUB menu is important for Debian 12 as you can load similar operating systems having different kernels or you can reset or change the root password for your root account:
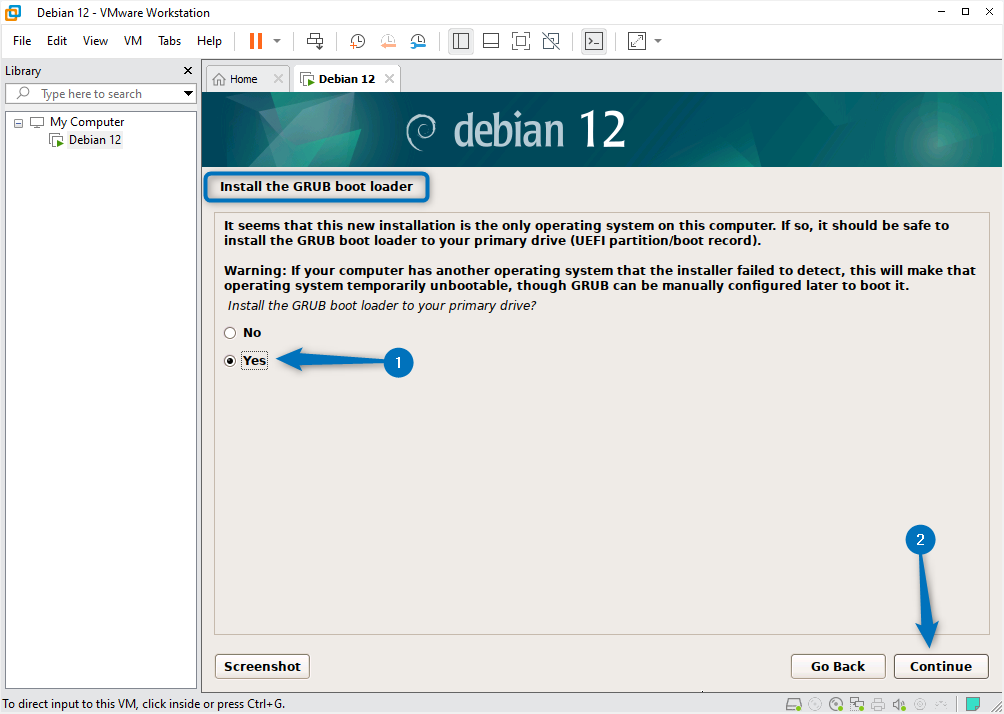
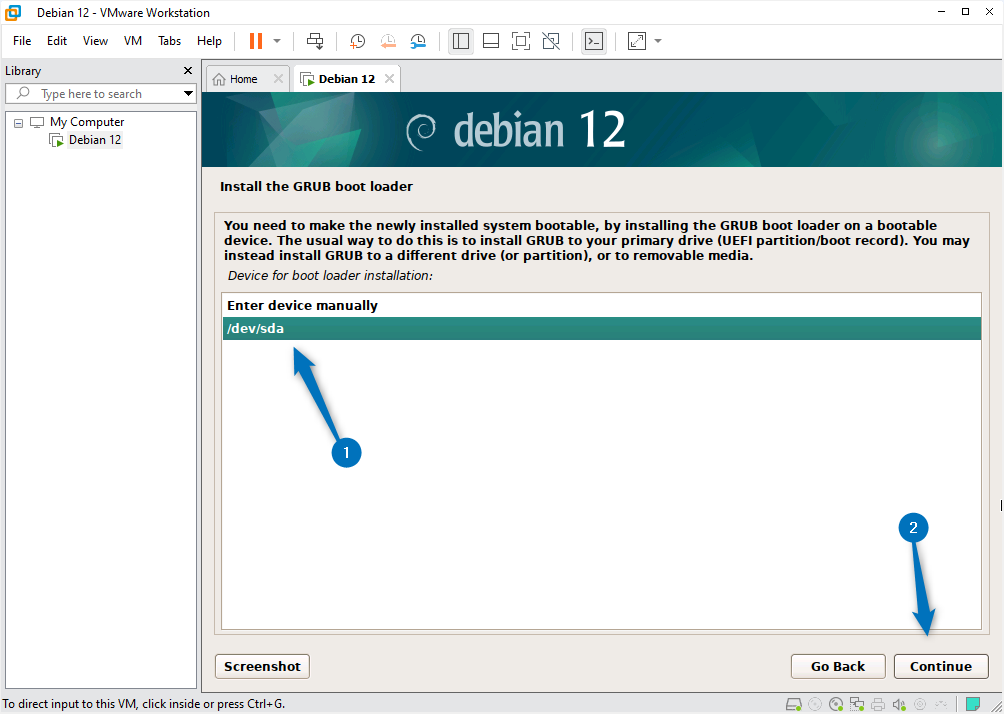
Next, select the drive in which you want the GRUB menu to be installed:
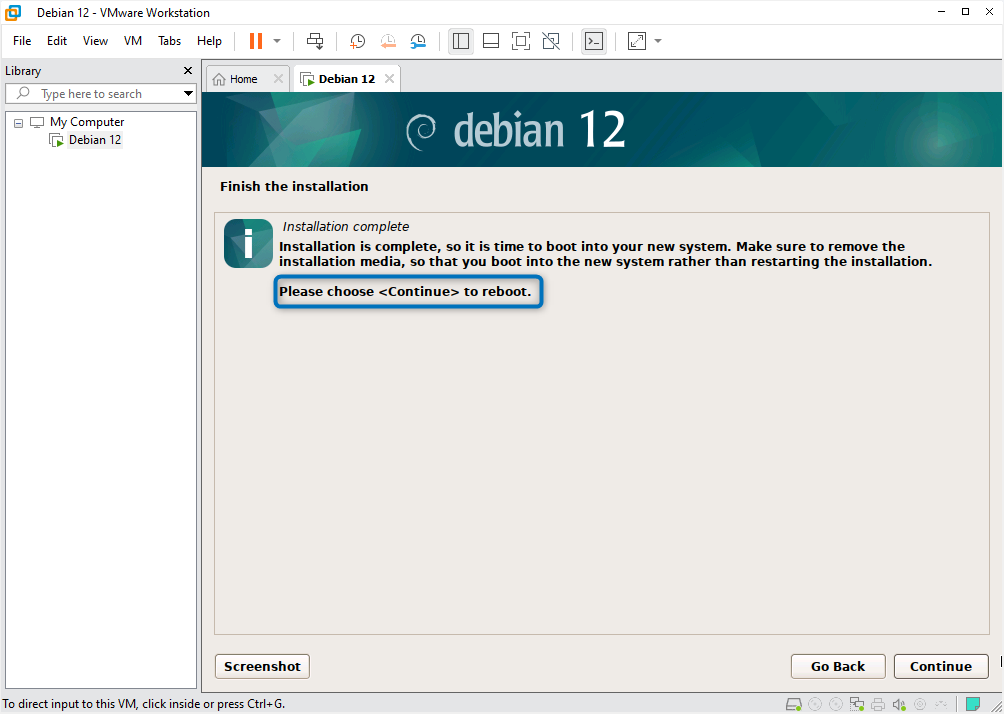
Once the setup is completed, reboot the system:
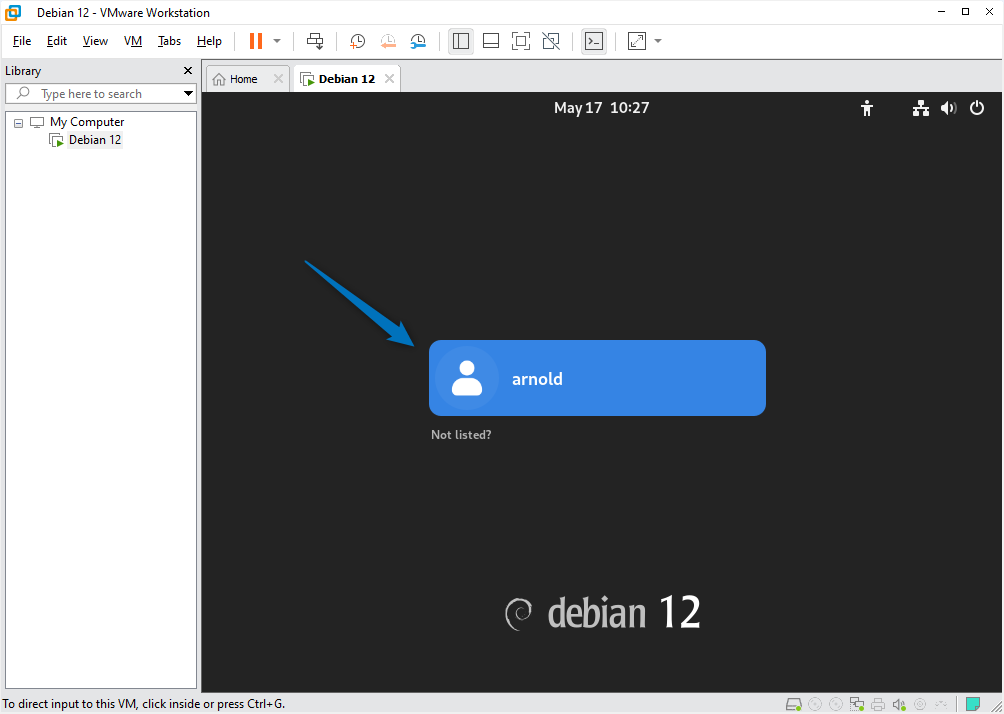
Now login to your Debian 12 non-admin account:
Once you are logged in to Debian 12 in VMware, verify the installed version by executing the below command:
cat /etc/debian_version
Now the process of installation is completed. To add any Debian user in the sudo group or want to make that respective user admin then read my article on how to add users in sudoers file in Debian 12.
Conclusion
To install Debian 12 on VMware first download its ISO file, then create a new virtual machine, and then launch it. Once you add the path for the Debian 12 ISO file simply load it and then follow the instructions offered by the Debian installation wizard.
