
Installing operating systems virtually serves several benefits which mainly include efficient utilization of hardware resources, easier migration, and deployment. Kali Linux a Debian-based Linux distribution is generally used for digital forensics and penetration testing. It can also be installed virtually. VMware is one of the popular virtualization platforms that allow the virtual installation of Kali Linux and this guide will explain how to install Kali Linux on VMware.
2 Ways to Install Kali Linux on VMware
To install Kali Linux on VMware there are two ways one is by using the Kali Linux installer image and the other is by using the pre-built Kali Linux setup. So here are some steps to install Kali Linux on VMware.
Step 1: Select and Download the Kali Linux Installer
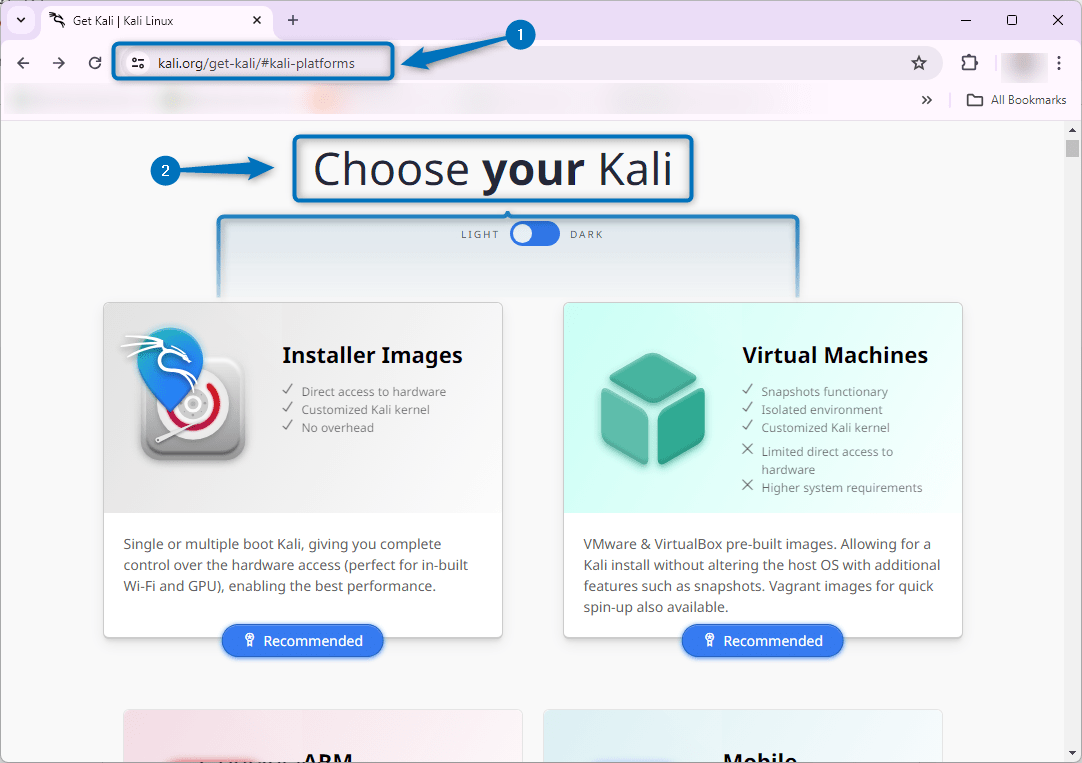
The first step to install Kali Linux on WMvare is to choose the type of setup file. As mentioned above there are two types of files so visit the Kali Linux download page and click on the desired file setup:
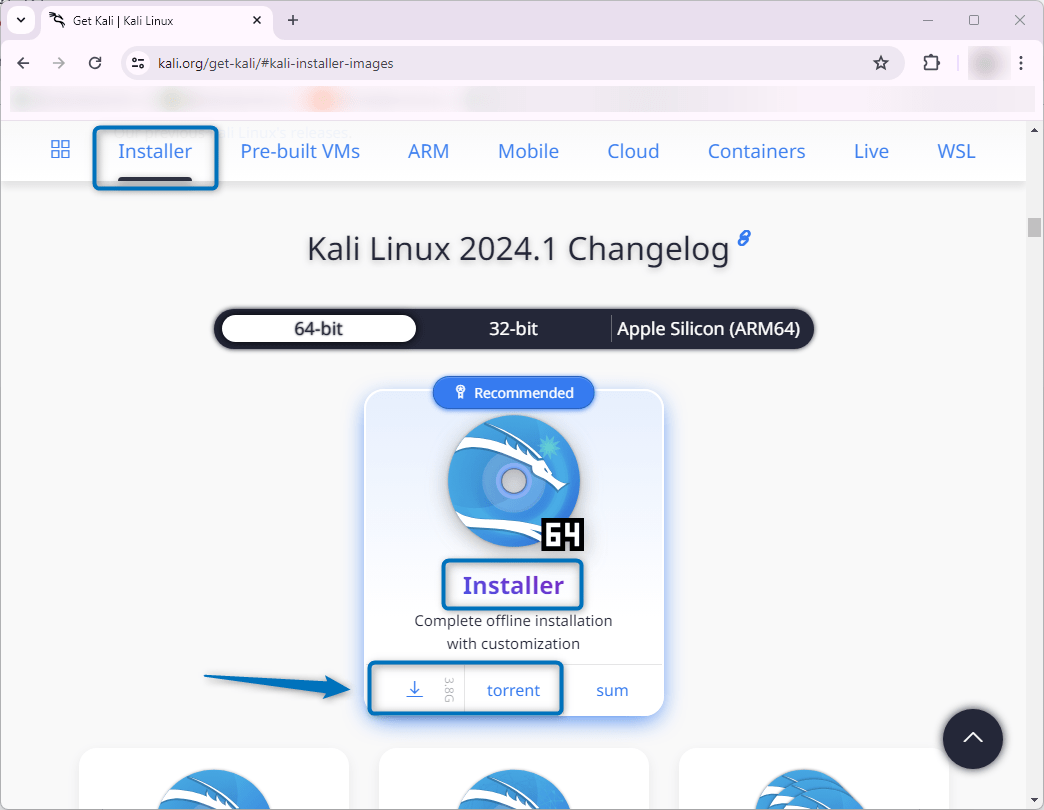
Here if you select the Kali Linux installer image file then you have to download it either manually or via a torrent application. Don’t forget to select the desired system architecture based on the host system hardware specifications:
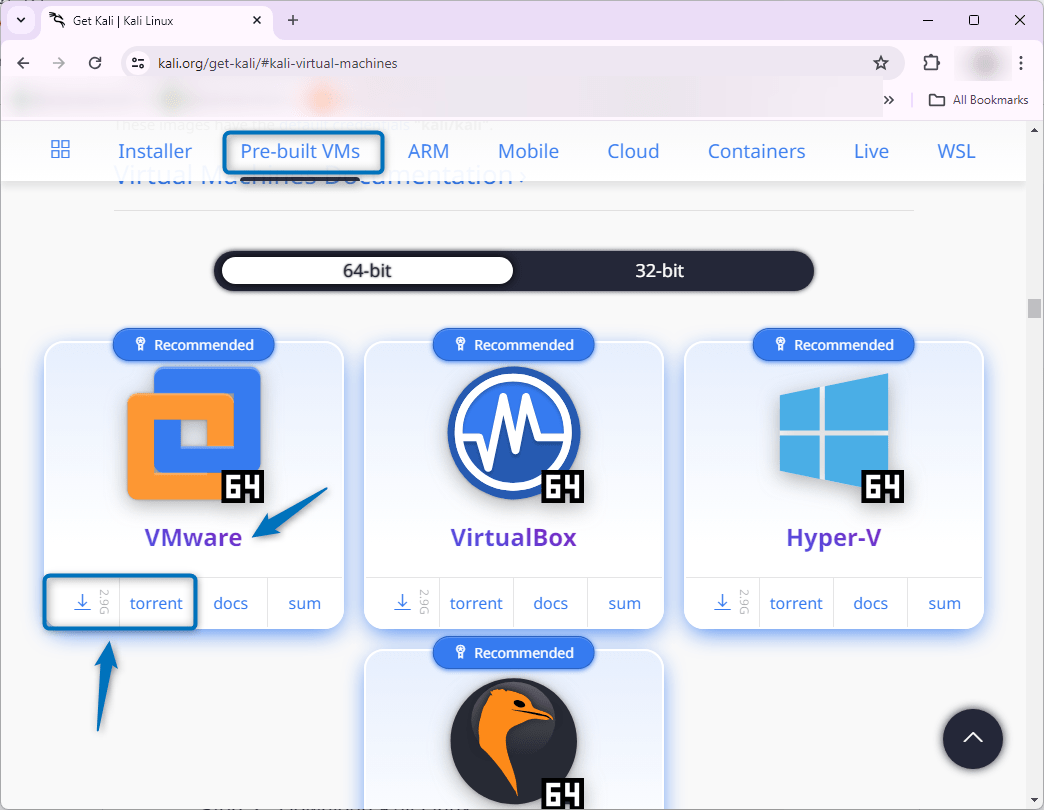
The same is the case for downloading pre-built Kali Linux setup files. Here make sure you are downloading the pre-built file for VMware as it provides different files based on the virtualization platform:
Step 2: Create Kali Linux Virtual Machine on VMware
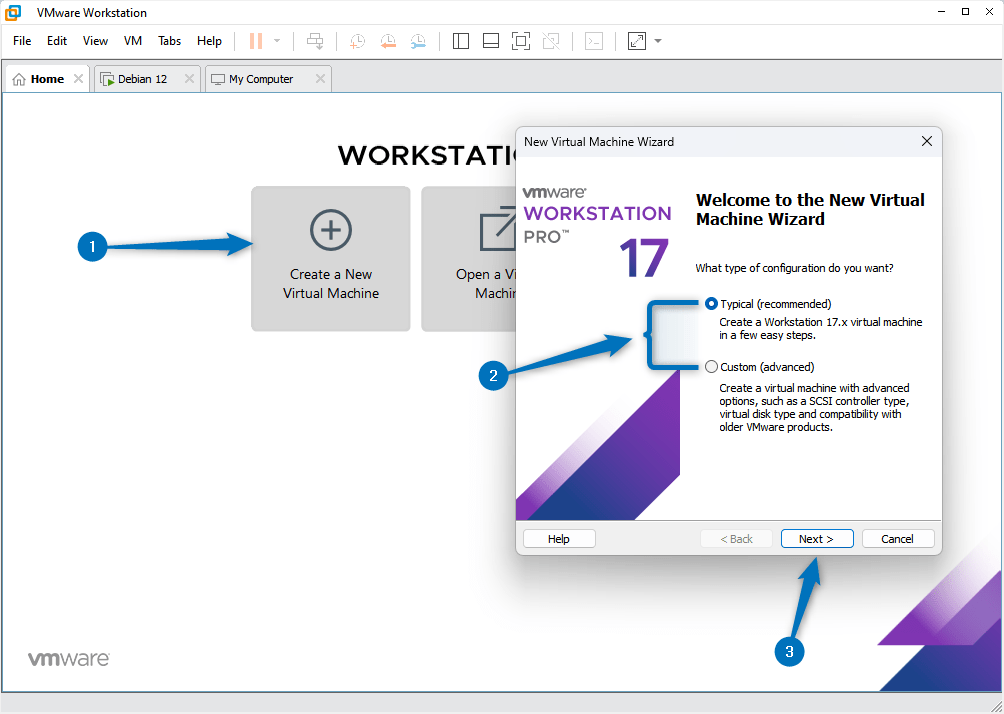
After downloading the setup file the next step is to create a virtual machine in VMware. For that just click on the Create New Virtual Machine option. Next, select the virtual machine configuration, the typical configuration type is usually recommended for beginners but you can select custom if you are an expert:
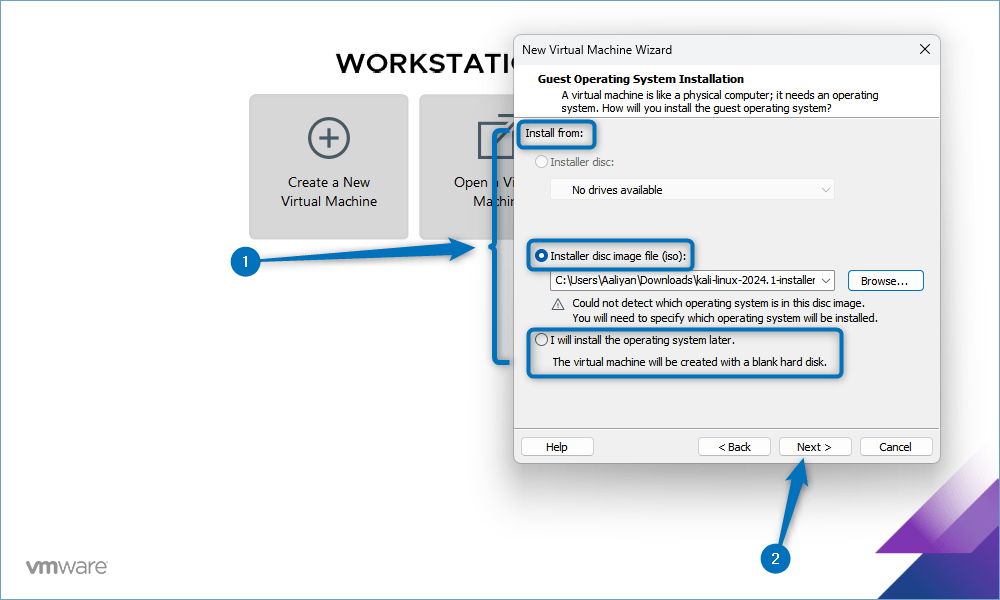
Next, there are three options for adding the Kali Linux setup file one is by connecting a bootable USB drive, the second is by adding the path for the setup file and the third is by adding it at the time of launching the virtual machine:
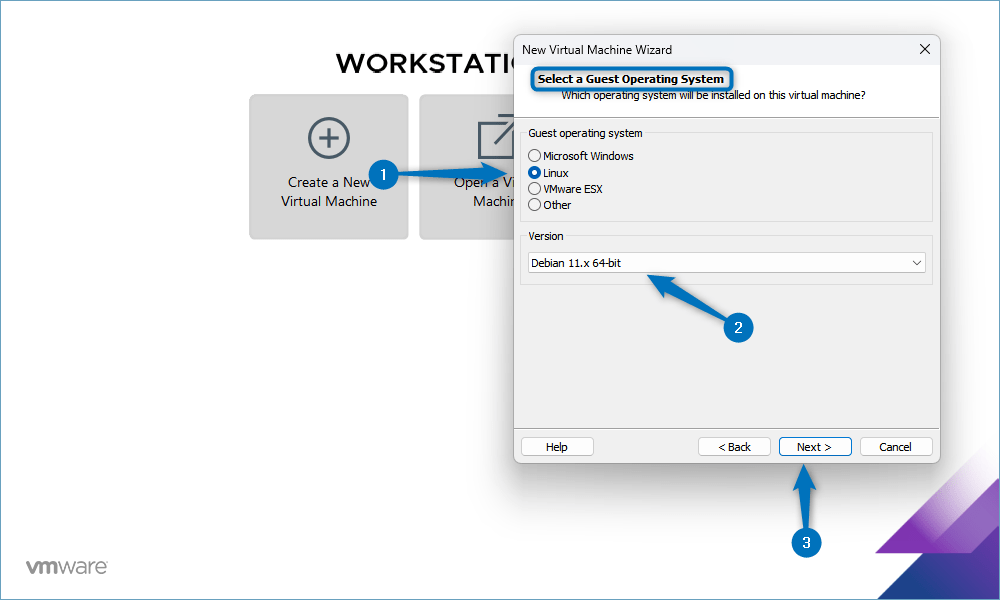
Next, add further details for the Guest operating system. Here you need to select Debian 11 as there is no version of Kali mentioned in the options:
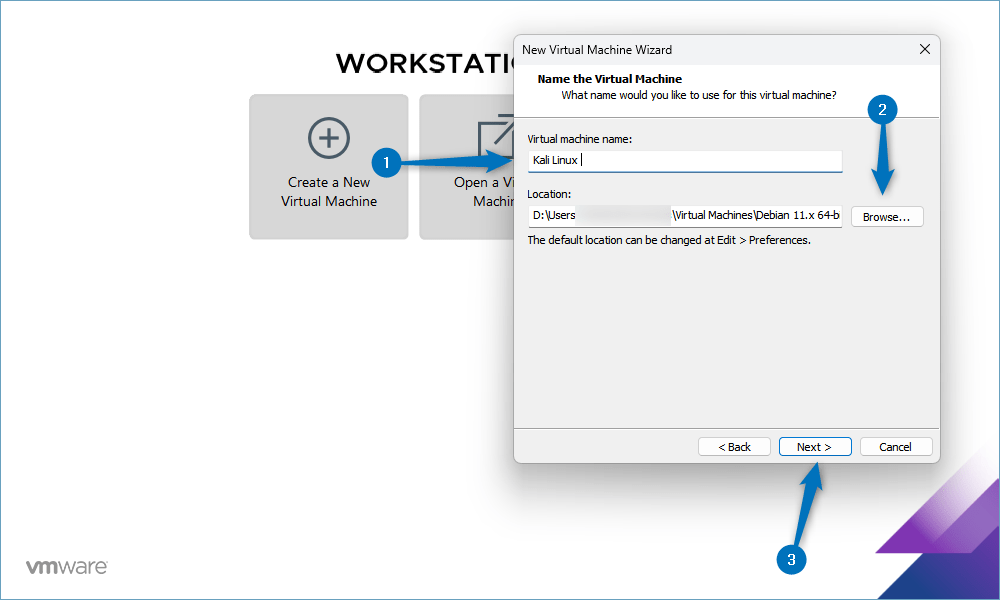
Now name your virtual machine and add the location of the installation directory of the virtual machine:
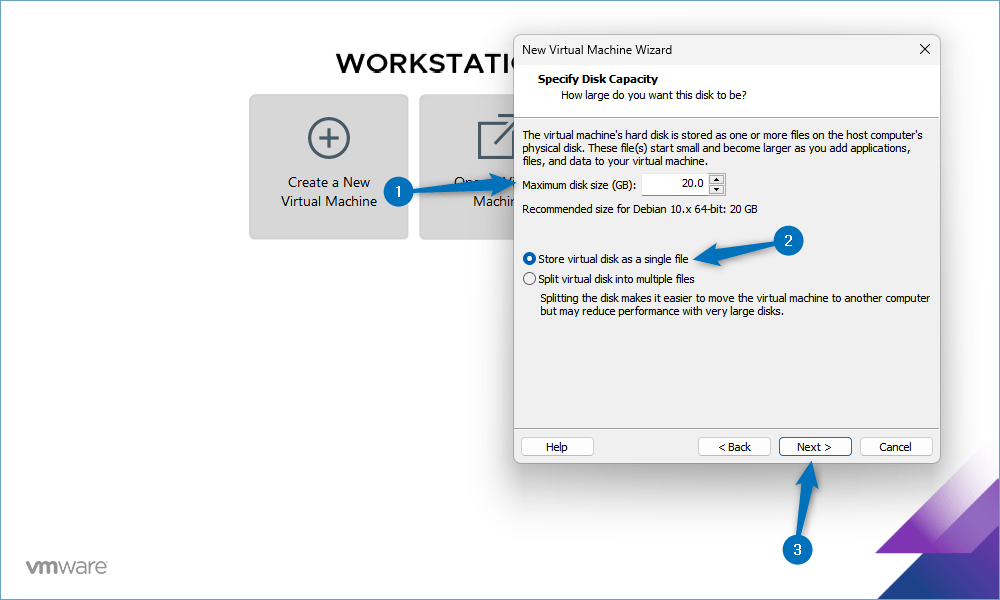
Next, allocate the storage space for the Kali Linux virtual machine. It is better to allocate around 30 GB if you want to use Kali substantially. After that select the file distribution here I would suggest keeping all the virtual disks on a single file:
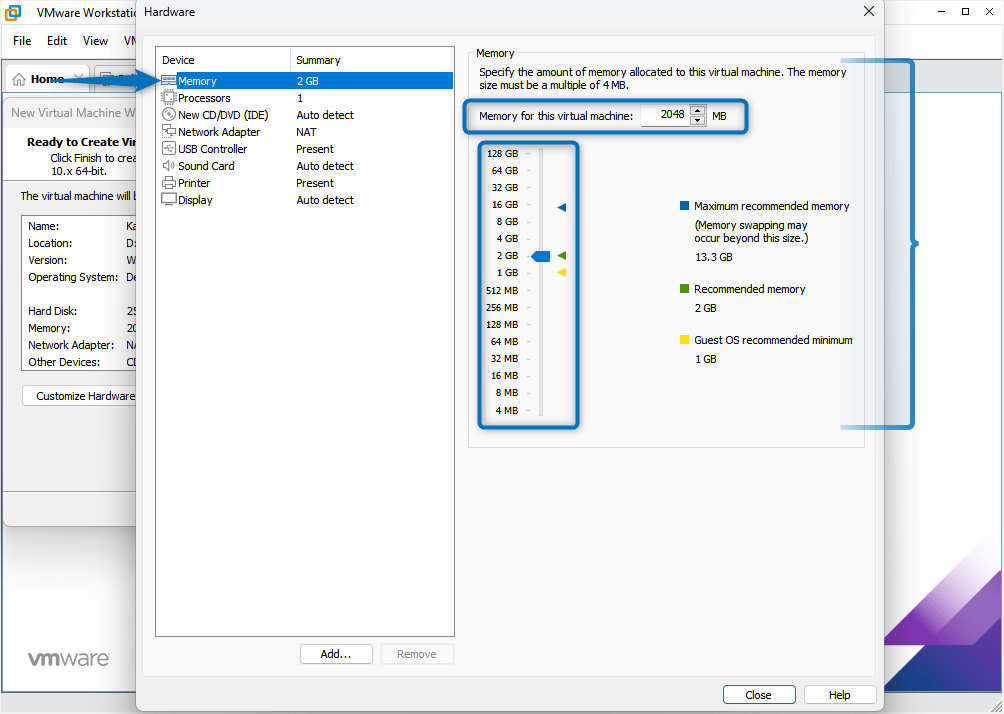
Now you can set some more specifications for the virtual machine and for that click on Customize Hardware. Here you will find several different settings for the virtual machine:

The first is the RAM specifications which you can either set manually by entering a number or by using the slider:
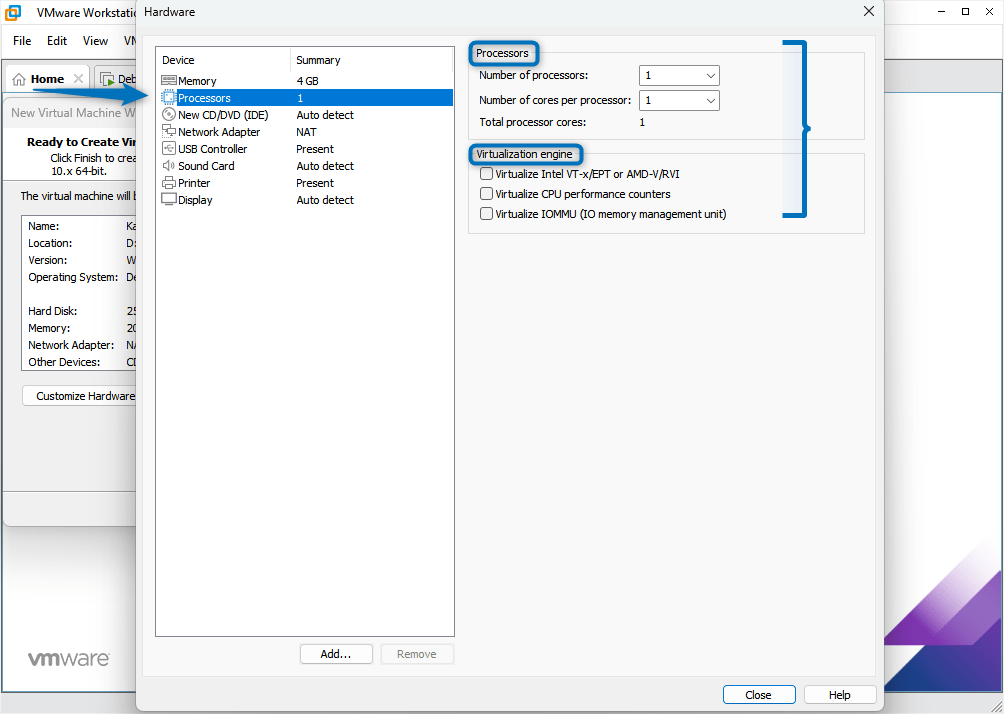
The next setting is allocating the number of processors and CPUs for the Virtual Machine. Further, there are some virtualization options as well which you can turn on:
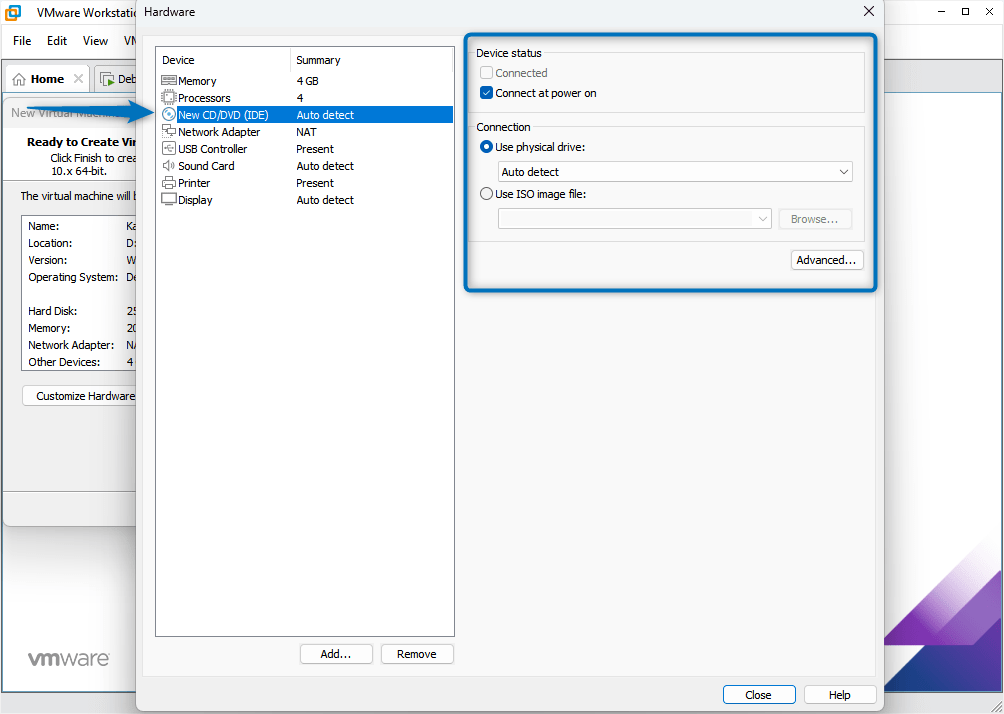
In the New CD/DVD (IEC) settings of VMware you can set the connection settings and device status settings:
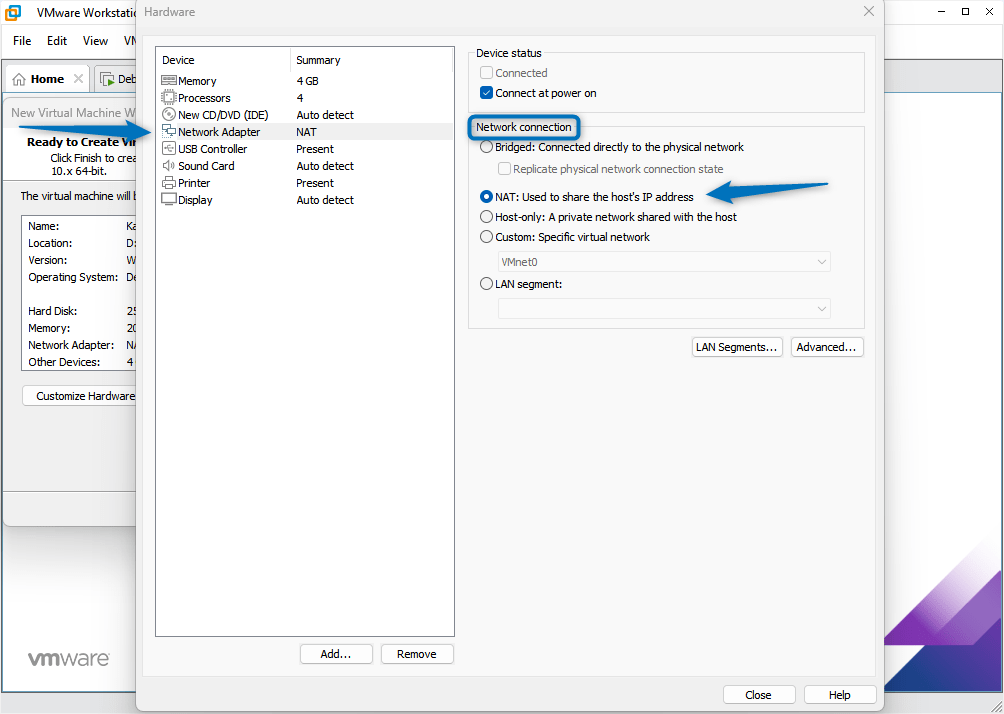
The internet connection for the virtual machine is quite important. So in the NAT settings, you can use the Bridged option that will connect directly to a physical network. Otherwise, you can go with the NAT option that shares the host IP address:
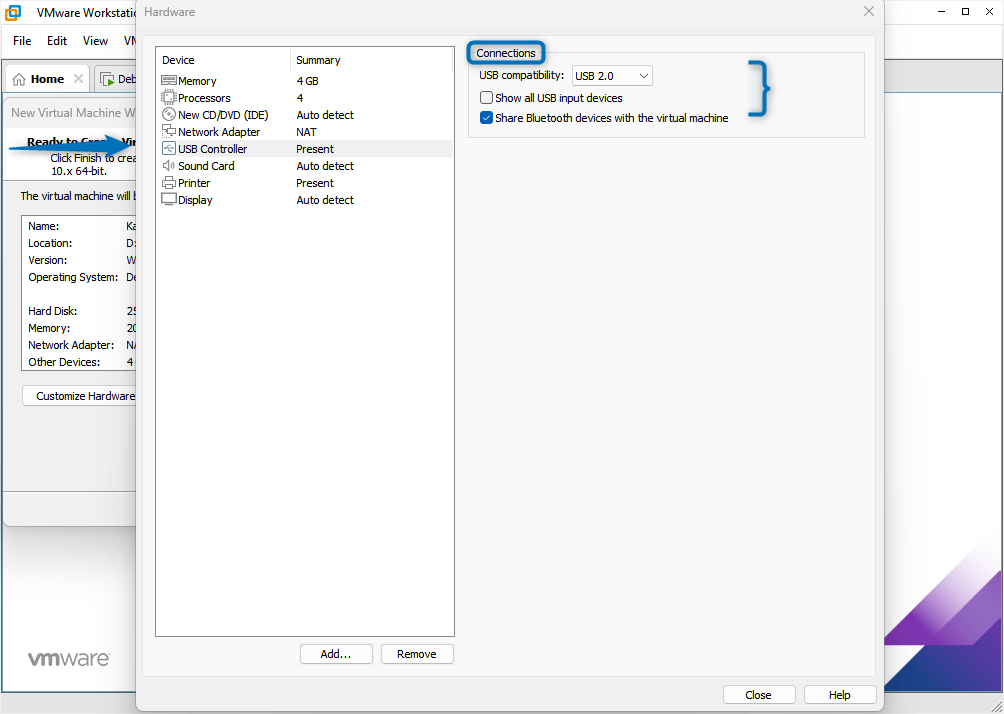
The next is the USB controller settings, here you can select USB compatibility, Bluetooth share settings, and visibility for all USB input devices:
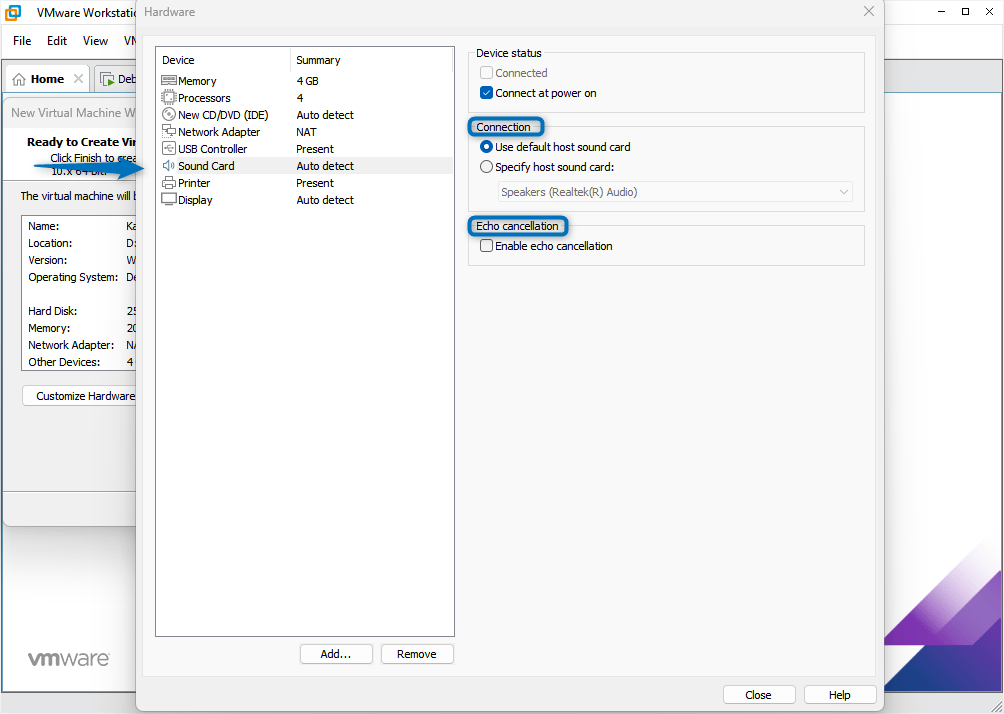
The next hardware setting is about the sound settings. Here you can select specific sound cards for your virtual machine and enable echo cancellation:
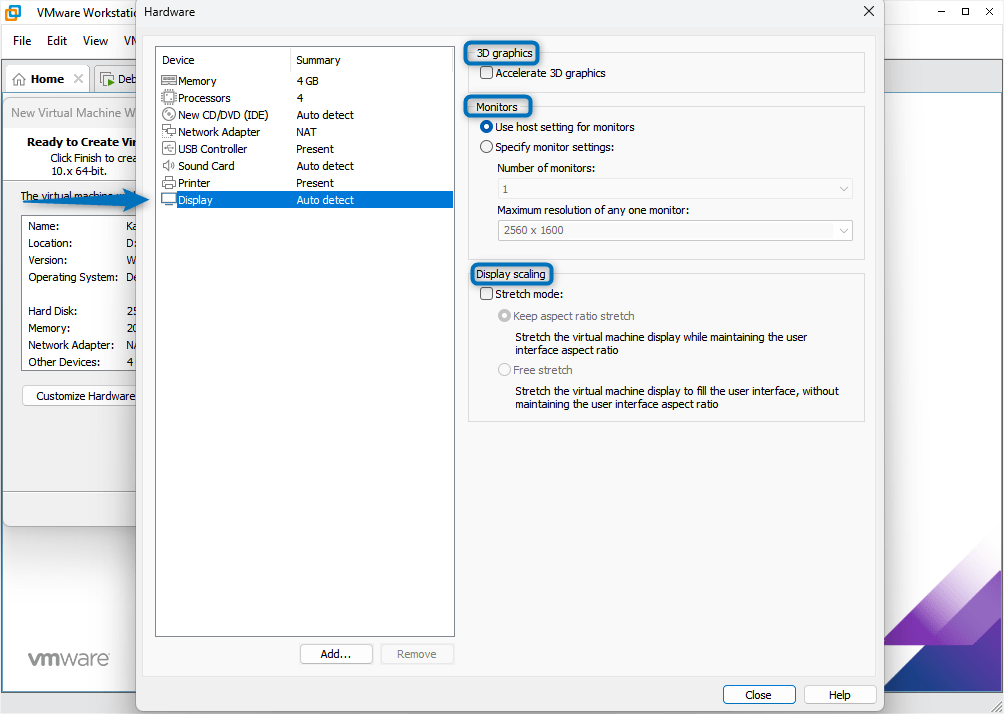
Further, you can set printer settings. In the display settings, you can enable 3D acceleration, set Monitor options, and Display Scaling:
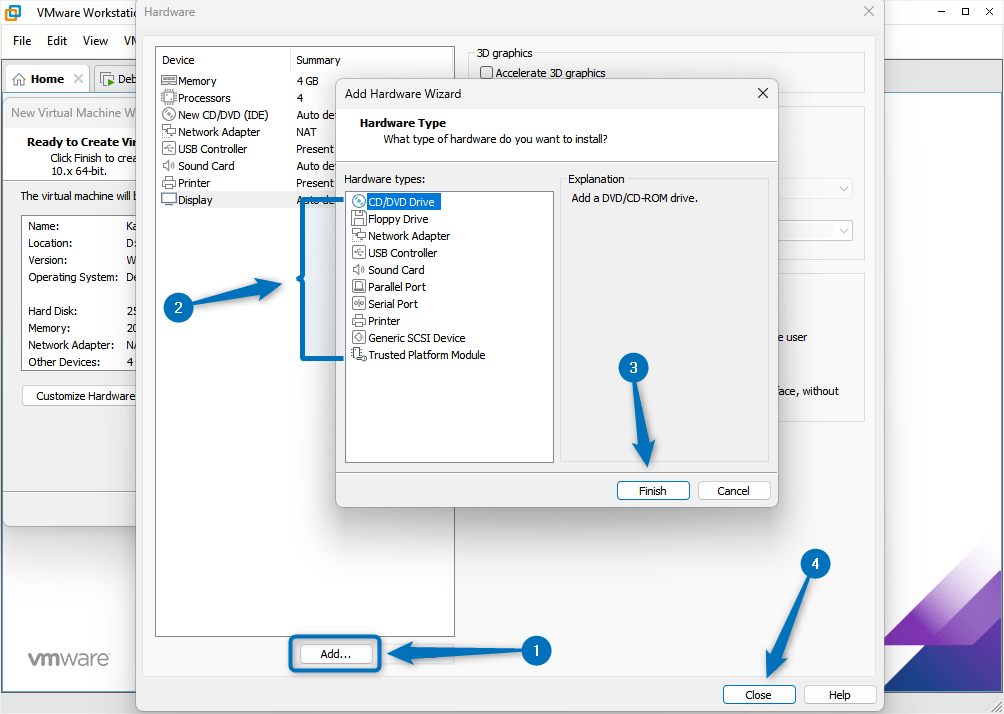
Further, you can also add some other settings for your Kali virtual machine by clicking on the Add option:
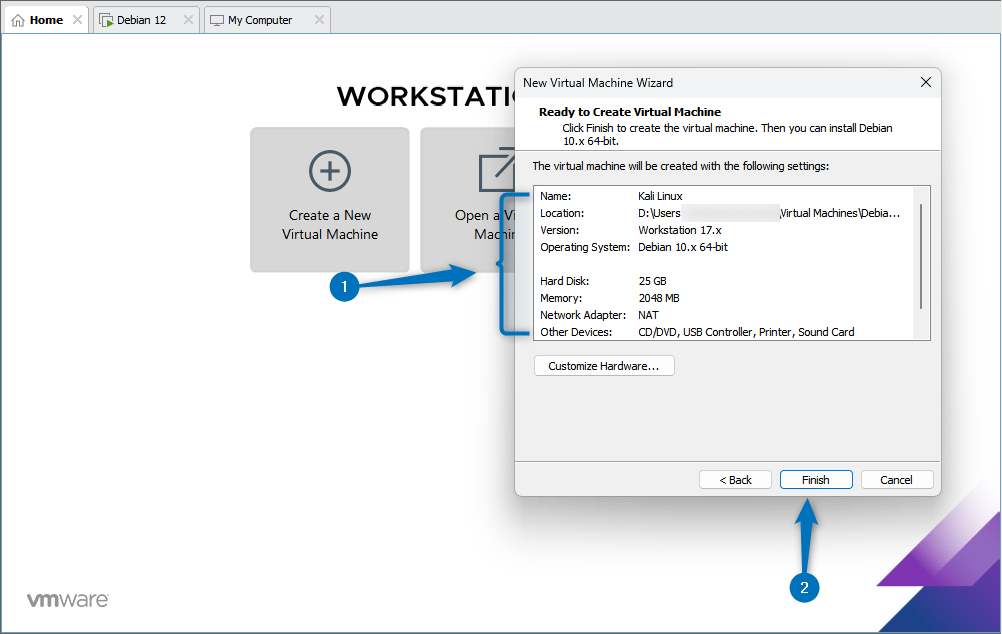
Now, verify all the virtual machine specifications and proceed by clicking on Finish:
Step 3: Install Kali Linux on VMware
As mentioned previously there are two types of setup files so the installation of Kali based on setup files varies. Kali Linux installation via its installer image is lengthy and requires several configuration steps. Installing Kali using its pre-built setup file is easy and requires fewer configuration steps.
Installing Kali Linux using its Installer Image
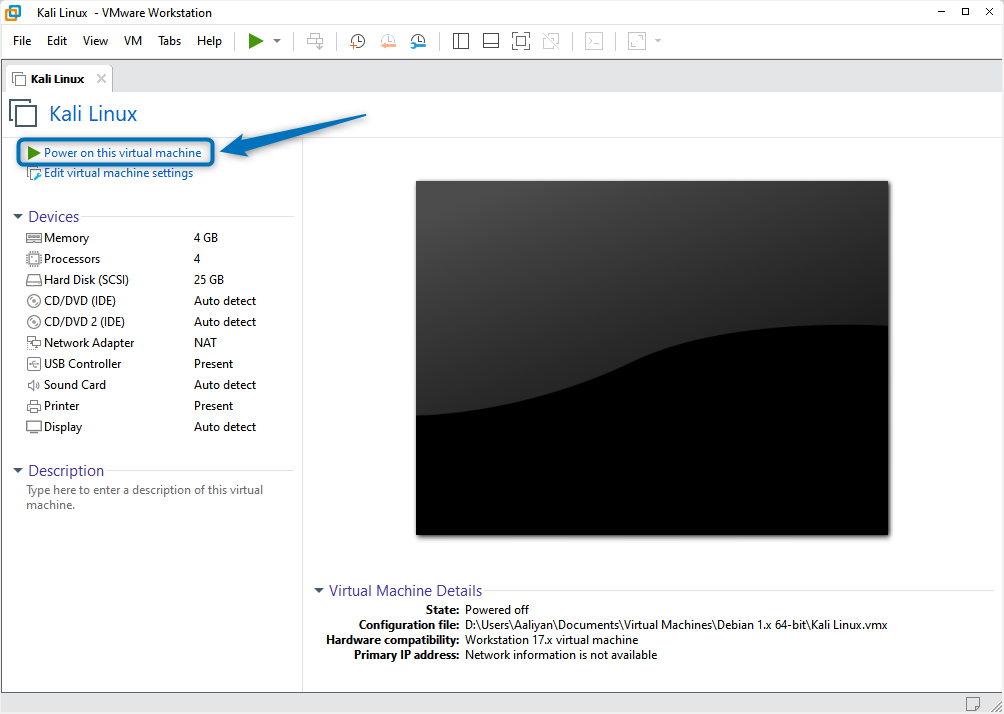
Once you have created a virtual machine on VMware for Kali Linux launch it by clicking on Power on this virtual machine option:
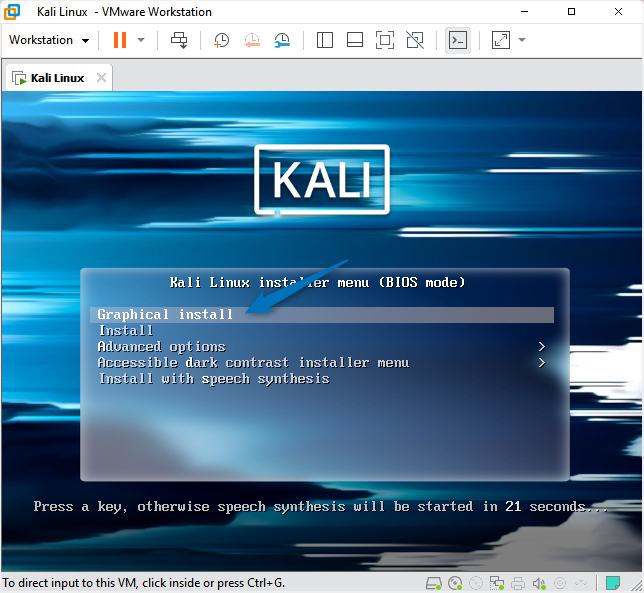
Now the Kali setup wizard will start and from the installer menu select the Graphical Install option:
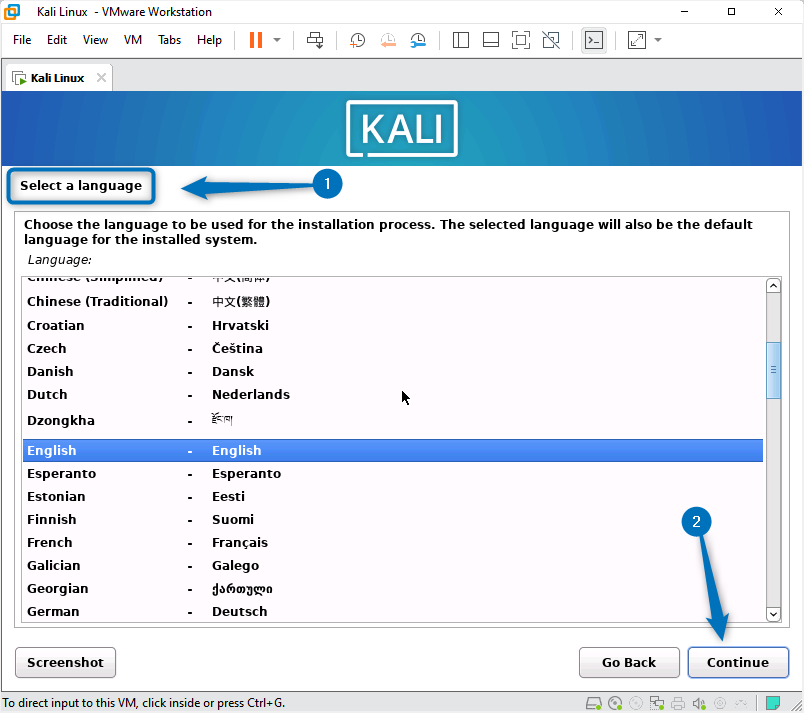
Next, select the language for the Kali setup wizard and proceed:
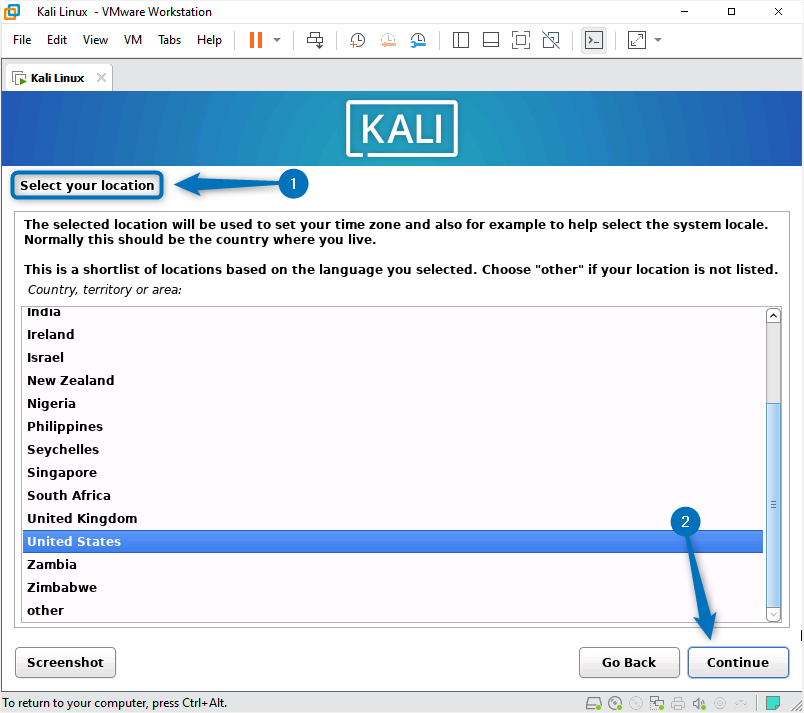
After that select the location of the virtual machine that will help in setting the time zone and package manager server location:
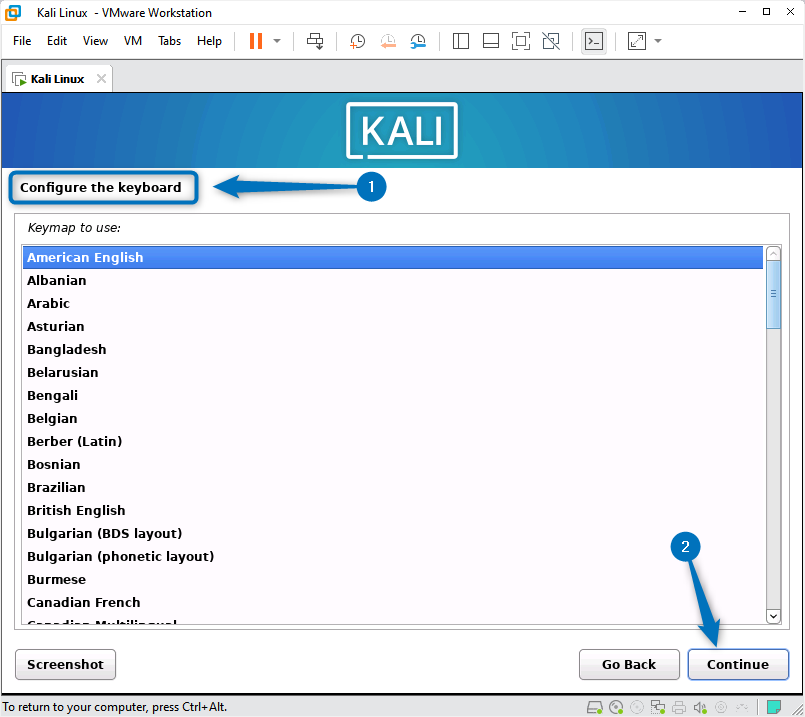
Based on the location and language the keyboard layout also varies so select the desired language layout for the keyboard and proceed to the next step:
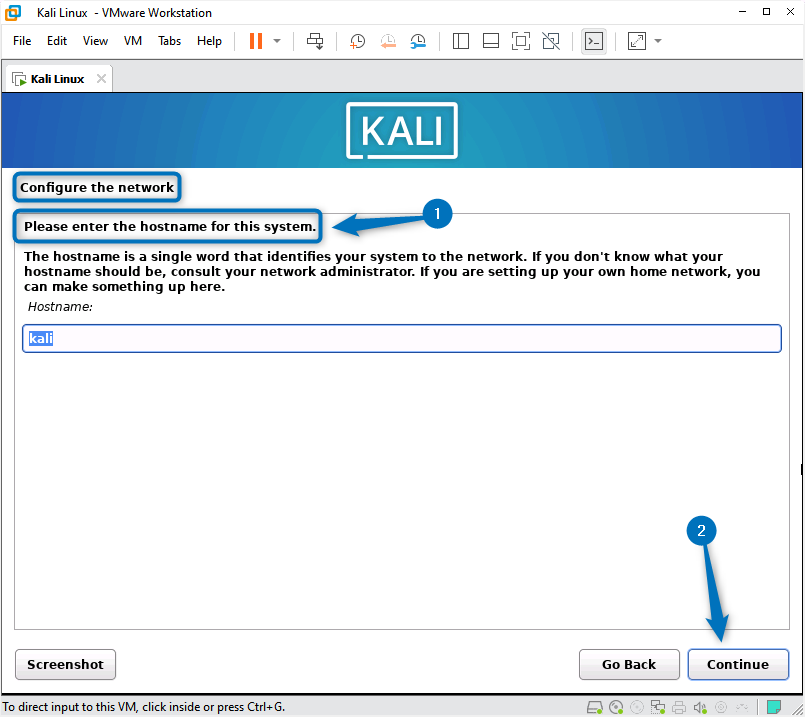
On the Linux operating system, there are different types of hostnames and each serves a specific purpose. So set the hostname for the Kali Linux that will be used for network configuration:
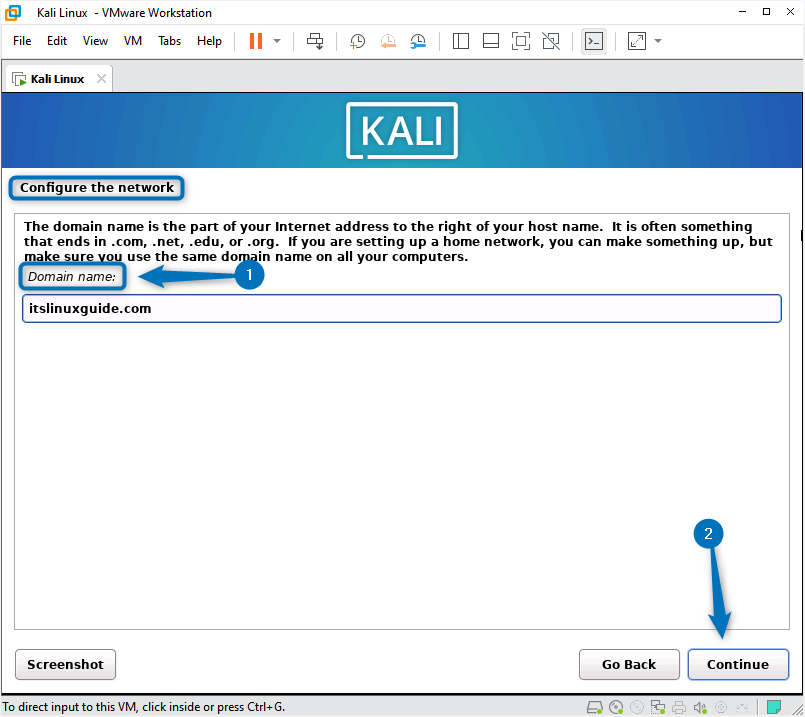
Next, add the domain name if you have any otherwise you can keep it blank and proceed to the next step:
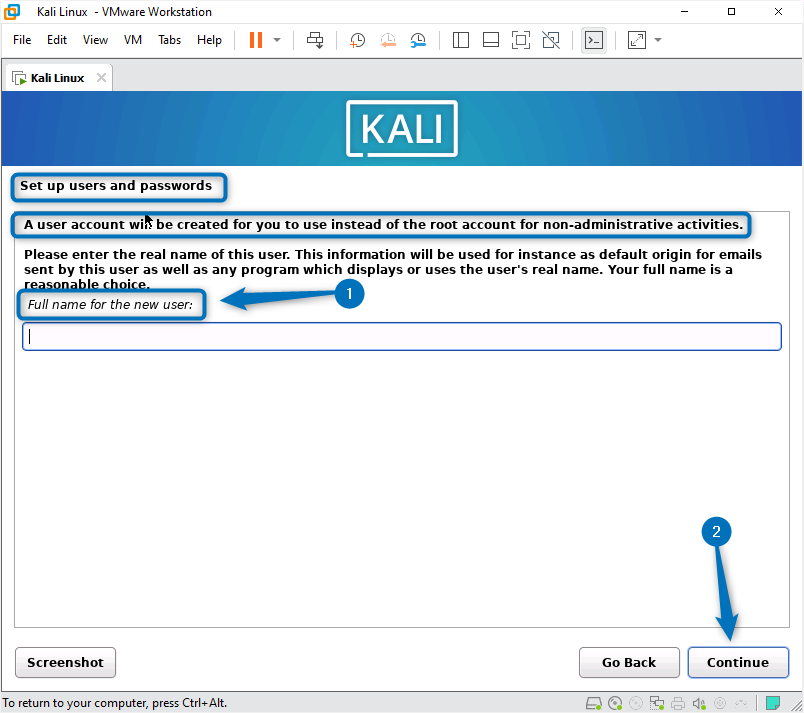
For non-administrator activities, you need to have a user account without admin rights so enter the full name of the user:
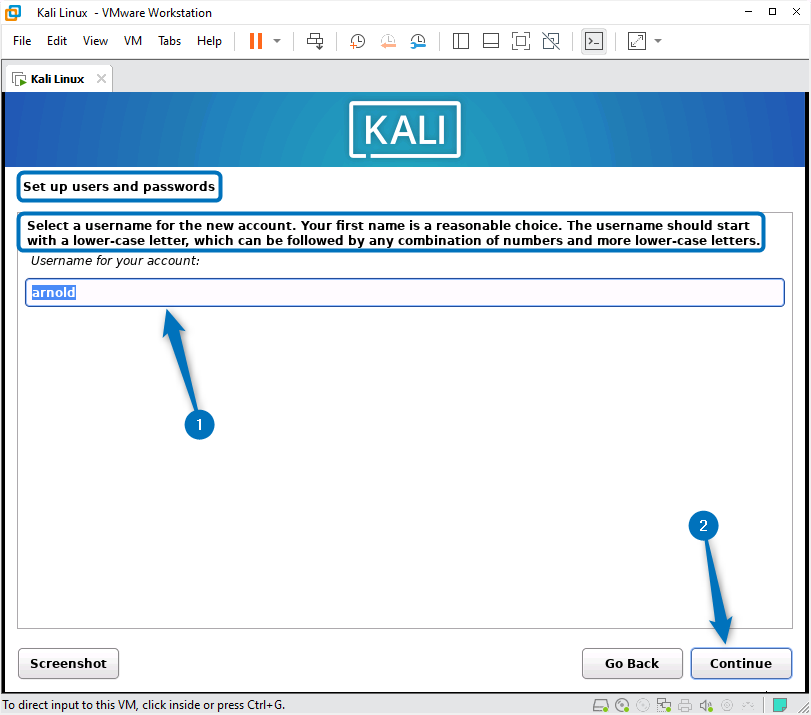
Next, set the username for the Kali Linux non-administrative account:
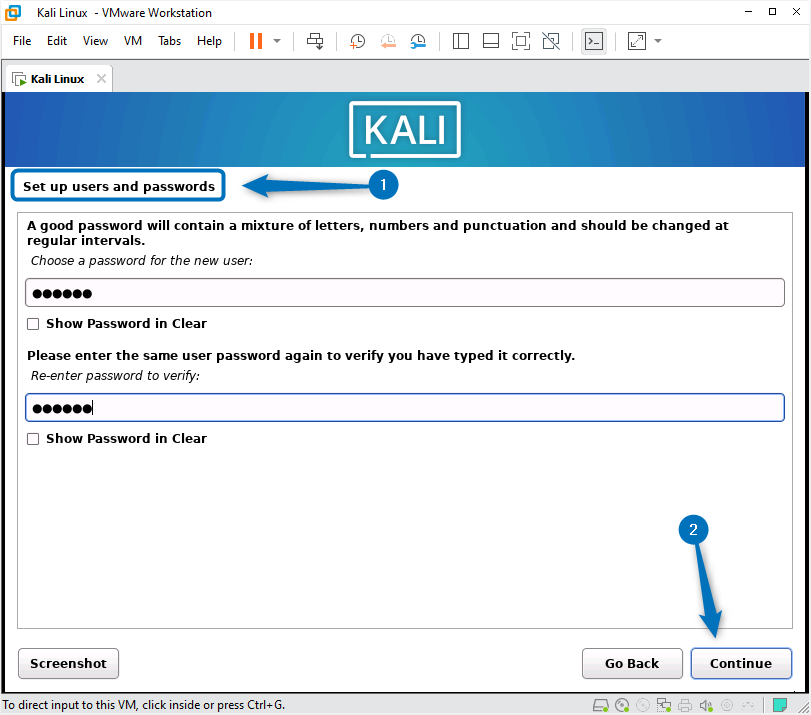
To secure the Kali user account set the desired password twice and proceed to the next step:
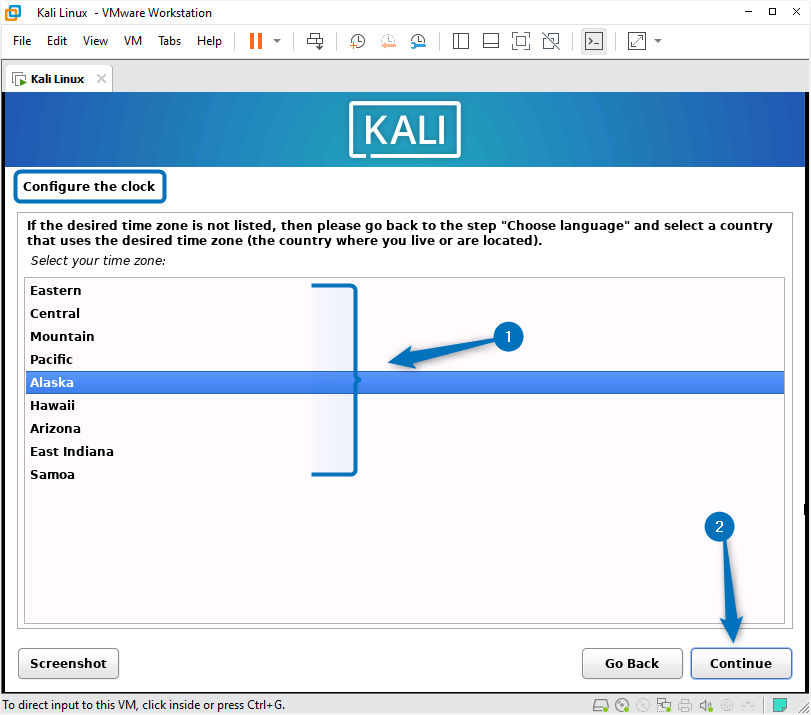
Next, select the time zone under which your system location comes, based on the time zone your Kali Linux clock will be adjusted:
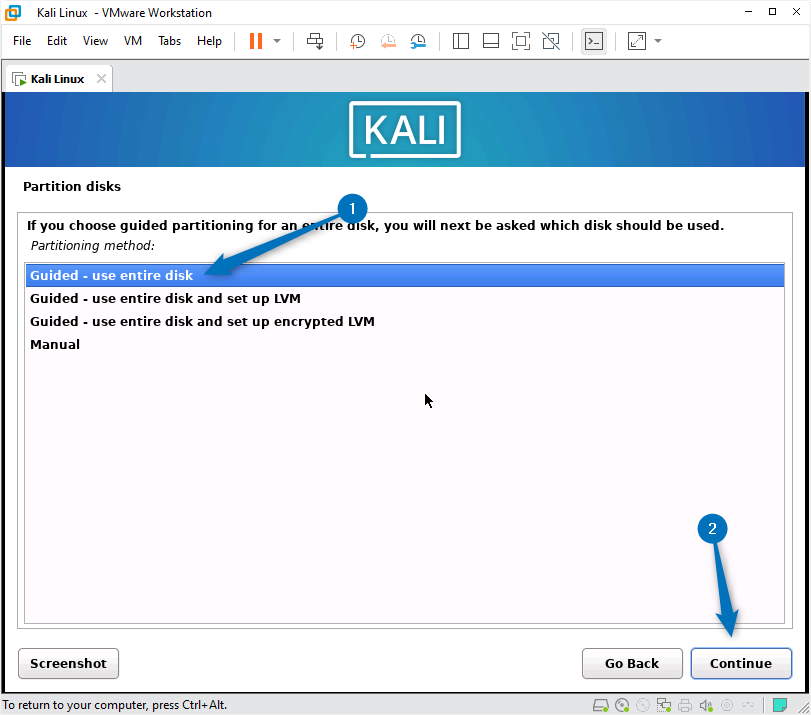
The Kali setup will now ask for setting up for disk partitions. Here I would recommend going with the first option which is Guided – use entire disk option:
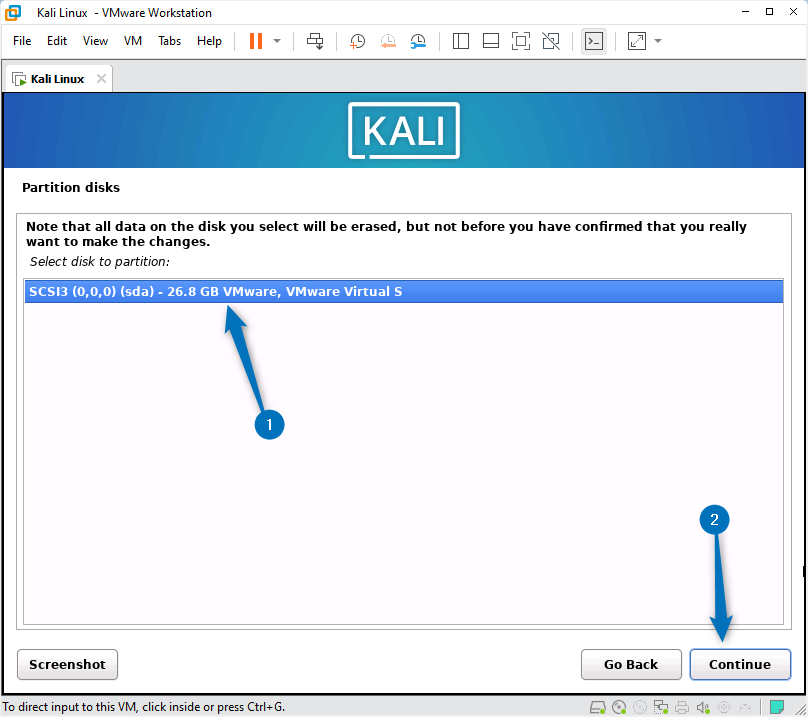
Now select the partition disk available, in the case of VMware you will see one disk here only so click on Continue:
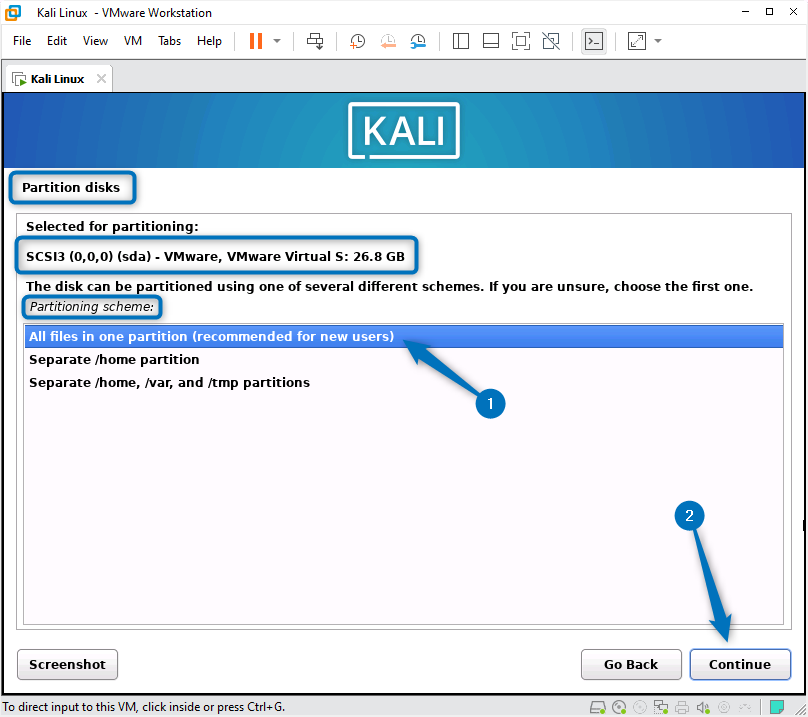
Now, the setup will ask about the partition scheme. You can either divide the partitions for specific directories or keep all the files in one single partition. I would recommend if you are a new user then keep all the files in one partition:
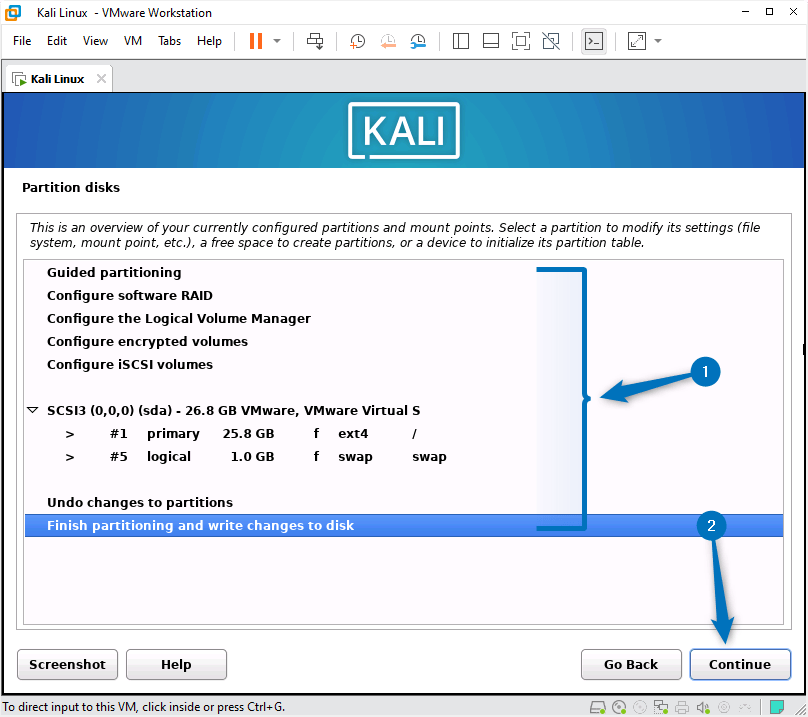
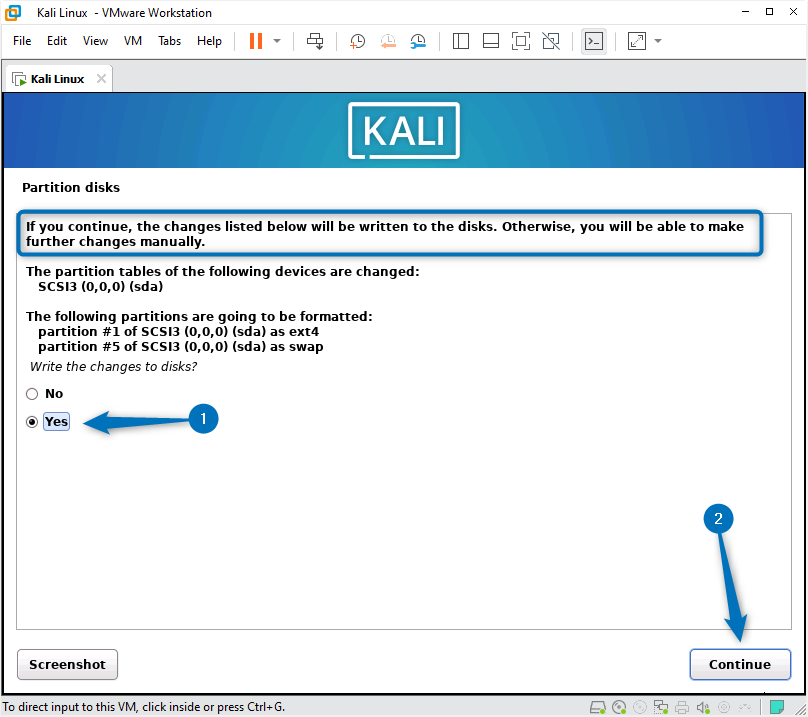
The disk partition is now all set. Now review all the changes made for the partition then select Finish partitioning and write changes to the disk option, afterward proceed to the next step by clicking on Continue:
Next, to allow writing changes to the disk select Yes:
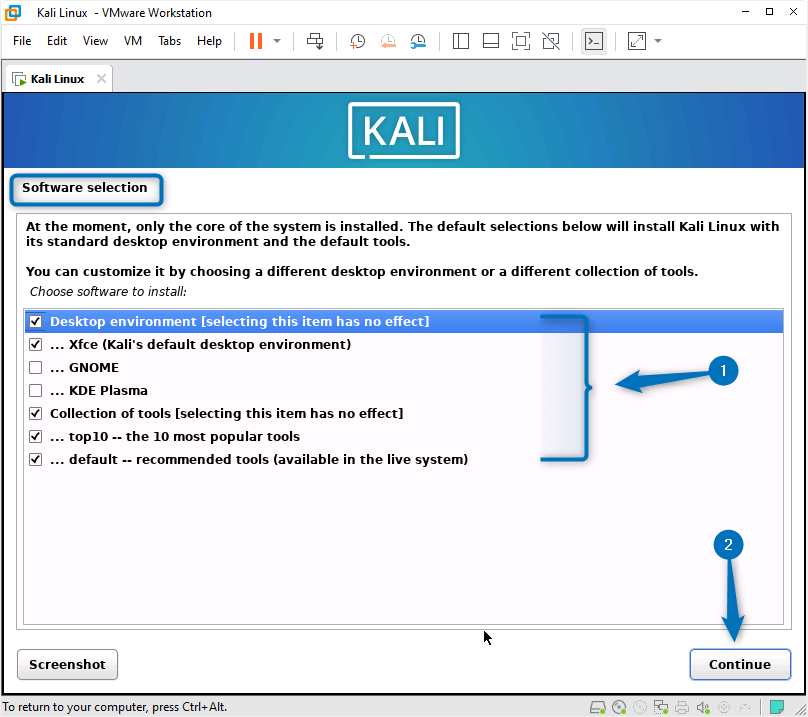
Selecting the desktop environment is one of the major settings while installing Kali. The Kali Linux setup wizard gives several desktop environment options for Kali Linux so select the desired one. Other than the desktop environment, several other software tools for installations are already selected by default:
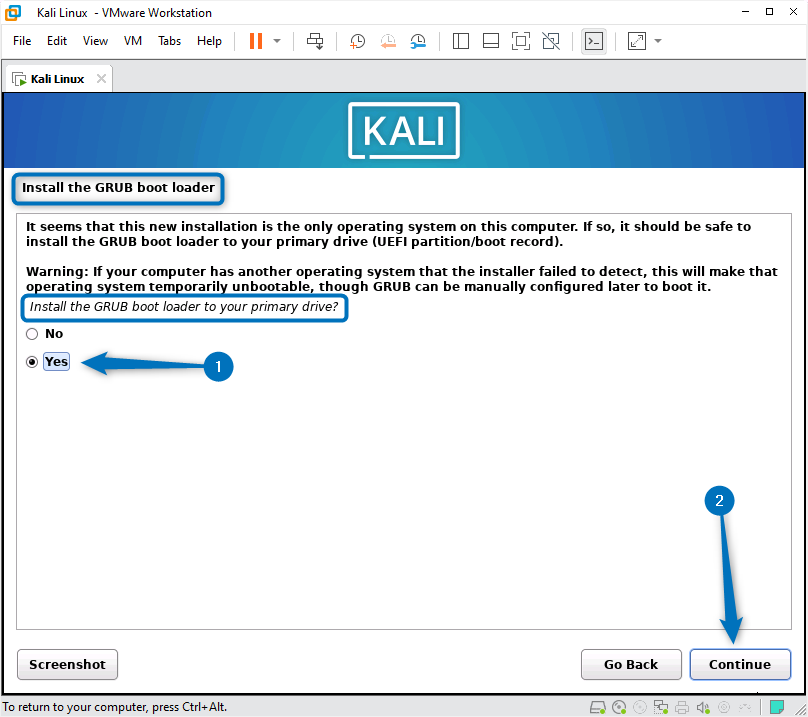
To manage the boot process of Kali and other Linux distributions there is a GRUB utility used thus providing flexibility in managing multiple operating systems. So allow its installation for Kali Linux and proceed to the next step:
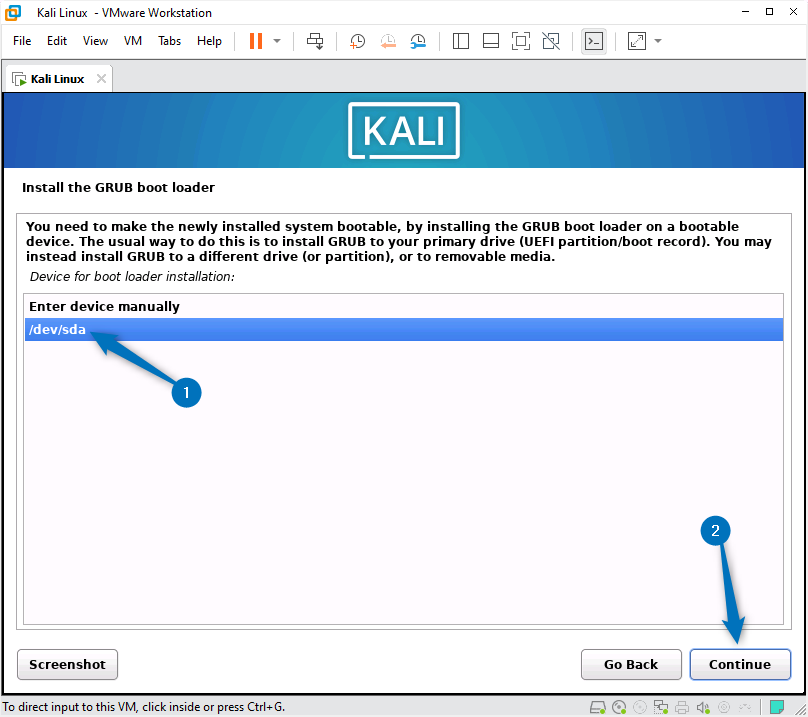
To install the GRUB menu select the disk and proceed:
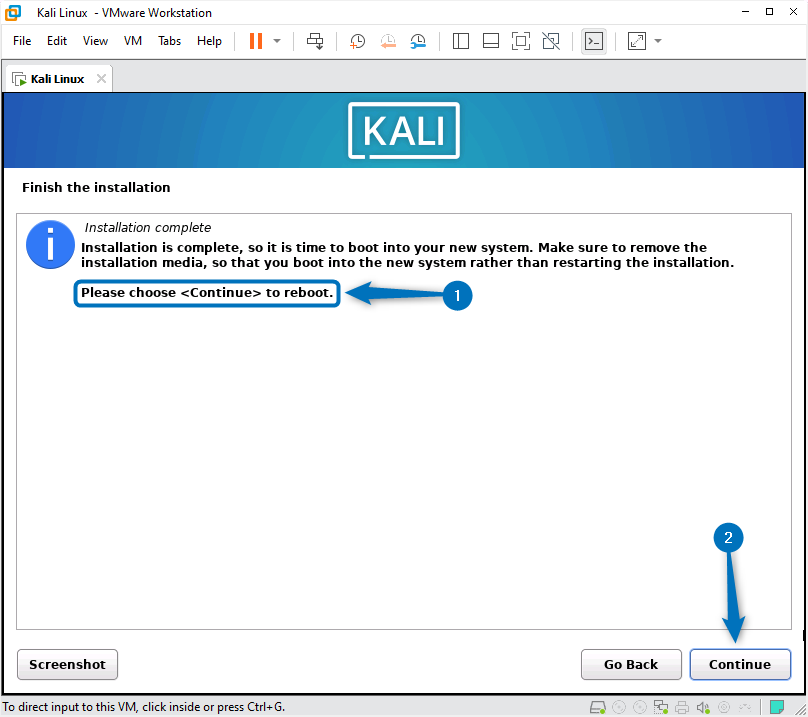
Now the setup is complete so reboot the system to apply all the changes:
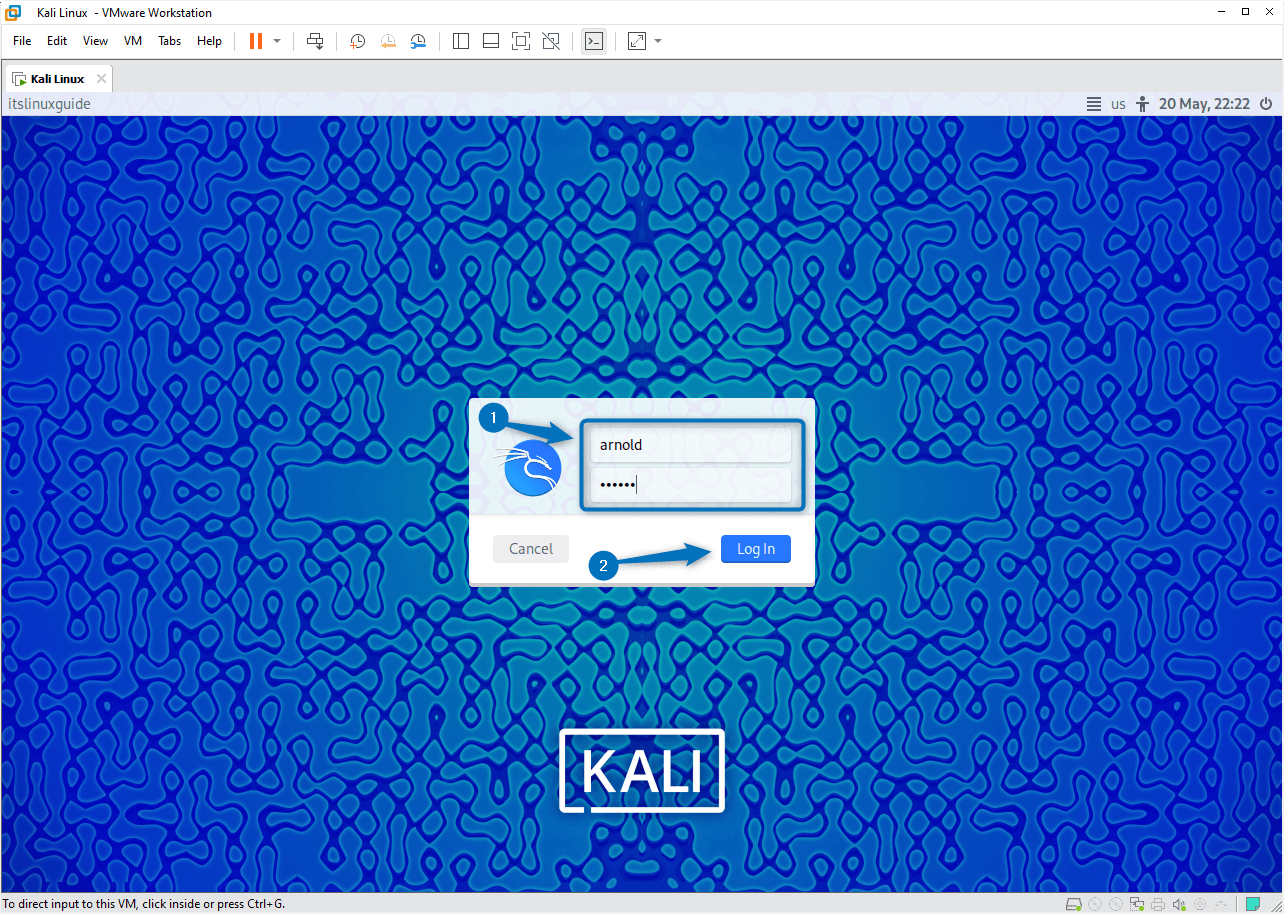
Next log in to the Kali user account using the set username and password:
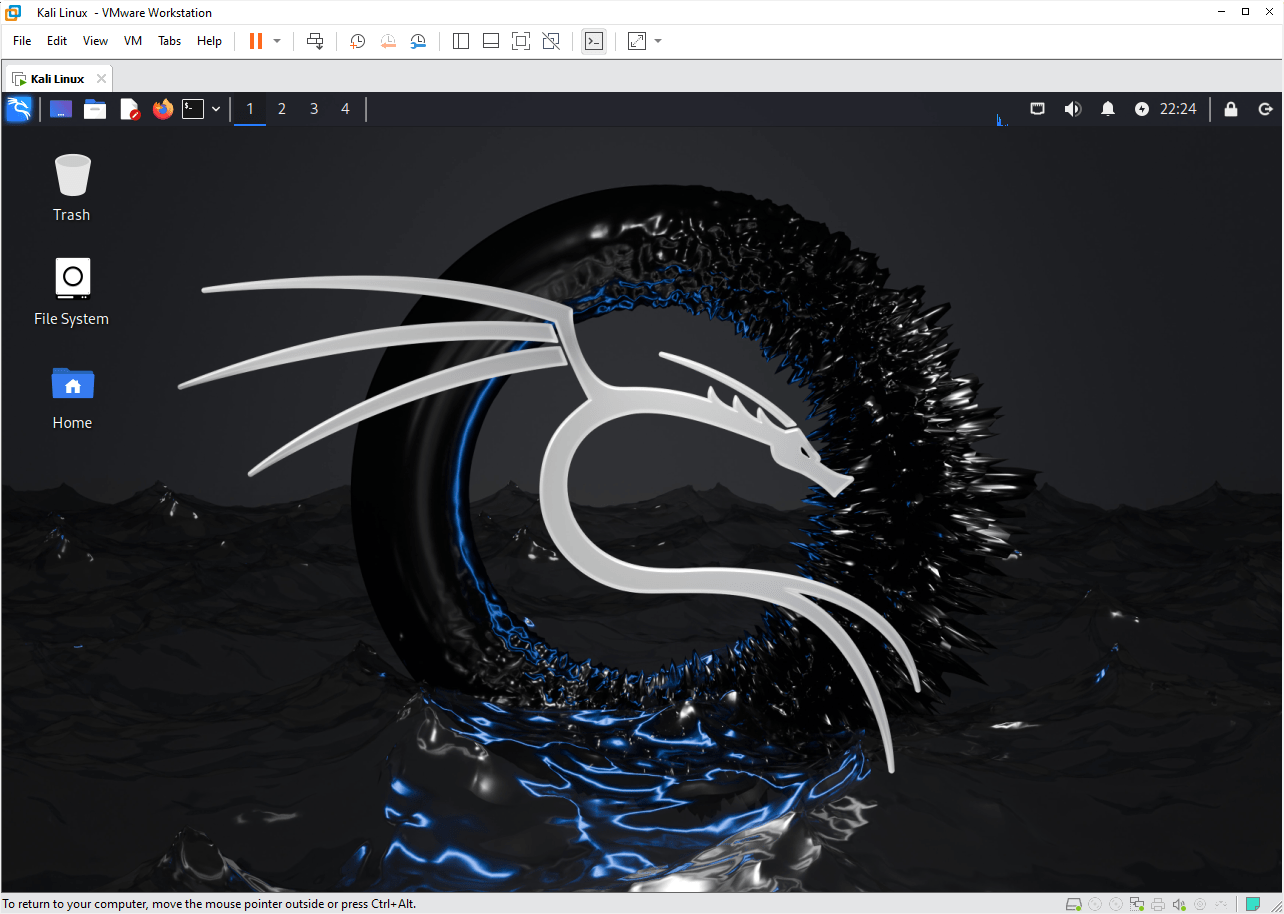
Once logged in the following will be the homepage of Kali Linux:
Installing Kali Linux using its Pre-built VMs
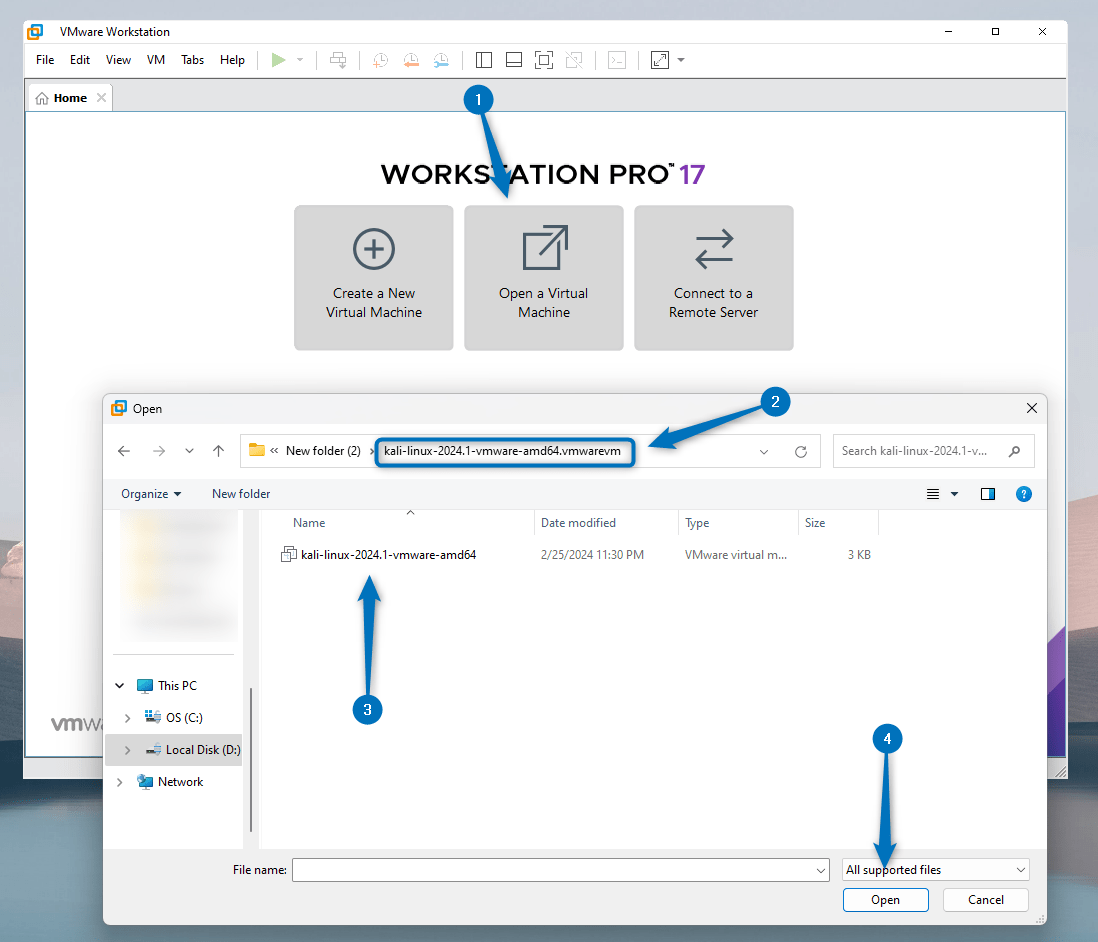
The second method to install Kali on VMware is by using its pre-built installer image. Since it is pre-installed so just click on Open a Virtual Machine and select the file having the type VMware virtual machine:
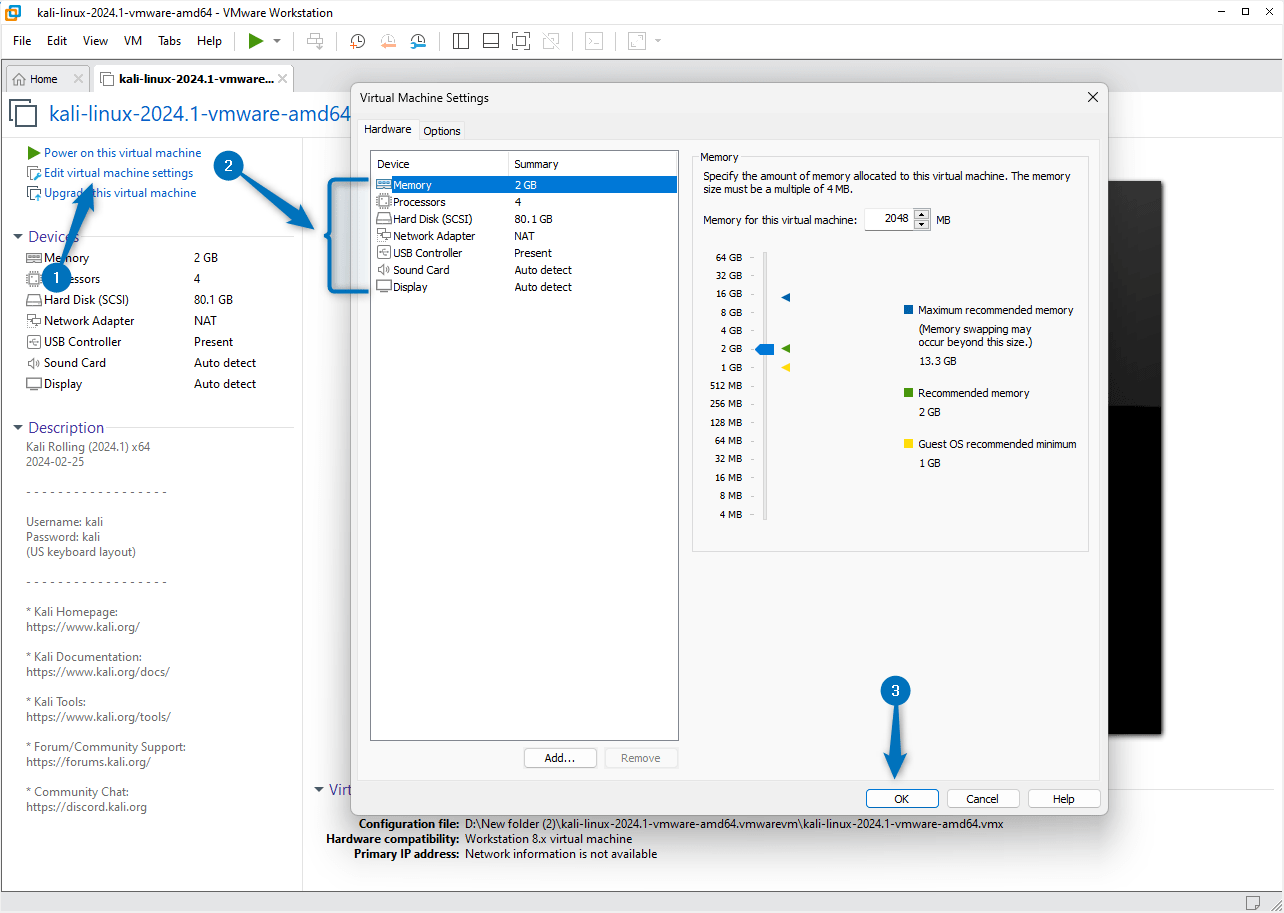
Now if you want to set any configuration for the virtual machine click on Edit virtual machine settings as I did in the earlier method:
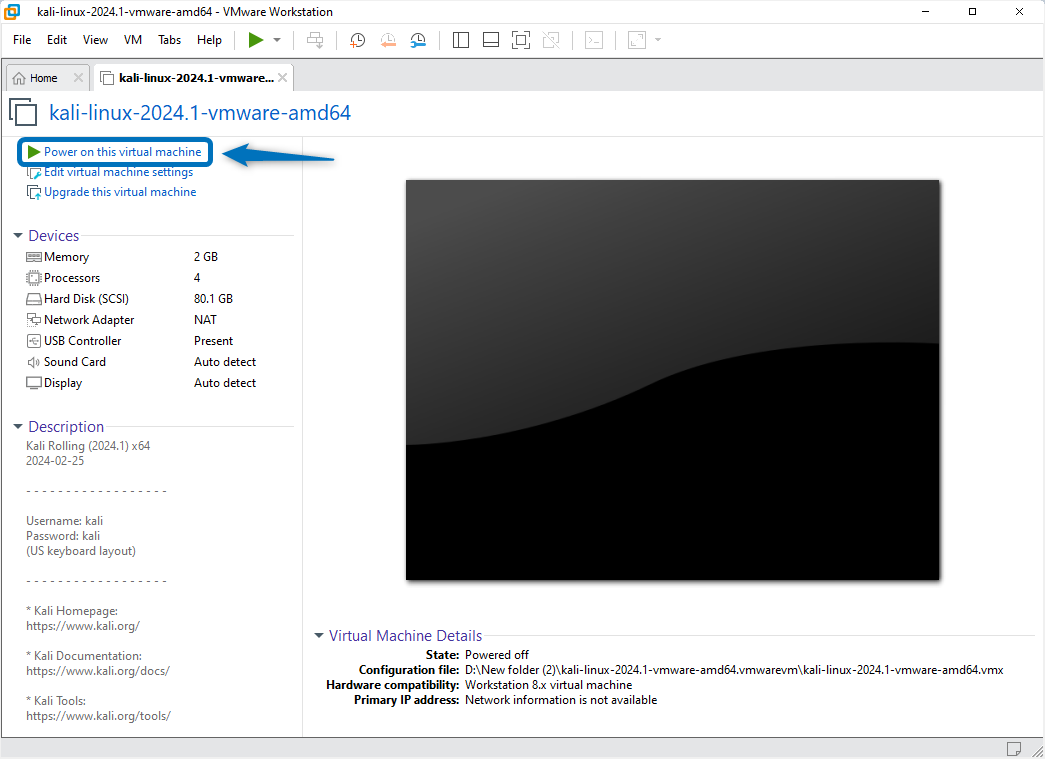
Now power on the machine :
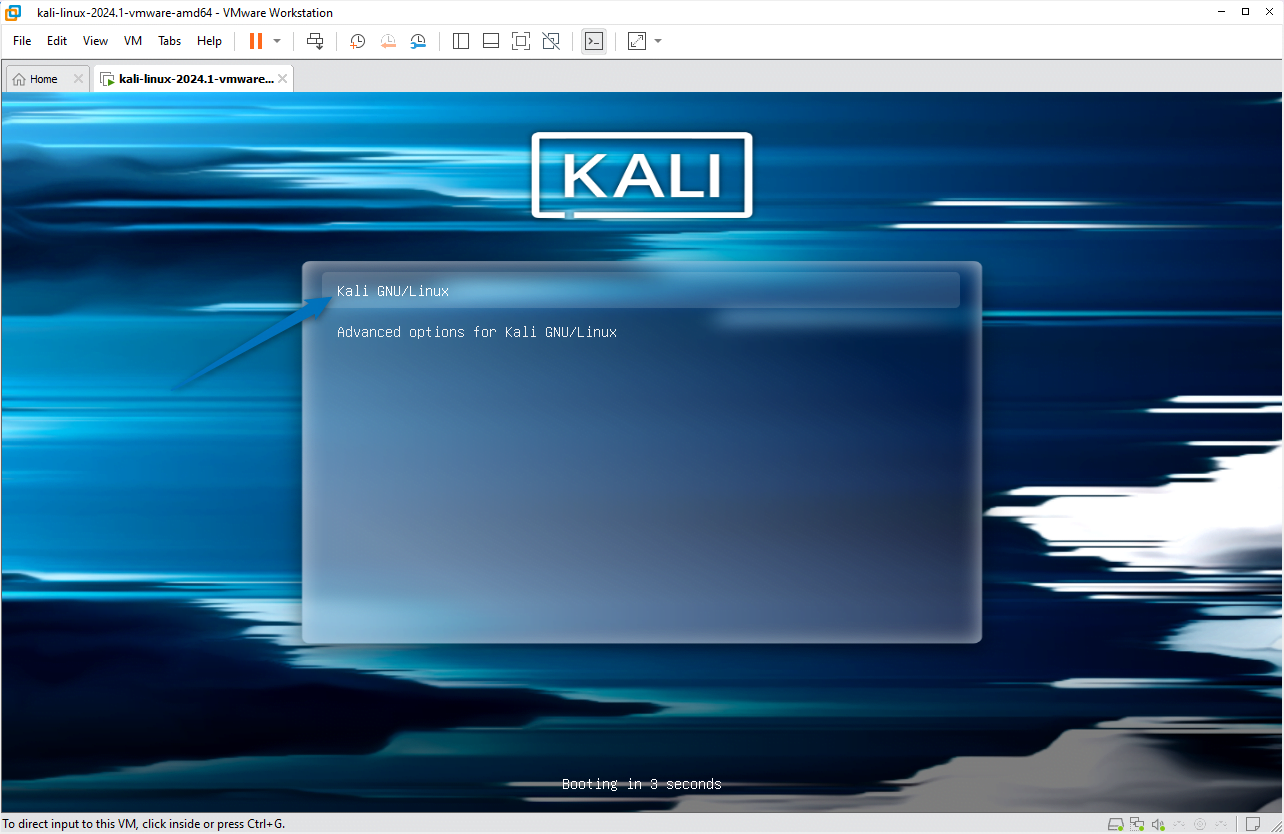
Now select Kali GNU/Linux from the boot menu:
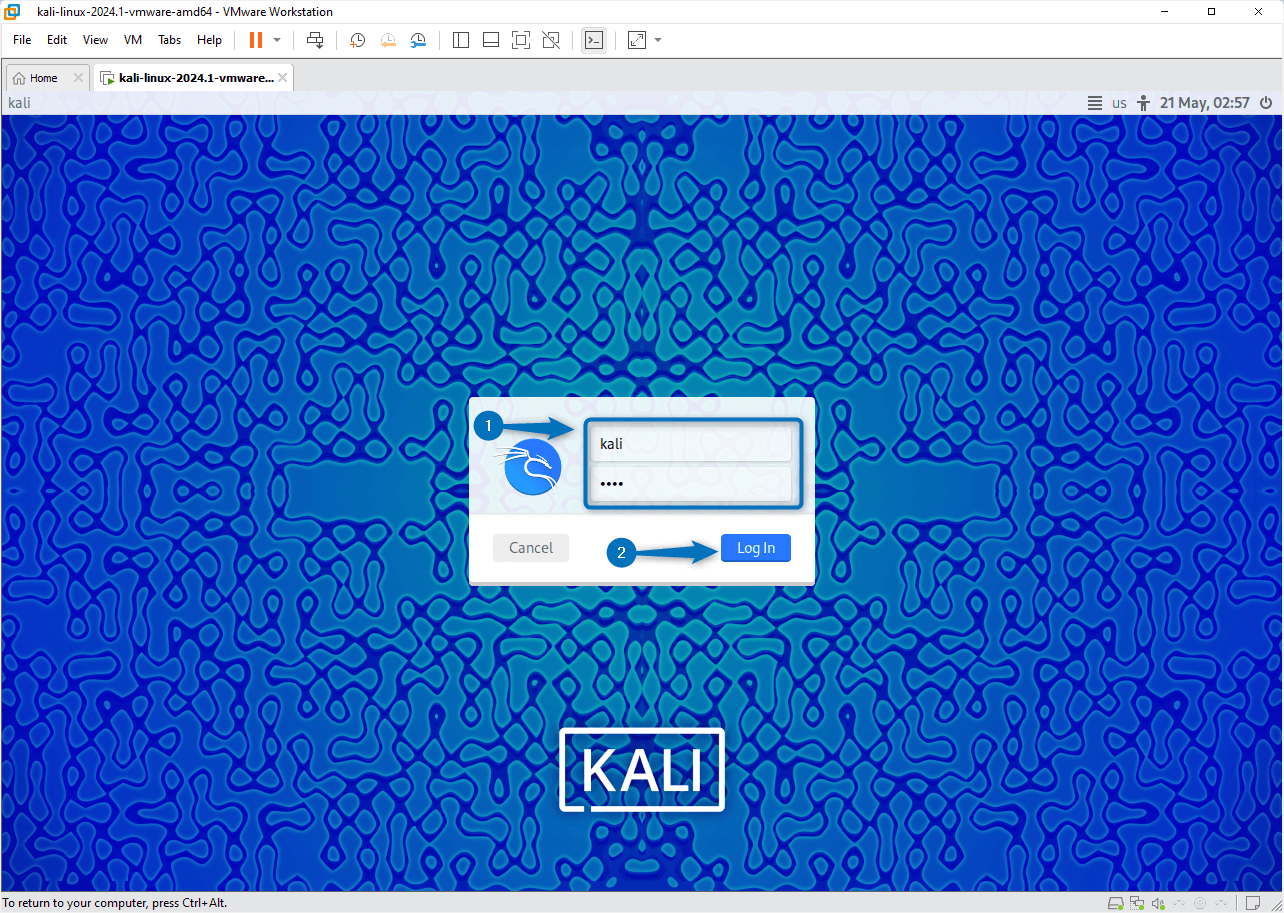
Here use Kali as username and password to log in:
Note: The file downloaded for the pre-built image of Kali Linux needs to be extracted first.
Conclusion
Kali Linux comes with two setup files one is the installer image and the second is the pre-built image. To install Kali Linux on VMware using the installer image first create a virtual machine and then add the installer file path then launch it. Next, follow the configuration steps for Kali installation. To install Kali Linux on VMware using the pre-built image file simply extract the file and open it in the VMware. If you are planning to use Kali Linux on regular basis then use the installer image to install Kali Linux on VMware otherwise the best way is to use the Kali Linux pre-built image file.