Personal package archives or in other words, PPAs are package repositories that contain software repositories that are not available in the official package managers. PPAs are primarily maintained by either developers or users rather than the official distribution. On Ubuntu and other Linux distributions, the method for using the PPA for package installation is the same as that of using the official repository.
However, unlike the official repository, the process for removing PPA on Ubuntu is somewhat different. Like there is a GUI method for it (Software & Updates app), this guide will focus on several techniques to remove PPA from Ubuntu.
4- Ways to Remove PPA From Ubuntu
The prime benefit of using the PPAs for installing any application on Ubuntu and other Linux distributions is that you can install the applications with their latest versions with some bug fixes. On the other hand, apps installed via PPA can be unstable or might encounter errors but this happens in rare cases:
1: Through Ubuntu Software & Updates App
The first and easiest way around to remove PPA from Ubuntu is by using its Software & Updates app. This is a GUI method and most Linux users prefer it as it does not involve command usage, to launch the app simply search for it in the apps menu;
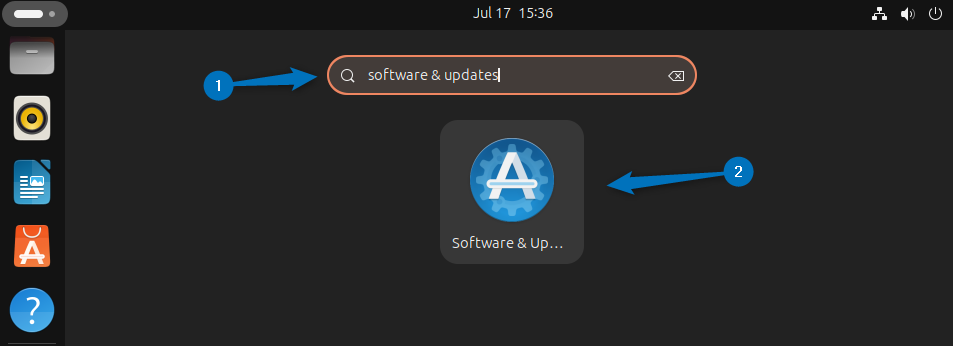
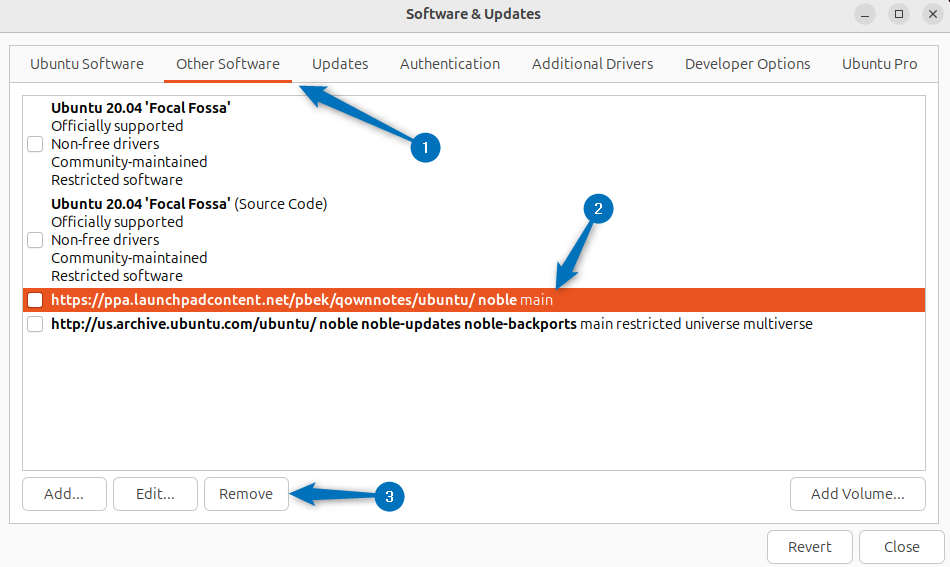
Next, go to the Other Software tab and there you will see all the PPAs added in Ubuntu. Next, select the respective PPA you want to remove and then click on the Remove icon at the bottom:
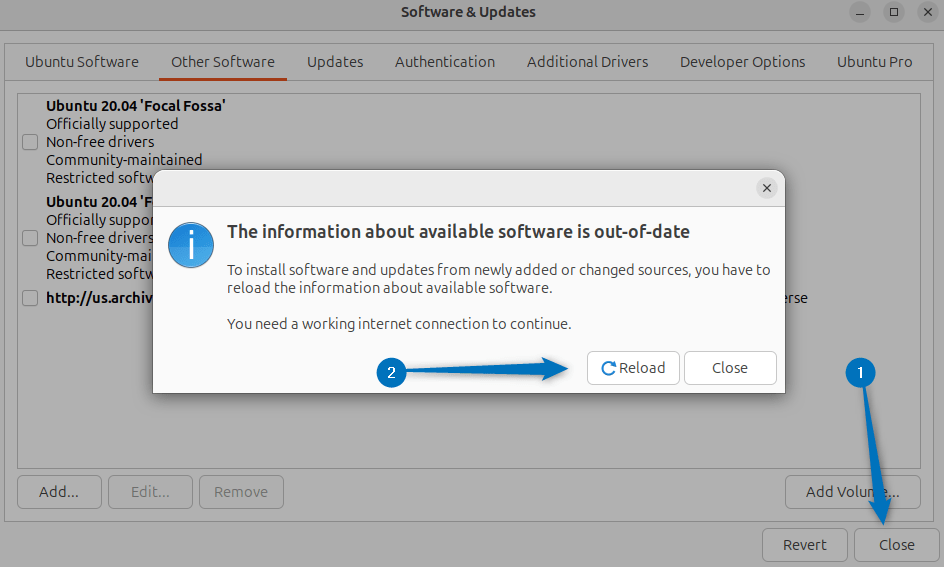
Now when you click on Close option after removing the PPA then a pop-up will appear asking to refresh the changes so click on the Reload option:
2: Through apt Package Manager
The second method for removing PPA from Ubuntu is using the apt package manager that is also used to add it as well. To demonstrate removing PPA I have added the two repositories one is for QOwnNotes and the other is for Neovim software. The repositories are saved in the sources list directory and to see the list of all the repositories use the below command:
ls /etc/apt/sources.list.d/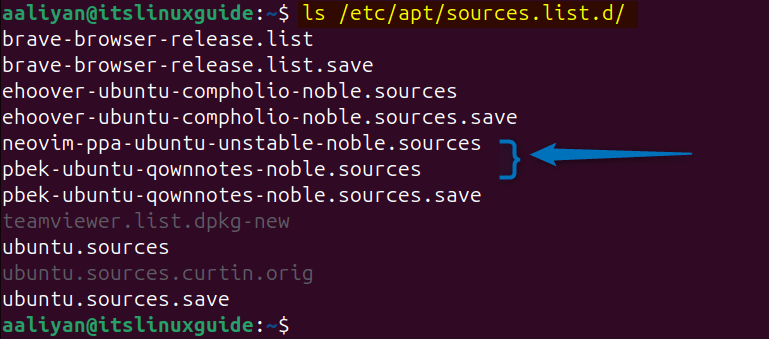
Next, to simply remove the PPA use the same command of adding it but use the remove flag as in the command below:
sudo add-apt-repository --remove -n [PPA-repository-to-removed]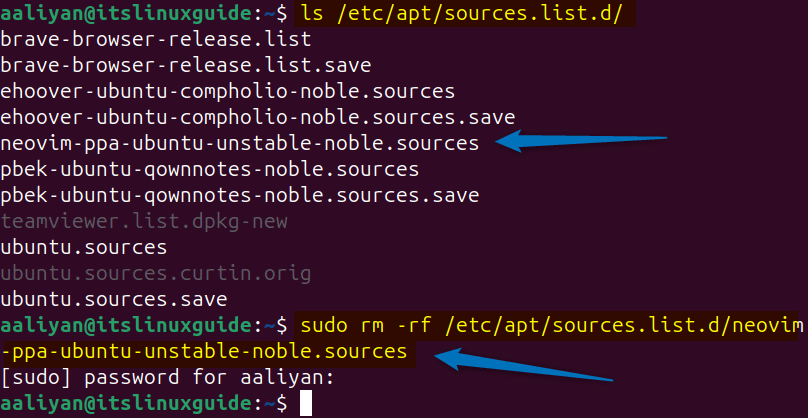
3: Manually Removing PPA from source.list.d Directory
Another way to remove PPA from Ubuntu is by navigating to the sources directory and then removing the desired repository using the remove command. Here the below command removes the Neovim PPA repository by using the path along with its name:
sudo rm -rf /etc/apt/sources.list.d/[ppa-repository-name]
Alternatively, you if you are in the sources directory then use the below command syntax:
sudo rm [PPA-repository-name]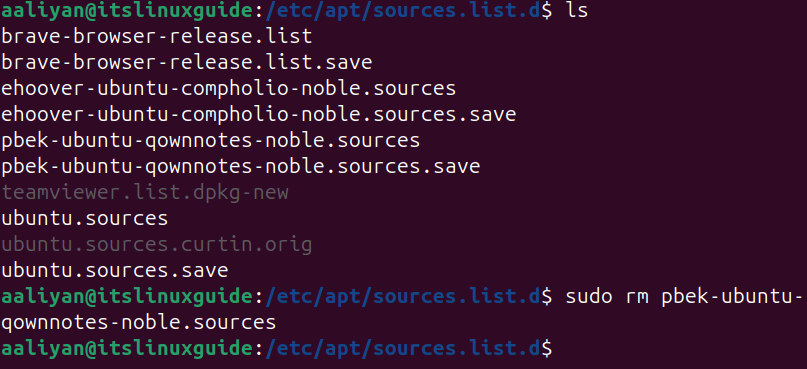
4: Through ppa-purge Utility
To either remove PPA or to downgrade any package on Ubuntu install via PPA you can use the ppa-purge utility. However, this utility needs to be installed on Ubuntu via apt as in command below:
sudo apt install ppa-purge -y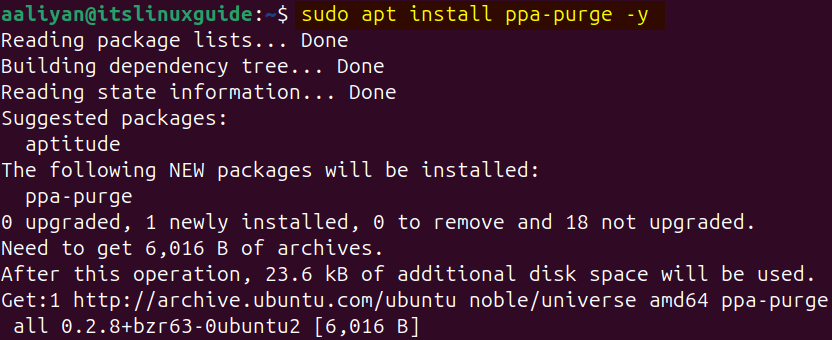
Now to remove any PPA use the ppa-purge command along with the respective utility name as in the command below:
sudo ppa-purge [ppa-repository-name]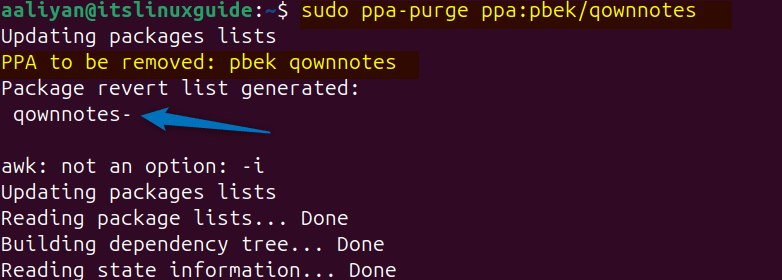
Once the repository is removed you will see the message of PPA purged successfully as in the image below:

How To Fix Missing Software & Updates App in Ubuntu
While removing the PPA using the Software & Updates app on Ubuntu it suddenly disappeared and it seemed to be uninstalled or removed. As in the image below I have been searching for in Apps menu but cannot find it:
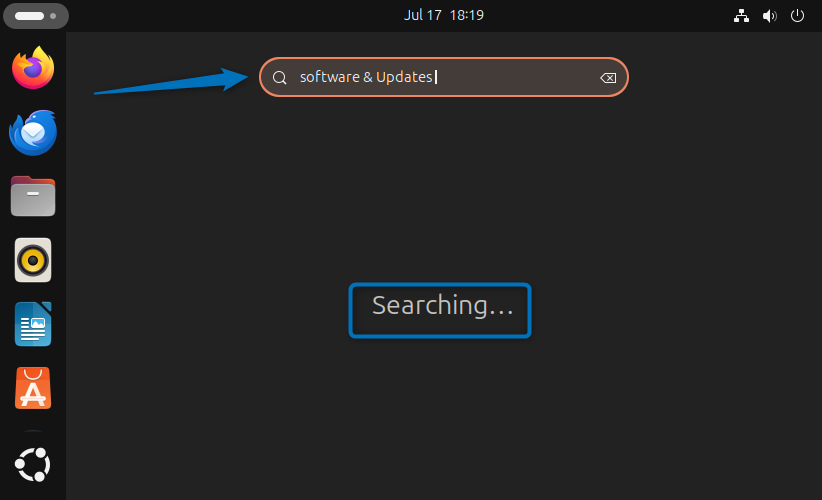
So, to fix the software & Updates app issue I installed the software-properties package using the apt package manager as in the command below:
sudo apt install software-properties-gtk -y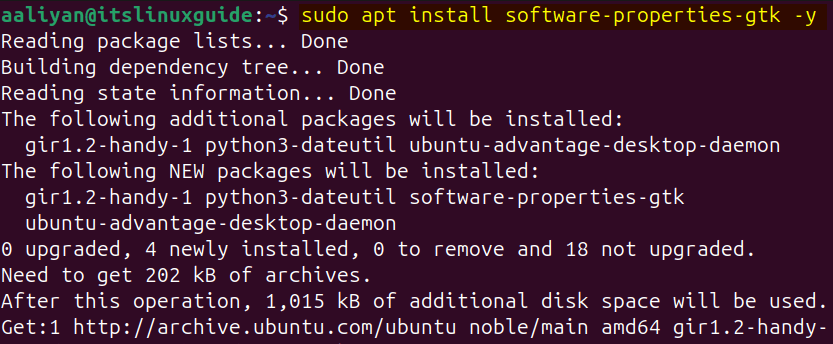
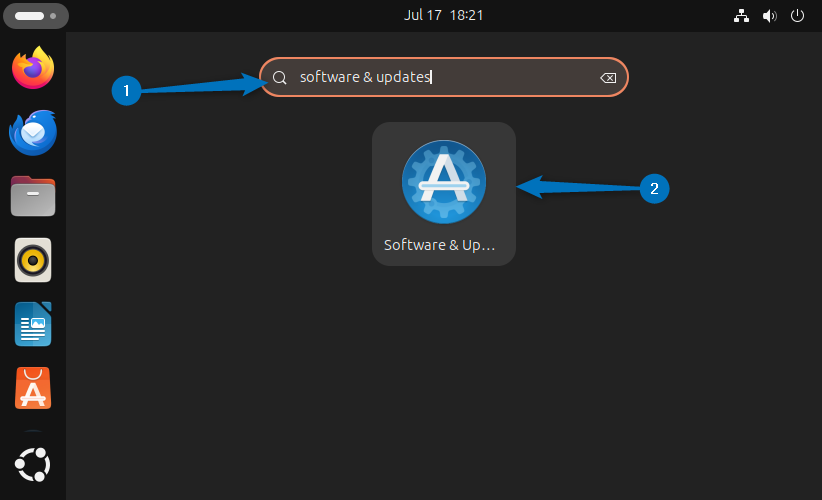
Now as in the image below after installing the software-properties package the software & update app is installed:
Conclusion
This guide discussed four ways to remove PPA from Ubuntu which included using Software & Updates app, apt package manager, PPA-purge repository and manually removing the PPA from sources directory. The recommended method for removing PPA on Ubuntu is using its software & update apps. In case if this app does not appear in the app menu then install the software-properties package.
